Getting started: Please make sure your work area is covered and you are not working on an unprotected surface. We recommend working on the Sculpey® Oven Safe Work Mat, wax paper, metal baking sheet, or disposable foil. Uncured Liquid Polymer Clay may damage unprotected furniture or finished surfaces. Be sure to cover your crafting area appropriately. Stir Liquid Sculpey® completely. Thin with Sculpey® Clay Softener & Thinner as needed. Wash hands after use (we have found that baby wipes work best). Baking: It is important to use an oven thermometer when you bake the liquids so that you can ensure your oven is at the correct temperature. Do not microwave the liquids. They must be baked in a Preheated oven at 275 ºF (130 ºC) for liquid colors and 300 ºF (149 ºC) for Clear – Do not exceed baking temperatures. If you are using the liquids as a glaze or in thin pieces less than1/4 inch bake for 15 minutes. For thicker pieces that are ¼ or above bake for 30 minutes. If you are baking on a ceramic tile then you will also need to bake at 30 minutes since it will take longer for the tile to heat up. This will ensure the proper fusing of the liquid material. When baking these liquids you may experience some vapors or a slight odor. This is not harmful and will not affect your creation.
To create the mold
You will need the Alumilite Amazing Mold Rubber Kit, a plastic cup that is large enough to house your original, and the original item. The little glass kitten in the center of the photo is the item that I am creating a mold from. It fits easily into the 3 ounce plastic cup that is shown to its left.
Before you begin, it’s really important to read all the instructions included with the Mold Rubber kit - especially if you haven’t worked with this type of material before.
For the base of the mold, you will need something that is leak proof for your original item to sit on top of. Here I’m using a slab of unbaked scrap clay. I conditioned the clay well, not caring what color it is or what it looks like, and I made a slab that is slightly larger than the open end of the cup. Here I have the open rim of the cup sitting on top of the slab to make sure the slab is a good size.
Position your original in the center of the slab. Push it down gently so that it sits securely in the clay. If you don’t use scrap clay here, you can tape or glue your original down to a secure base.
Cut the closed end of the cup off with sharp scissors so that you just have an open ended cylinder.
Place the cup upside down on the slab of unbaked clay with the original sitting in the center.
Gently push the scrap clay base up around the rim of the cup. This will create a leak proof base that won’t allow the molding material to come out.
Please read all the directions for the Amazing Mold Rubber if you haven’t already. It’s very important the Base material be stirred really well and the Catalyst be shaken completely before mixing.
I used a plastic spoon and a second plastic cup, the same size as the mold, to mix up my parts. I guesstimated that since my little glass cat sits so well inside the 3 ounce plastic cup, that I will need 2 ounces of the molding material to make the mold. I also guesstimated that the original cat itself is probably taking up about 1 ounce of the space inside the cup.
I followed the directions in the Mold Rubber kit to mix up 2 ounces of Base with 1 scoop of Catalyst. I poured these into the plastic cup and stirred thoroughly.
Again, following the instructions in the kit, I poured the material down one edge allowing it to fill the mold from this point.
I used my 12mm Ball Tool at this point to tap out air bubbles.
Once my cat was completely covered, I felt that the top of the mold would be too thin because I could still see the tip of the cat’s ear through the molding liquid.
I used packing tape to add on a chimney like extension to the top of the mold. I wrapped packing tape around the outside of the cup with the sticky side out. Then I wrapped more packing tape around the first piece of tape with the sticky side in. That way the chimney that I created would not be sticky on either side.
Then I topped off the mold with the remainder of the mold material so that the cat’s ear would be more submerged. Then I waited for the mold to cure.
The instructions stated that the materials would take 2-8 hours to cure. I actually allowed my mold to cure for 24 hours because I was in no hurry to de-mold it. When it’s completely cured it will feel pretty firm in the cup and not sticky to the touch. First, I removed the tape chimney
Then I peeled the unbaked clay base away from the edges.
Then I removed the unbaked clay base entirely.
I squeezed the mold material to make a gap between it and the plastic cup.
Once the cup was loose from the mold, I cut it with scissors to make it easier to peel it away.
Then I used finger pressure to pull the mold away from the sides of the glass original.
Then I carefully squeezed, and gently pulled the original glass cat out of the mold.
When filling the mold with Liquid Sculpey®, it works best if you pre-heat the mold. The Mold Rubber is very insulating and pre-heating it will help the Liquid Sculpey® to cure more evenly. Place the mold in the oven at 275F while you mix up your colors.
I made a couple different color combinations for the cats. The first one I will show you is the Gold, White, and Silver.
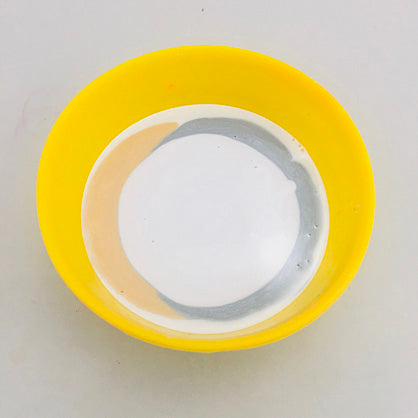
It’s really important to stir your Liquid Sculpey® colors before using them. I filled the bottom of a 2 ounce silicone baking cup with White Liquid Sculpey® (LS).
Then I added squirts of Gold LS and Silver LS on top of the White.
Then I added more White on top of the other colors. You can keep adding more layers of colors. Whichever color you use the most of will be the dominant color. Whichever color ends up on the top will go into the mold first.
Remove the mold from the oven. It is ready to fill when you can comfortably touch the mold with your uncovered hand, but the mold should still feel very warm.
Pinch the cup so that it forms a little pour spout along one edge.
Pour the LS into the mold at the spout edge.
The most detail in my mold is obviously in the face area. So I filled only the head first.
I used the 12mm ball tool to rapidly hit the side of the mold repeatedly to release air bubbles.
Then I filled the rest of the mold to level. Again, I used the 12mm Ball Tool to release air bubbles. I think that hitting the side of the mold with the Ball Tool also helps to blend the colors a bit inside the mold so they do not look so separated.
Bake the mold following the baking instructions for LS.
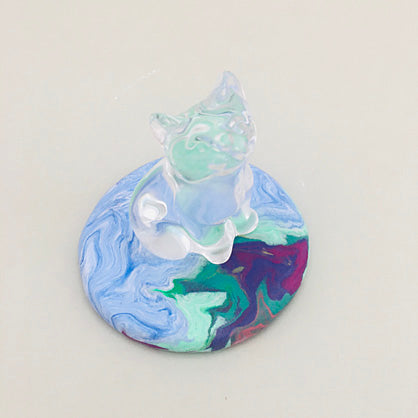
Allow the mold to cool completely before de-molding it. I found that squeezing a gap between the baked piece and the side of the mold and then adding a drop or two of Sculpey® Clay Softener & Thinner makes a really great release.
After you place a couple of drops of the Thinner between the molded piece and the mold, massage the mold to spread the Thinner all around inside. Then the baked LS piece will be very easily squeezed out from the bottom.
The mold is suitable for using over and over so I couldn’t resist making the little cat in more colors.
I began again by pre-heating the mold.
My next color combo is with Black, Silver, and Pearl. I filled the bottom of a silicone baking cup with Silver LS first. Then I added a layer of Black LS.
Then I added a layer of Pearl LS.
Next I added more layers of Black LS and Silver LS.
Pinching the side of the cup, I filled the warm mold.
I stopped filling when I got the head filled, then I tapped air bubbles out with the 12mm Ball Tool.
Then I filled the mold to level with more of the mixture and released air bubbles by tapping the sides rapidly with the 12mm Ball Tool.
Then I baked the mold again following the baking instructions for LS.
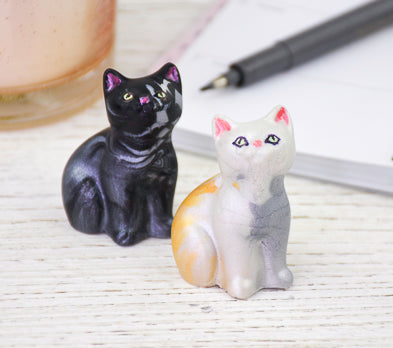
Here’s how the adorable little cats looked once they were both de-molded. I decided they needed some details to highlight their faces.
I placed a very small amount of pink mica powder on a scrap piece of paper. I squirted a dot of Sculpey® Glossy Glaze in the mica powder and stirred it up with the tip of the paintbrush. This will make a nice spreadable subtle color. I painted this color inside the ears and the nose.
Next, I made a light green color for the eyes with a little bit of green mica powder and a drop of Sculpey® Glossy Glaze.
I used a super fine black permanent marker to highlight the eyes.
Here’s a look at the nice way the colors blended on the backs of the cats.
To be honest, I did make quite a few cats with this fun project!