Skip to product information
1 of 1

Sculpey III® Mixed Media Robot

Sculpey III® Mixed Media Robot

Designed by Amy Koranek
Read More
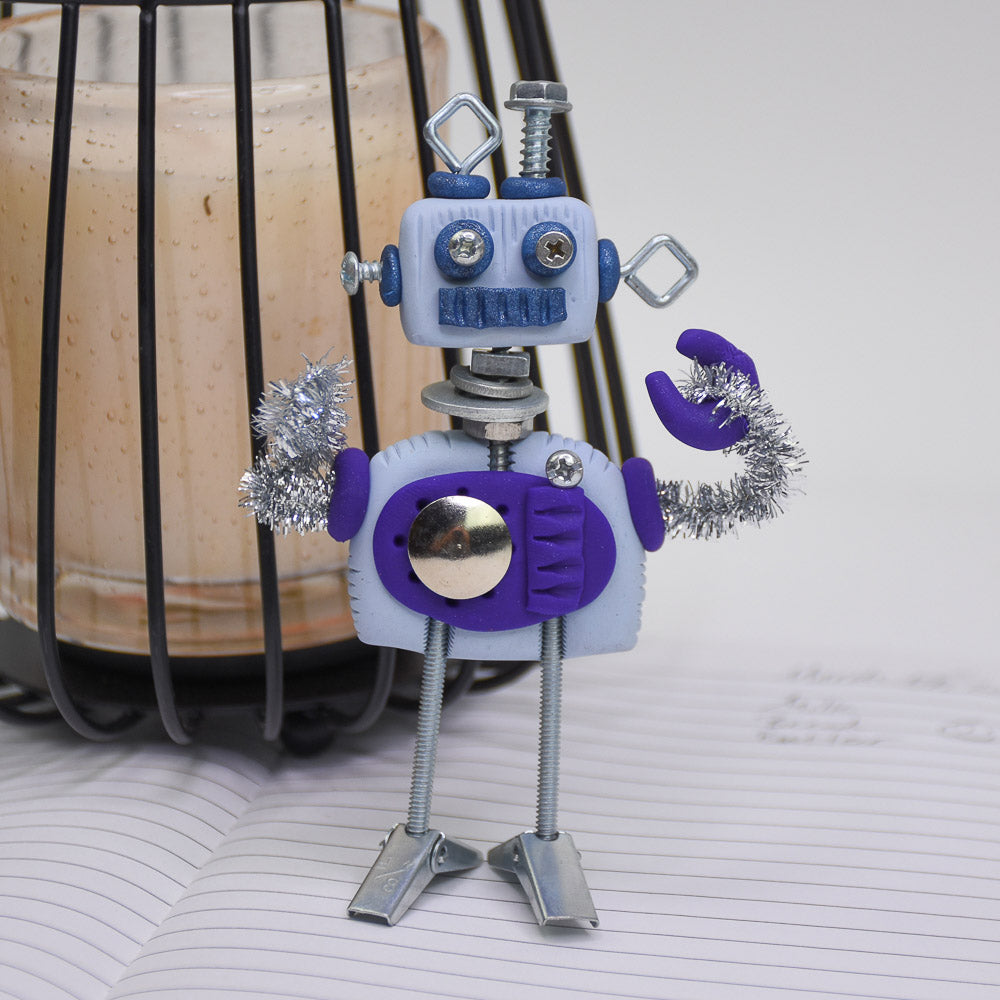
Who doesn’t love a friendly little robot? This guy can stand or sit on your desk or even guard your favorite houseplant! COMPLETION TIME: 60 Minutes to make and bake.
Read Less
ADDITIONAL SUPPLIES
  • 4” Silver chenille stems (2 per robot)
  • Oversized thumbtack (1 per robot)
  • Toggle bolt anchors (2 per robot)
  • Eye hooks (2 per robot)
  • Large screw (1 per robot)
  • Small screws (4 per robot)
  • 1.25” screw (1 per robot)
  • Miscellaneous washers (4 per robot)
View full details
Project Instructions

Step 1

Getting Started:

Please make sure your work area is covered and you are not working on an unprotected surface. We recommend working on the Sculpey® Oven Safe Work Mat, wax paper, metal baking sheet, or disposable foil. Uncured clay may damage unprotected furniture or finished surfaces. Be sure to cover your crafting area appropriately.

Start with clean hands, unwrap and knead clay until soft and smooth, or condition by running clay though a Pasta Machine. We recommend using a designated machine for clay purposes only. When working with multiple colors, clean hands with soap and
water or baby wipes (we have found that baby wipes work best) before switching colors. Shape clay, pressing pieces firmly together.  Wash hands after use.

Baking:

Begin by preheating oven to 275 °F (130 °C). After you are done creating; for best results bake clay on an oven-proof surface such as metal, aluminum foil, an index card or the Sculpey® Oven Safe Work Mat at 275°F (130 °C) for 15 minutes per ¼" (6
mm) of thickness according to package directions. Oven safe glass or ceramic
surfaces are also acceptable for baking; however please note that the baking
times may take longer as the glass or ceramic surfaces take longer to heat up. For best baking results, use an oven thermometer. DO NOT USE MICROWAVE OVEN. DO NOT EXCEED THE ABOVE TEMPERATURE OR RECOMMENDED BAKING TIME.

Step 2

Each robot will need 1/2 bar of Arctic Blue clay.

For the head and body divide the clay into a 1/3 size piece (head) and a 2/3 size piece (body).

Shape the body into a thick square.

Push the longer 1.25” screw into the surface of the body. Push the toggle anchors into the surface of the body as shown. Do not push the metal pieces all the way through - they will be sandwiched inside the clay after we put the details on top.

Step 3

Each robot will need 1/8 bar purple. Add Purple elements as shown for the control panel and sleeves.

Step 4

Add details (as shown) with tools.

Step 5

Push a big thumbtack into the detail area. Add various washers to the neck.

Step 6

Form the 1/3 remainder of the Arctic Blue (from Step 2) into a square and push it down on top of the screw neck.

Step 7

Add face details as shown in Navy Pearl (about 1/8 bar)


Step 8

Add more details with screws, eye screws, and with tools for texture.

Bend chenille stems in half and twist them together to make them thicker.

Push a bent chenille stem into each sleeve with the tail ends going into the clay and the loop ends toward the hands.

Make little claws with Purple.

Step 9

Carefully open the loop ends and gently push a little claw into each end.

Bake following the baking instructions for Sculpey III®. Allow to cool completely before handling. The arms can be posed after cooling. The anchors for feet can be adjusted to help him stand.