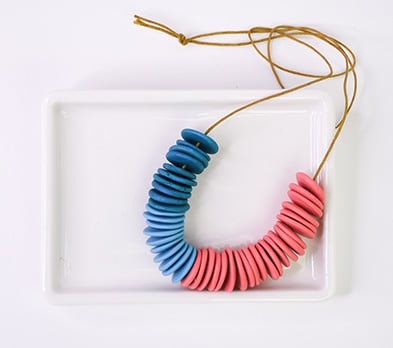
Sculpey Premo™ Interchangeable Disk Necklace
Sculpey Premo™ Interchangeable Disk Necklace
Designed by Amy Koranek
Read More
This necklace idea is bursting with color, and you can make it completely unique by changing the design up even after it’s completed! Using a basic cord that can be worn tied, makes it super easy to string and un-string the beads any time you like, making the combinations of patterns endless. COMPLETION TIME: 60 Minutes to make and bake
Read Less
ADDITIONAL SUPPLIES
- Ruler
- 30” Thin faux leather cord in a coordinating color
- Scissors

Project Instructions
- Getting Started:
Start with clean hands, unwrap and knead clay until soft and smooth, or condition by running clay though a Pasta Machine. We recommend using a designated machine for clay purposes only. When working with multiple colors, clean hands with soap and water or baby wipes (we have found that baby wipes work best) before switching colors. Shape clay, pressing pieces firmly together. Wash hands after use.
- Baking:
The secret to making this interchangeable disk necklace look so cool is making the beads basically the same size. Here’s my technique for getting multiple beads all similar in size and shape:
Roll a log that is 3/8” thick from 1/4 bar of Coral Premo™
Roll a log that is 3/8” thick from 1/4 bar of Coral Premo™

Lay the log alongside a ruler. Use a Clay Blade to mark the log out in 1/4” segments, trimming off the wonky ends

Cut the log on the marks that you made to create the exact same volume of clay in each bead. Roll all the beads up into balls by hand.

Flatten each ball with your fingertip to approximately the same thickness and diameter. The little inconsistencies created by your fingertip on the surface of each bead is a good thing. These inconsistencies will help the disk beads not sit perfectly on top of each other creating movement.
Poke a hole through the middle of each disk with the 2mm Ball Tool. Flip each disk over and poke the same hole through the back as well so the hole is really neat. Also double check that the hole is large enough to accommodate your necklace cord.
Poke a hole through the middle of each disk with the 2mm Ball Tool. Flip each disk over and poke the same hole through the back as well so the hole is really neat. Also double check that the hole is large enough to accommodate your necklace cord.

Repeat Steps 2-5 with 1/8 block of Peacock Pearl and 1/8 block of Turquoise. If you roll the ropes to the same thickness and you cut the segments to the same length as you did the Coral pieces, you should have beads that are all the same volume. However, this will create only half as many beads because you are starting with only half as much clay of each color.

Bake the beads following the baking instructions for Sculpey Premo™. When the beads are completely cool you can string them in this pattern...

Or you can string them like this...

Or even this design.
Tie a knot in the cord and trim the ends with scissors. You can string the disk beads in a different way every time you wear it!
Tie a knot in the cord and trim the ends with scissors. You can string the disk beads in a different way every time you wear it!


