
Sculpey Soufflé™ and Walnut Hollow Wooden Shelf Collaboration
Sculpey Soufflé™ and Walnut Hollow Wooden Shelf Collaboration
Designed by Amy Koranek
Read More
Read Less
This tutorial has lots of tips and tricks for creating a trendy wall piece. The cool hexagon pattern can be adjusted to fit any wall decor. And the extruded ropes of clay make a nice outline on the front of the fun shape. Learn how to mount oven bake clay design elements permanently to wood with Translucent Liquid Sculpey®.
COMPLETION TIME:3 Hours to make, bake, and finish.
ADDITIONAL SUPPLIES
- Walnut Hollow wood shelf
- Clay Extruder Set
- Craftsmart Gray Satin Acrylic paint
- Paintbrush
- Sandpaper
- Ruler
- Pencil
- Tall jar for propping the shelf in the oven
- Heat gun

Project Instructions
- Getting Started:
Start with clean hands, unwrap and knead clay until soft and smooth, or condition by running clay though a Pasta Machine. We recommend using a designated machine for clay purposes only. When working with multiple colors, clean hands with soap and water or baby wipes (we have found that baby wipes work best) before switching colors. Shape clay, pressing pieces firmly together. Wash hands after use.
- Baking:
First prepare the wood shelf for the project by sanding any rough areas with sandpaper. Bake the shelf in a preheated oven at 275F to release excess sap from the wood. If sap shows up after baking the shelf for 20 minutes, you can easily sand it away.
Next, divide the shelf in half from top to bottom and draw a light pencil line across the surfaces. Paint the top half of the shelf with gray acrylic paint and allow to dry completely.
Next, divide the shelf in half from top to bottom and draw a light pencil line across the surfaces. Paint the top half of the shelf with gray acrylic paint and allow to dry completely.

On the bottom half of the shelf where you will put the clay hexagon shapes, squirt a bead of Translucent Liquid Sculpey® (TLS).

Spread the TLS evenly with your fingertips. You should be able to see the wood grain slightly through the liquid. The TLS will seep into the wood grain making it the ideal adhesive for raw clay.

Make a flat sheet of Pumpkin Souffle™ by sheeting it through the pasta machine on the thickest setting.
Cut out as many large hexagons as possible using the large cutter.
Cut out as many large hexagons as possible using the large cutter.

You can easily step the cutter over and cut out another row by lining up the next cut to the last one. Save the partially cut pieces along the edges of the clay to fill in small areas.

Make a flat sheet of Igloo Soufflé™ by sheeting it through the pasta machine on the second thickest setting. Cut out as many large hexagons as possible. Save the partially cut pieces along the edges of the clay to fill in small areas.

Next texture the Igloo hexagons with the texture sheet. You can texture three hexagons at a time by placing the texture sheet on top of them and using heavy fingertip pressure.

Carefully remove the texture sheet from the clay. You will need to repeat this process for 22 large hexagons.

Make a flat sheet of Concrete Soufflé™ by sheeting it through the pasta machine on the third thickest setting. Cut out as many small hexagons as possible.

Starting at the bottom of one of the sides, lay a row of Pumpkin large hexagon shapes. Fill in small areas with partial pieces.
Center a small thin Concrete hexagon in the center of each of the whole Pumpkin large hexagons.
The next row will be Igloo textured hexagons. Fill in small areas with partial pieces.
Make sure the pieces lay perfectly flat onto the TLS layer over the wood. The raw clay pieces should stick really well to the TLS layer and bond perfectly during baking.

Continue the pattern of alternating Pumpkin and Igloo stripes all the way up the bottom half of the first side.

Fill in all the small areas with partial pieces. Layer small thin Concrete hexagon shapes in the centers of the Pumpkin hexagons as desired. When one side is complete, the shelf will be baked to secure the hexagon pattern into place.

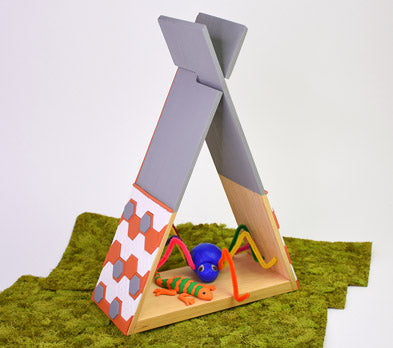
This photo is looking inside my kitchen oven. I propped one end of the shelf unit on top of a glass jar to hold the raw hexagon shapes as level as possible during baking.
Bake following the baking instructions for Sculpey Soufflé™ above. When the shelf is completely cool, repeat all steps to decorate the opposite side of the shelf in a matching pattern.
Bake the shelf again, propping as you did before to keep the raw surface level during curing.
Allow the shelf to cool completely again.

Back the plunger out of the clay extruder by turning the handle. Roll a thick log of Pumpkin to a size that will just fit inside the clay extruder.

Add the medium sized circle dye to the end of the extruder and secure with the threaded cap. Extrude the entire log of Pumpkin through the dye making a long skinny rope. Try to keep the rope as straight as possible laying it on your work surface as it emerges from the extruder.

Squirt a thin line of TLS across the top of the hexagon pattern where it touches the painted area on one side. Lay a piece of the Pumpkin rope on top of the pattern and trim the ends to fit. Use a heat gun to set the TLS so that you can handle the project without moving the rope. Place the heat gun on hi setting and move it back and forth across the area where the TLS is. You will notice the TLS will go from shiny to matte. When it goes matte, you can remove the heat.
Repeat this step to place a thin rope of extruded Pumpkin across the other side as well. Also set this second rope with the heat gun so it does not move.
Repeat this step to place a thin rope of extruded Pumpkin across the other side as well. Also set this second rope with the heat gun so it does not move.

Lay the shelf flat. Place a bead of TLS on the front edges of the shelf and smooth it flat with your fingertips.
Add ropes of Pumpkin to the front edges as well. Set these with the heat gun too.
Add ropes of Pumpkin to the front edges as well. Set these with the heat gun too.

Bake the entire shelf, laying it on its back, one more time following the baking instructions for Sculpey Soufflé™. When the shelf is completely cool, inspect one more time for sap that may have leaked out through the wood during the multiple bakings. If you see sap, you can sand it flat with the sandpaper and touch up with paint.
