

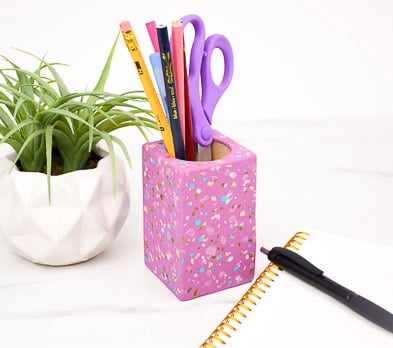
Sculpey Premo™ Mauve Terrazzo Pencil Cup
Sculpey Premo™ Mauve Terrazzo Pencil Cup
Designed by Amy Koranek
Read More
Read Less
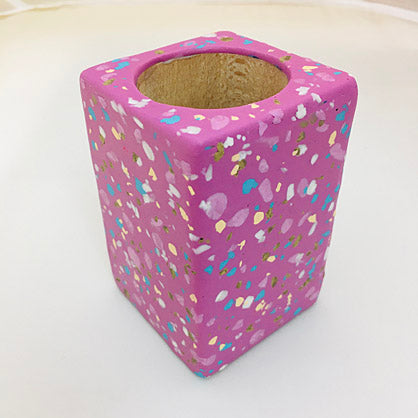
Translucent Liquid Sculpey teams up with several Sculpey PremoTM colors to create a fun and colorful addition to your desktop featuring a faux terrazzo pattern.
COMPLETION TIME:45 Minutes to make and bake
ADDITIONAL SUPPLIES
- Wood pencil cup
- Corn starch
Project Instructions
Please make sure your work area is covered and you are not working on an unprotected surface. We recommend working on the Sculpey® Oven-Safe Work Mat, wax paper, metal baking sheet, or disposable foil. Uncured clay may damage unprotected furniture or finished surfaces. Be sure to cover your crafting area appropriately.
Start with clean hands, unwrap and knead clay until soft and smooth, or condition by running clay though a Pasta Machine. We recommend using a designated machine for clay purposes only. When working with multiple colors, clean hands with soap and water or baby wipes (we have found that baby wipes work best) before switching colors. Shape clay, pressing pieces firmly together. Wash hands after use.
Start with clean hands, unwrap and knead clay until soft and smooth, or condition by running clay though a Pasta Machine. We recommend using a designated machine for clay purposes only. When working with multiple colors, clean hands with soap and water or baby wipes (we have found that baby wipes work best) before switching colors. Shape clay, pressing pieces firmly together. Wash hands after use.
- Baking:
Squirt some Translucent Liquid Sculpey® onto each side of the wooden pencil cup.

Spread the Translucent Liquid Sculpey® (TLS) with your fingertips evenly. When the TLS is spread evenly, you should still be able to see the wood grain through it. This is a good indication that the TLS is not too thick. The TLS will absorb into the grain of the wooden cup while you prepare the terrazzo pattern.

Mix a very small amount of Mauve and Pearl together to make Pearl Mauve.
Sheet Mauve to a sheet 1/8” thick that is large enough to wrap around the outside of the wooden pencil cup.
Lay the Mauve sheet in front of you. Pinch off random size and shape pieces of Pearl Mauve and press them onto the Mauve sheet. Roll the sheet with the Acrylic Clay Roller so that the pieces lay flat in the Mauve background.

Pinch off random size and shape pieces of Pearl and press them into the Mauve sheet. Roll the sheet with the Acrylic Clay Roller so that the pieces lay flat in the Mauve background.

Here’s a trick that you might find helpful. In order to create little bits of clay that don’t stick together, you can use corn starch as a release. Shave off some of the next color, in this case Turquoise, and sprinkle a little corn starch on your work surface.

Lay the clay on top of the spot of corn starch. As you chop the color with the blade, the pieces will be more likely to stay separated by the corn starch. If used sparingly, the corn starch will not alter the color of the clay.

You can keep cutting and chopping until the pieces are very tiny.

Sprinkle the colors randomly over the background. Continue Steps 6-9 to add Antique Gold and Ecru to the sheet as well. Be sure to roll with the Acrylic Clay Roller between every color so the sheet stays flat.

Cut a piece of the clay with the Clay Blade to fit one side of the pencil cup. Smooth the clay sheet to the side of the cup, smoothing out air bubbles with your fingertips and the Acrylic Clay Roller.

Continue covering each side of the box being careful to smooth out air bubbles as described in Step 10. Trim the edges with the Clay Blade so they are very neat. Smooth the seams at the corners with your fingertips.

Use the remaining clay sheet to make a top for the cup. Smooth the seams with your fingertips. Trim out the opening with the Clay Blade.
Bake following the baking instructions in Step 1 above. Allow to cool completely before handling.
Bake following the baking instructions in Step 1 above. Allow to cool completely before handling.
- Choosing a selection results in a full page refresh.
- Opens in a new window.