

Sculpey® III Extruded Picture Frame
Sculpey® III Extruded Picture Frame
Read More
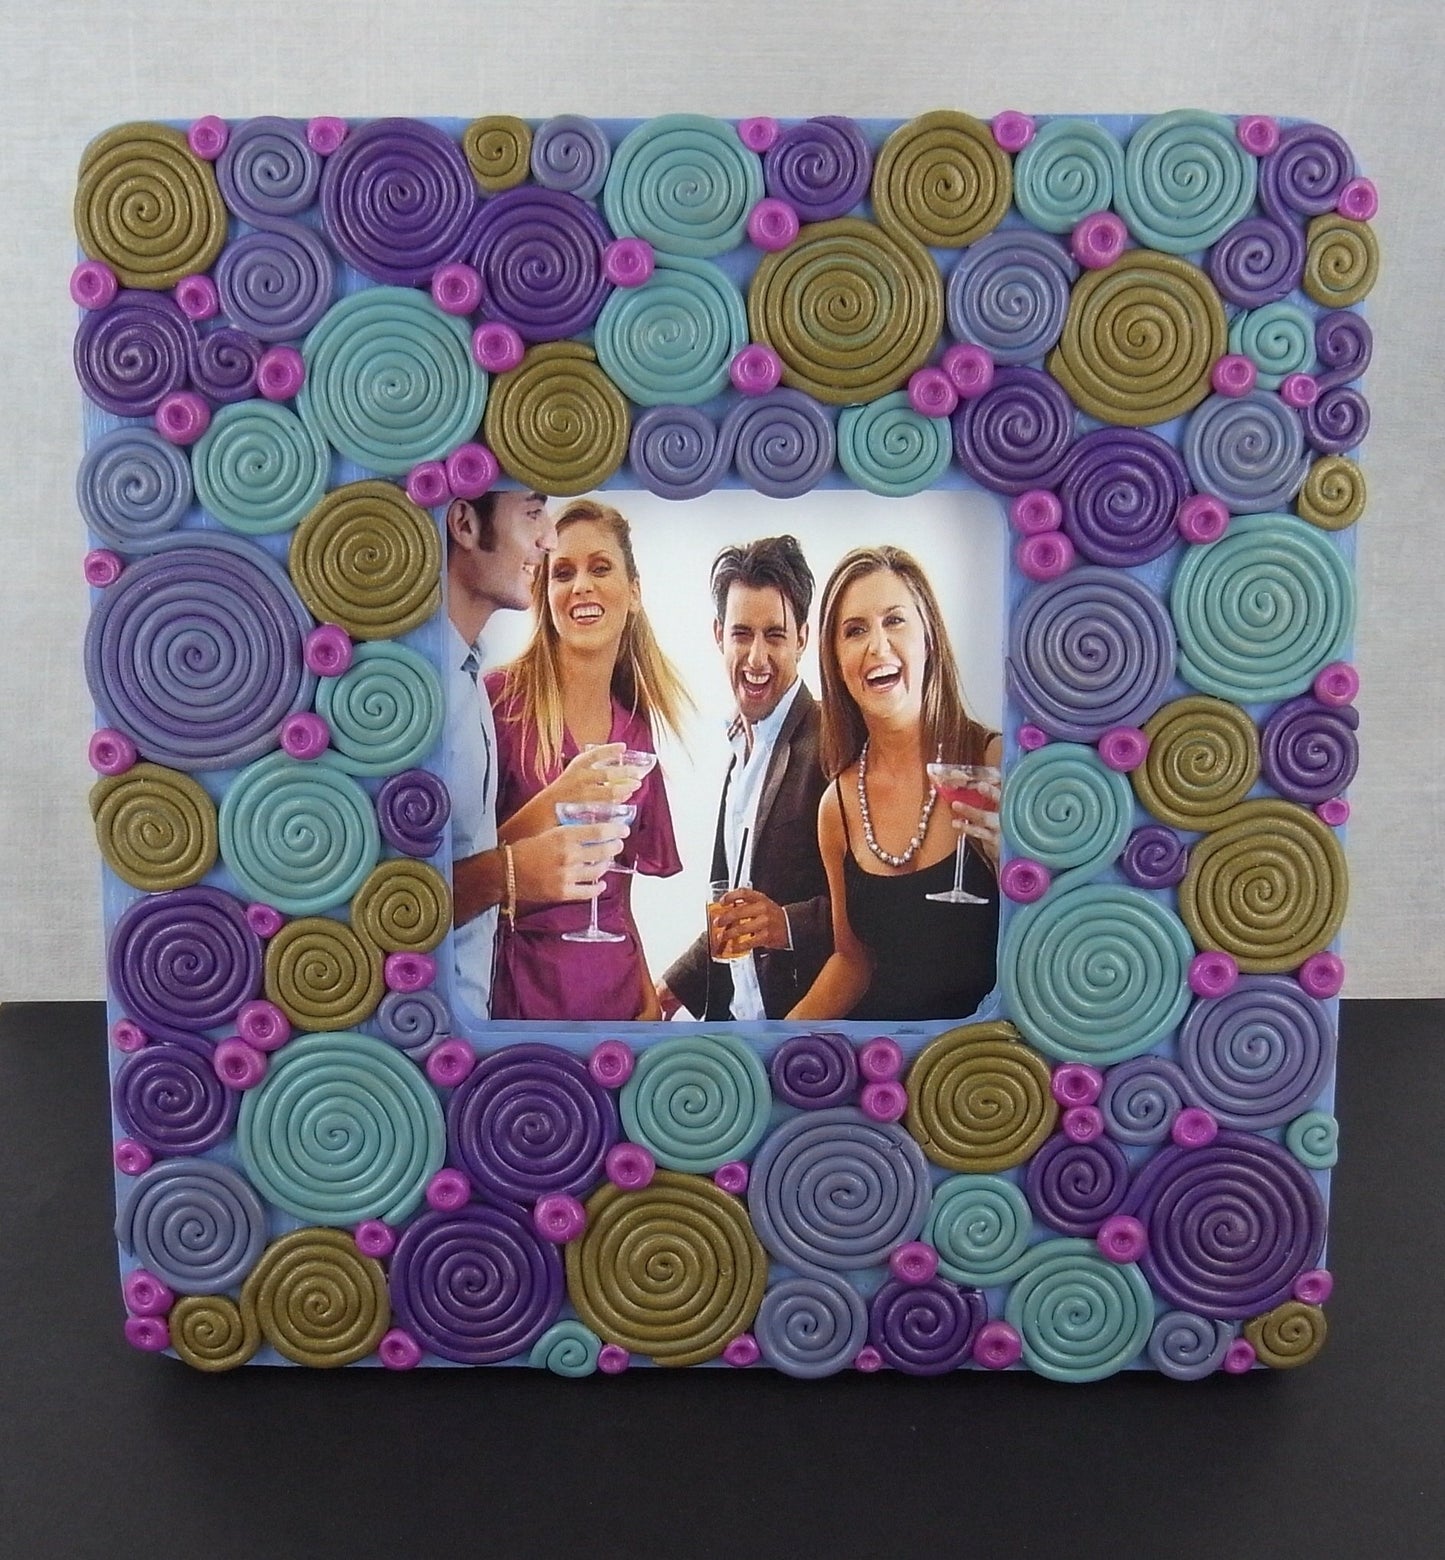
Display your treasured images in this charming swirl design frame. Create your own color combinations to achieve the look that fits your home!
Read Less
ADDITIONAL SUPPLIES
- Wood Frame 3.5”x3.5”
- Acrylic Paint: Periwinkle, Metallic Pure Gold Paint
- Brush
- Craft Knife
Project Instructions
Do not use unbaked clay on unprotected furniture or finished surfaces. Start with clean hands and work surface area. Good work surfaces include wax paper, metal baking sheet, or disposable foil. Knead clay until soft and smooth. For best results, clean your hands in between colors. Shape clay, pressing pieces together firmly. Bake on oven-proof glass or metal surface at 275 °F (130 °C) for 15 minutes per 1/4" (6 mm) thickness. For best baking results, use an oven thermometer. DO NOT USE MICROWAVE OVEN. DO NOT EXCEED THE ABOVE TEMPERATURE OR RECOMMENDED BAKING TIME. Wash hands after use. Baking should be completed by an adult. Begin by preheating oven to 275 °F (130 °C). Test temperature with oven thermometer for perfectly cured clay. For best results, condition all clay by running it through the clay dedicated pasta machine several passes on the widest setting. Fold the clay in half after each pass and insert the fold side into the rollers first.

Paint wooden frame with Periwinkle acrylic paint and allow to dry. (You may need two coats)

Cut each bar of clay into 3 pieces and knead each piece in your hands until it’s soft and pliable. Roll each color of clay into a log slightly smaller than the extruder barrel. Attach the 3rd largest circle disk to the extruder. Extrude about twelve 8” to 10” long snakes for each color. In between extruding each color, make sure to clean the barrel of the extruder to avoid color transfer. Always extrude the colors lightest to darkest. Set all the extruded pieces aside on waxed paper.

Choose the color you want to start with and begin making coils. To make a coil, curl one end of the extruded clay inward until you reach the end. To make a double coil, curl one end of the extruded clay inward towards the center, continue wrapping the clay around until you reach the center or a little before. Then, start at the opposite end of the snake, reverse the direction of the coil. Apply a thin coating of Bake and Bond to the part of the frame where the coil will be adhered. Press the coil onto the frame.
Make different sized coils for all of your colors and continue adding them to the frame, working in small sections. Keep the coils as close to the next as possible. Alternate colors and sizes when arranging them on the frame, make some coils larger and some smaller. Make some with double coils. Continue until the frame is filled.Next, roll about 60 small balls, varying in sizes of Fuchsia Pearl. Press these dots randomly in places, especially where there are gaps. Use the Etch N’ Pearl to make indents into each ball.
When the frame is complete, bake according to the directions above. Once the frame has cooled, dry brush some Metallic Gold Paint over the coils. Dry brushing is when very little paint is applied on the brush using no water. Simply make quick strokes with your brush over coiled areas to give it some sheen and depth. This will dry very quickly. Once dry, you can coat the entire frame with Sculpey Gloss Glaze and allow to dry completely.