

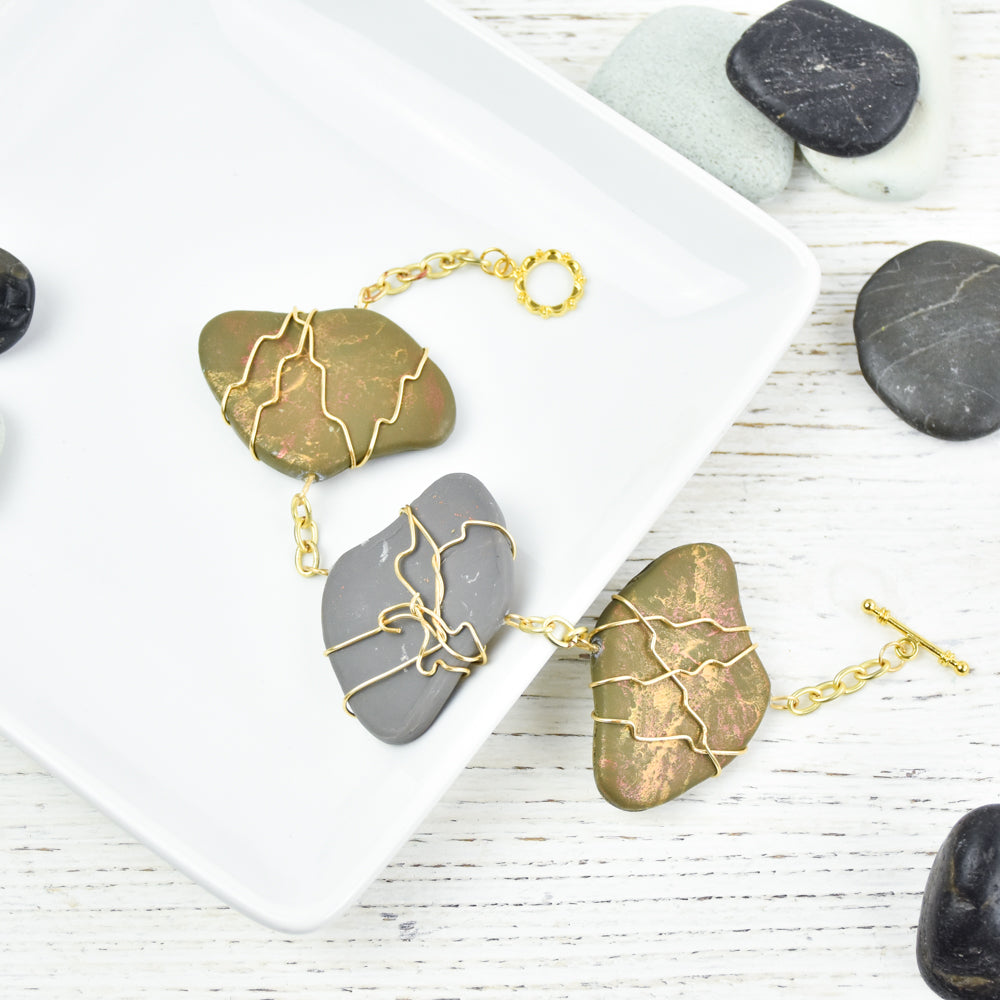
Sculpey III® Wire Wrapped Faux Stone Bracelet
Sculpey III® Wire Wrapped Faux Stone Bracelet
Designed by syndee holt
Read More
Read Less
Have some round cutters that have gotten out of round? It’s super easy to bend them into organic shapes to create a faux stone effect. Do a simple wire wrap, along with traditional eye pins, and create a spectacular bracelet!
TIME TO COMPLETION: 75 minutes
ADDITIONAL SUPPLIES
- Deli paper or light paper
- Cutters in shapes you want (or make them! See below)
- Gold craft wire 22 gauge
- Square nose jewelry pliers
- Needle tool
- Instant glue
- Small amount of gold chain and bracelet clasp
- Gelli plate and metallic paint colors (optional)
- Baby wipes
Project Instructions
- Getting Started:
Start with clean hands, unwrap and knead clay until soft and smooth, or condition by running clay though a Pasta Machine. We recommend using a designated machine for clay purposes only. When working with multiple colors, clean hands with soap and water or baby wipes (we have found that baby wipes work best) before switching colors. Shape clay, pressing pieces firmly together. Wash hands after use.
- Baking:
Sheet out a small piece of the conditioned Elephant Grey (or Hazelnut) on the middle setting on the Clay Conditioning Machine. Apply a small amount of metallic paint (this is copper) to the gelli plate. Immediately press the sheet of clay onto the gelli plate. Do NOT rub the clay, put press gently with your hands. Immediately remove the sheet of clay and admire the gorgeous look from the gelli plate.


You can repeat this step with a second color if you wish. I’ve used both metallic Gold and Copper on these pieces, but even a regular turquoise acrylic paint would look lovely on these colors!

Sheet out two layers on the widest setting and stack them under your painted sheet of clay. You can see that I took round cutters and bent the cutting edge with my nylon pliers. Do NOT try to bend the rolled edge, as that can break the cutter.


Place the deli paper, or other thin paper on top of the clay and firmly press the cutters down into the clay. I like to put a board across the top to press evenly and without hurting my hands! Before you remove each cutter, wiggle it slightly to help release that last super thin bit of clay. Use a smooth round edge, like a barrel of an Exacto blade, to smooth any rough edges. Use your needle tool to put small holes about 1/4 inch deep on either side of each bead. Bake as directed.

Once the clay has baked and cooled, cut a length of the gold wire that is about 12 inches long. Wrap the wire around the bead, allowing the shape of the bead to dictate the wraps. Tightly wind the wire ends together and tuck under one of the wraps. The wires will not be really tight against the clay.

Use your flat nose pliers to tighten the wires (and add movement in the design!) by grasping the wire and rotating your wrist a small amount. You will immediately know if you have twisted the right way because the wire will tighten! You can do this on both the front and the back of the bead. If you want the wire on the front of the bead to be smooth, just do all the tightening on the back of the bead. Repeat for each of the other beads.


If you didn’t use a needle tool to place the stringing holes before baking, you can use a small hand drill (also called a pin vise) to do so now. Put a drop of instant glue on your eye pin and press it firmly into place on either side of the bead.

Once the glue has dried, select your favorite bead for the middle of the bracelet. Add a link or two of chain between each bead and short chain links with the clasp on each end. Done!
