

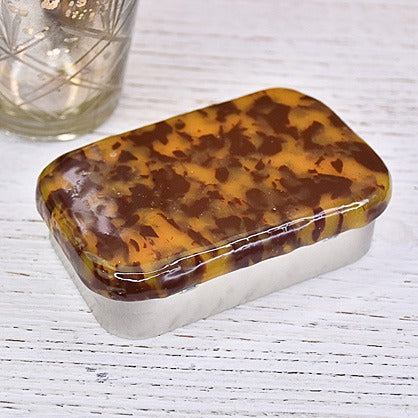
Sculpey Premo™ Amber Umber Box
Sculpey Premo™ Amber Umber Box
Designed by Amy Koranek
Read More
Read Less
I used the Terrazzo mosaic style technique of making to create this box that mimics tortoiseshell quite well. Covering a mint tin is a good way to upcycle and it provides a nice useful gift (even to yourself!).
TIME TO COMPLETE:90 Minutes to make and bake
ADDITIONAL SUPPLIES
- Copier paper or deli paper or other barrier paper
- Clean mint tin with a hinged lid
- Heat gun
Project Instructions
- Clay Getting Started:
Start with clean hands, unwrap and knead clay until soft and smooth, or condition by running clay though a Pasta Machine. We recommend using a designated machine for clay purposes only. When working with multiple colors, clean hands with soap and water or baby wipes (we have found that baby wipes work best) before switching colors. Shape clay, pressing pieces firmly together. Wash hands after use.
- Clay Baking:
- Liquid Getting Started:
- Liquid Baking:
For this project we will need 2 ounces of Amber Premo and 1 ounce of Burnt Umber. This will make the Amber the dominant color in our finished design which will keep the look more light and interesting. Remove 1/16 bar of the Amber and set aside for later. Place the remainder of the Amber and 1 ounce of Burnt Umber on top of a piece of paper so it will be easy to keep in one place as you chop it into pieces. Chop up the two colors into chunks using the Super Slicer.

Keep chopping the colors into smaller and smaller pieces, not larger than 3/16” in size. Make sure the color chips are mixing up together and randomly spread into each other.

Organize the assembly of chips into a rectangular shape with your hands. Try to keep the chips in an even layer on top of the paper if you can.

Place another piece of paper over the top of the chips. I like to use deli sheets because they are not sticky and they are translucent enough that I can see the colors through them. Roll over the paper on top of the chips with the Acrylic Clay Roller to press the chips into each other and fill in gaps. Flip the chips with the bottom sheet of paper over and roll over the back side as well. Flip the chips and the paper back over again.

Remove the top layer of paper. If there are areas in the sheet that have holes in them, you can remove little bits from around the outside edges and press them into place in the holes. Then put the paper back over the top and roll again. Try to keep the sheet to a thickness of at least 1/8” when you are all done rolling. Set the speckled sheet aside for now.

Place a layer of Gold Liquid Sculpey® (LS) on the top lid of the mint box. This layer is necessary to block out any writing on the lid. Amber Premo is somewhat translucent and this writing would show through the Amber even after it is baked.

Spread the Gold LS to the edges of the lid with the knife tool. Bake the box following the baking instructions for LS.

Allow the box to cool completely. Make a thin strip of Amber from the piece that was set aside in Step 2. Use this little strip to cover up the edge of the box.

Trim the little strip and smooth the cut edges.

Drape the Amber/Umber sheet over the box lid. Form it to the shape of the lid and over the corners with your hands.

Make sure the sheet is forming really closely to the top, edges, and corners of the lid. Trim excess clay with the Super Slicer. Make sure the clay top does not block the hinges at the back.

Open Clear LS by removing the lid completely. Stir the Clear LS really well with the end of the knife tool. Clear LS will commonly have a layer of sediment in the bottom of the bottle which must be mixed back into the liquid. When the Clear LS is mixed together again, replace the lid. Place some Clear LS on top of the clay sheet. Spread the Clear LS around on the top of the clay with your fingertips. You’ll notice that the Clear LS really likes to stick to the solid clay. If you spread it thinly enough it will stick rather than run off even on the edges.

Bake the box again following the baking instructions for Premo. When the box comes out of the oven, the Clear LS will still be slightly foggy. You can clear it by adding more heat with a heat gun. Turn the heat gun onto HI. Hold the heat 4”-6” away from the surface of the clay and keep moving the heat across the surface. When you see the LS turn completely clear and go shiny, you can turn off the heat.
