Skip to product information
1 of 1

Sculpey Soufflé™ Molded Feather Necklace

Sculpey Soufflé™ Molded Feather Necklace

Read More
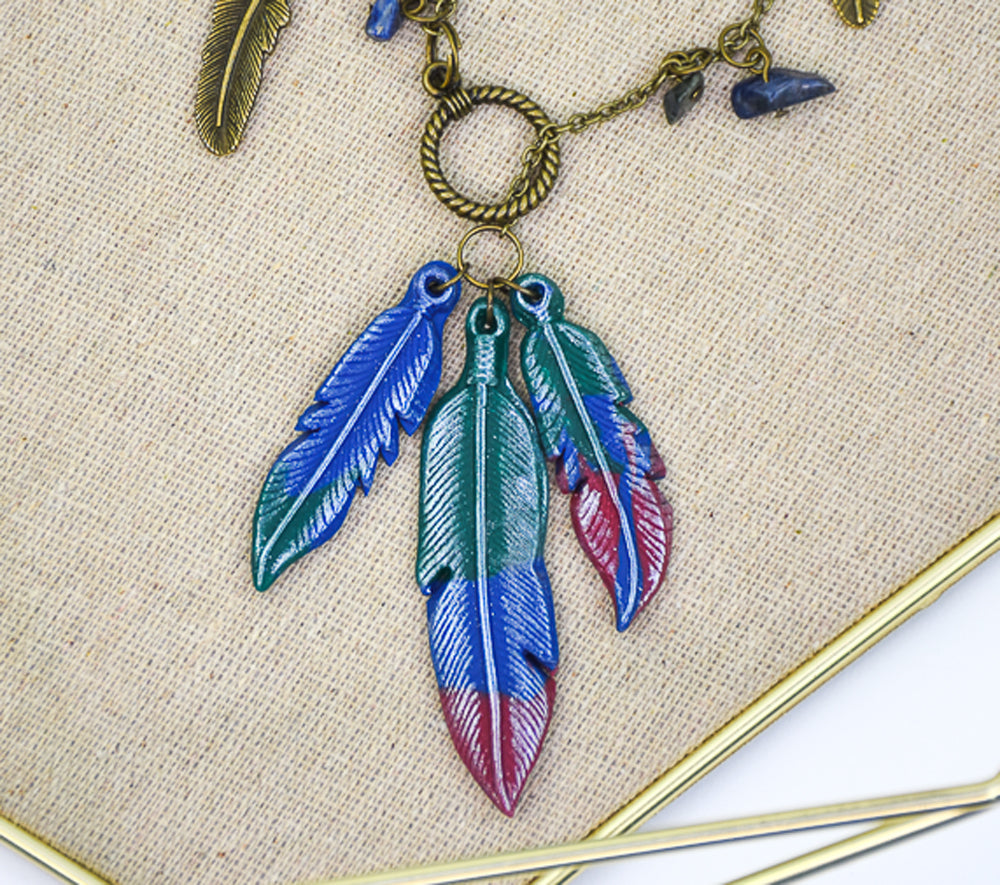
In this tutorial we will make molds from metal charms or other objects of your choice. The mold can then be used to reproduce copies to make identical pieces for accessories. COMPLETION TIME: 45 Minutes to make and bake the molds 75 Minutes to make, bake, and assemble the necklace DESIGNED BY AMY KORANEK
Read Less
ADDITIONAL SUPPLIES
  • Corn starch
  • Small paintbrush
  • Antique gold tone feather charms 2 small
  • Antique gold tone feather charm 1 medium
  • Antique gold tone feather charm 1 large
  • Pearl mica powder
  • 28” Antique gold chain
  • Large connector ring in antique gold tone
  • 6mm Antique gold jump rings (17)
  • 8mm Antique gold jump ring
  • Antique gold head pins (12)
  • Round nose pliers
  • Flat nose pliers
  • Natural lapis stone beads (12)
View full details
Project Instructions

Step 1

Getting Started:

Please make sure your work area is covered and you are not working on an unprotected surface. We recommend working on the Sculpey® Oven
Safe Work Mat, wax paper, metal baking sheet, or disposable foil. Uncured
clay may damage unprotected furniture or finished surfaces.
Be sure to
cover your crafting area appropriately.

 Start with clean hands, unwrap and knead clay until soft and smooth, or condition by running clay though a Pasta Machine. We recommend using a designated machine for clay purposes only. When working with multiple colors, clean hands with soap and water or baby wipes (we have found that baby wipes work best) before switching colors. Shape clay, pressing pieces firmly together.  Wash hands
after use.

 Baking:

Begin by preheating oven to 275 °F (130 °C). After you are done creating; for best results bake clay on an oven-proof surface such as metal, aluminum foil, an index card or the Sculpey® Oven Safe Work Mat at 275°F (130 °C) for 30 minutes per ¼" (6 mm) of thickness according to package directions. Oven safe glass or ceramic
surfaces are also acceptable for baking; however please note that the baking
times may take longer as the glass or ceramic surfaces take longer to heat up. For
best baking results, use an oven thermometer. DO NOT USE MICROWAVE OVEN. DO NOT EXCEED THE ABOVE TEMPERATURE OR RECOMMENDED BAKING TIME.

Step 2

We will create the molds first. Condition a small amount of Mold Maker - about twice as much molding material as the size of the original metal charm. Make a little patty. Swipe corn starch across the face of the Mold Maker patty. Swipe corn starch across the surface of the metal charm. Brush away excess corn starch from both the patty and the charm with a paintbrush. You don’t need to be able to see the corn starch on the surface.


Push the charm, decorative side down, into the Mold Maker
patty. Make one patty mold for each charm.

Step 3

Carefully remove the charms from the patties.

Bake the molds following the baking instructions for Mold Maker.

Allow to cool completely before handling the molds.

Step 4

For the large feather we will make a blended log to place in the mold. Condition enough of the Forest Green, Midnight Blue, and Cabernet to fill the mold. Shape the individual clays to fit the mold.

Step 5

Dust the mold with corn starch and wipe as much as possible back out with a paintbrush.

Push the clays together into a single rope making sure they are well hooked to each other. The little bit at the top is the piece we need to push into the eye area of the mold.

807-6

Push the clays into the mold as shown.

Step 7

If the clays is too thick, shave the excess away with a Clay Blade.

Step 8

Here is how the mold looks filled.

Step 9

Carefully flex the mold to release the clay feather. Do not bake the clay in the mold.

Step 10

Combine scraps of the three clay colors into a log and shape them to match the small feather mold.

Step 11

Push the small feather clay into the small feather mold repeating Steps 6-9.

Step 12

Gently flex the mold to release the feather.

Step 13

Repeat for a second small feather.

Step 14

Dust the back of the feathers with pearl mica powder to add interest.

Step 14

Dust the front of the feathers with pearl mica powder on the raised areas.

Poke a hole through each feather with the Blunt Point Tool.

Bake the feathers following the baking instructions for Sculpey Soufflé™.

Allow to cool completely before handling.

Step 16

Here is the basic layout for the necklace.

Step 17

To start the assembly, thread one end of the chain through the large connector ring.

Step 18

Connect the connector to an end of the chain with a 6 mm jump ring using flat nose pliers.

Connect the other end of the chain that is going through the connector ring to another 6 mm jump ring. This is the end that will be connected to the feathers.

Step 19

Here’s the layout for connecting the feathers to the chain.

Step 20

Connect the feathers to the jump ring on the end of the chain with small jump rings.

Step 21

This is the layout for the charms and stone beads that will be connected to the chain with small jump rings.

Step 22

Thread a head pin through each stone.

Trim the head pin to 3/8” tail with wire cutters. Use round nose pliers to create an eye in the tail of the head pin.

Add a small jump ring to each one.

Step 23

Add small jump rings to each small metal feather charm.

Attach charms and stone beads along the chain about 1/2” - 3/4” apart using flat nose pliers to open and close the jump rings.