

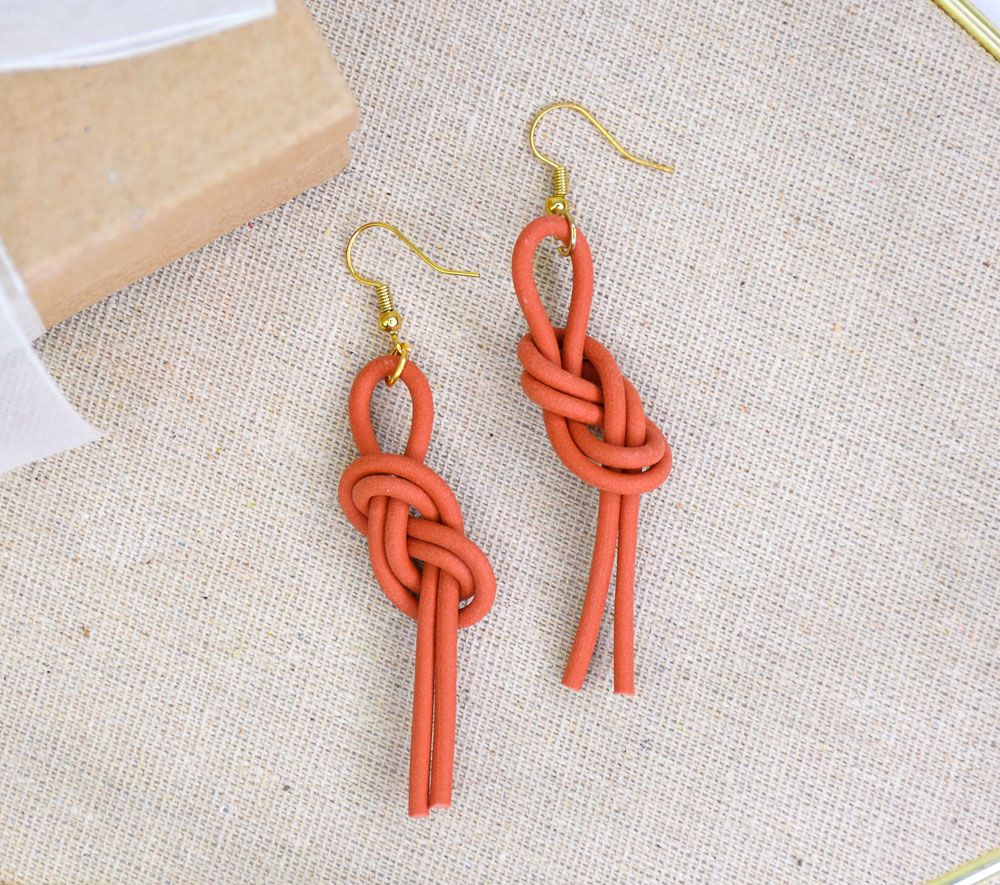
Sculpey Soufflé™ Cinnamon Knotted Earrings
Sculpey Soufflé™ Cinnamon Knotted Earrings
Designed by syndee holt
Read More
Read Less
I’m the first to admit that I’m probably the only gal from the 60s that did NOT macrame. Just tying my shoes was enough for me. So, when Sculpey asked me to KNOT a pair of earrings I immediately told my dogs, “NOT”. But I would do ANYTHING for my beloved Soufflé™ Cinnamon, so I sat down at my clay table. My brother says that this is a “figure 8 on a bight” knot. I just call it purty…TIME TO COMPLETION:30 minutes to bake
20 minutes to make
20 minutes to make
ADDITIONAL SUPPLIES
- Clay Extruder with single round medium extruder disc
- Baking tray with silicone mat or clean cardboard
- Ear wires (2) I used Rose Gold, but regular Gold looked good too
- 7 mm jump rings (2)
Project Instructions
Step 1
- Getting Started:
Start with clean hands, unwrap and knead clay until soft and smooth, or condition by running clay though a Pasta Machine. We recommend using a designated machine for clay purposes only. When working with multiple colors, clean hands with soap and water or baby wipes (we have found that baby wipes work best) before switching colors. Shape clay, pressing pieces firmly together. Wash hands after use.
- Baking also called Curing:
Step 2
Condition your package of Cinnamon clay until it is warm and rather soft. Then separate into 2 pieces that you roll out to fill extruder barrel completely. Extrude the clay right onto your baking tray, making sure that the clay doesn’t touch. My tray has a clean piece of cardboard in it.Bake/cure according to the directions in Step 1 above and allow to cool.

Step 3
Cut your extruded clay into about 10-inch pieces. Select one piece and start stroking the length and gently pulling at the clay. The goal is to warm the clay through friction to make it even more malleable.Fold the clay in half at the middle to make the top loop. Hold between thumb and forefinger like I am.

Step 4
Poke your fourth finger up and wrap both pieces of clay around it and secure with your thumb.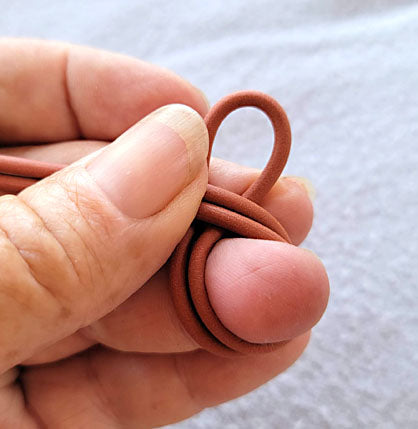
Step 5
Wrap the clay under your thumb around BEHIND the top loop, pull your finger out of the bottom loop and tuck the ends through the loop as shown.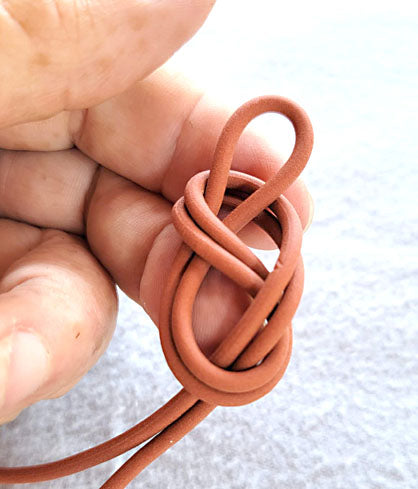
Step 6
That’s it! Now just take your time and tighten the two loops by pulling up the bottom loop and pulling the excess clay through the top loop. This is the most time consuming part!Take care not to twist the knot or the loops – actually they behave quite nicely.

Step 7
Well, I thought it was so fun and easy that I made a mirror image knot as well for the other earring.Once you have both earrings completed, trim the bottom ends to any length you wish.

Step 8
That’s it! Just add a jump ring and an ear wire of your choice and your earrings are done! NO GLUE needed at all…