Skip to product information
1 of 1

Sculpey Premo™ Color Mixed Stamped Earrings

Sculpey Premo™ Color Mixed Stamped Earrings

Designed by Amy Koranek
Read More
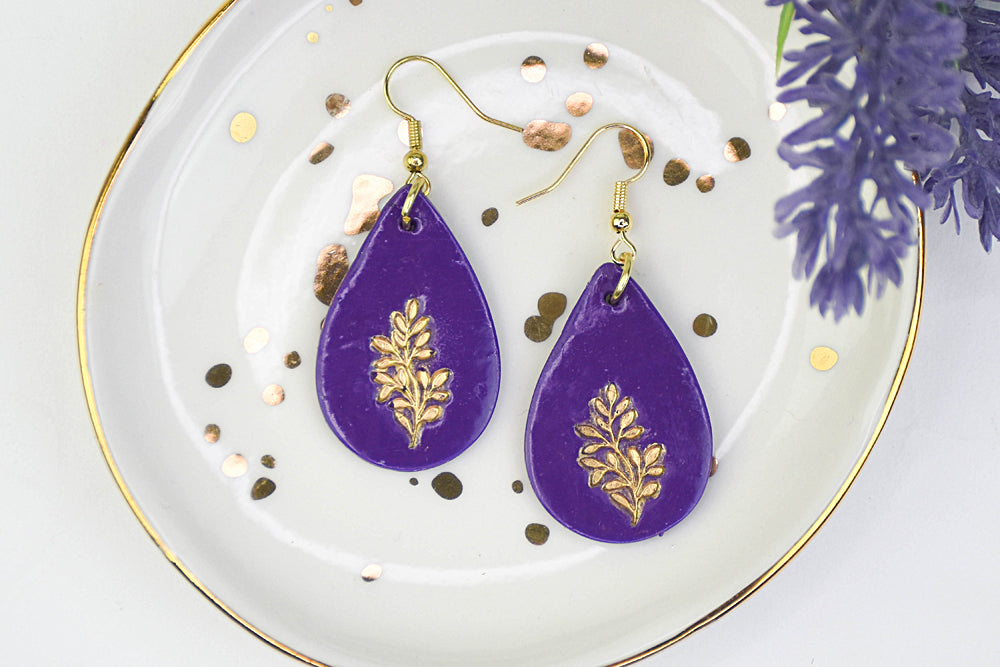
Create your own version of a rich purple tone that you can highlight with a golden stamped image in these easy-to-make earrings that will become a “go-to” pair for you or a lucky recipient. COMPLETION TIME: 95 Minutes to make, bake (twice), and assemble
Read Less
ADDITIONAL SUPPLIES
  • Small rubber stamp
  • Gold paint marker - I used DecoColor Premium Gold
  • Rubbing alcohol
  • Paper towel
  • Paintbrush
  • Gold tone ear wires (2)
  • 4 mm Gold tone jump rings (2)
  • Flat nose pliers
View full details
Project Instructions

Step 1

Getting Started:

Please make sure your work area is covered and you are not working on an unprotected surface. We recommend working on the Sculpey® Oven Safe Work Mat, wax paper, metal baking sheet, or disposable foil. Uncured clay may damage unprotected furniture or finished surfaces. Be sure to cover your crafting area
appropriately.

Start with clean hands, unwrap and knead clay until soft and smooth, or condition by running clay though a Pasta Machine. We recommend using a designated machine for clay purposes only. When working with multiple colors, clean hands with soap and water or baby wipes (we have found that baby wipes work best) before switching colors. Shape clay, pressing pieces firmly together.  Wash hands after use.

Baking (also called Curing):

Begin by preheating oven to 275 °F (130 °C). After you are done creating; for best results bake clay on an oven-proof surface such as metal, aluminum foil, an index card or the Sculpey® Oven Safe Work Mat at 275°F (130 °C) for 30 minutes per ¼" (6 mm) of thickness according to package directions. Oven safe glass or ceramic surfaces are also acceptable for baking; however please note that the baking times may take longer as the glass or ceramic surfaces take longer to heat up. For best baking results, use an oven thermometer. DO NOT USE MICROWAVE OVEN. DO NOT EXCEED THE ABOVE TEMPERATURE OR RECOMMENDED BAKING TIME.

Step 2

Premo™ Teal is a great color for mixing to create custom colors. Start with equal
amounts (1/16 bar each) Teal and Fuchsia.

Step 3

Mix them completely together.

Sheet or roll to 1/8” thickness.

Step 4

Stamp the image deeply into the clay sheet twice leaving enough room between the
stamps to accommodate your finished shapes.

Step 5

Cut out teardrop shapes using the 1.5” teardrop cutter.

Step 6

Poke holes in the top of each teardrop using the Blunt Point Tool.

Bake the clay pieces following the baking directions for Sculpey Premo™.

Allow to cool completely before handling.

Step 7

Use a gold paint marker to fill the textured areas with paint. Immediately clean
excess gold paint away from the surface with a paper towel pad doused with
rubbing alcohol.

Repeat for both earrings.

Step 8

Bake the earrings once again following the baking instructions for Sculpey Premo™ to set the gold paint.

Then add a thin layer of Sculpey® Glossy Glaze with a paintbrush and allow to dry
completely.

Here is the earring layout.

Step 9

Use flat nose pliers to open and close jump rings to connect the clay pieces to the ear wires.