Skip to product information
1 of 1

Sculpey Premo™ and Liquid Sculpey® Cocktail Ring

Sculpey Premo™ and Liquid Sculpey® Cocktail Ring

Read More
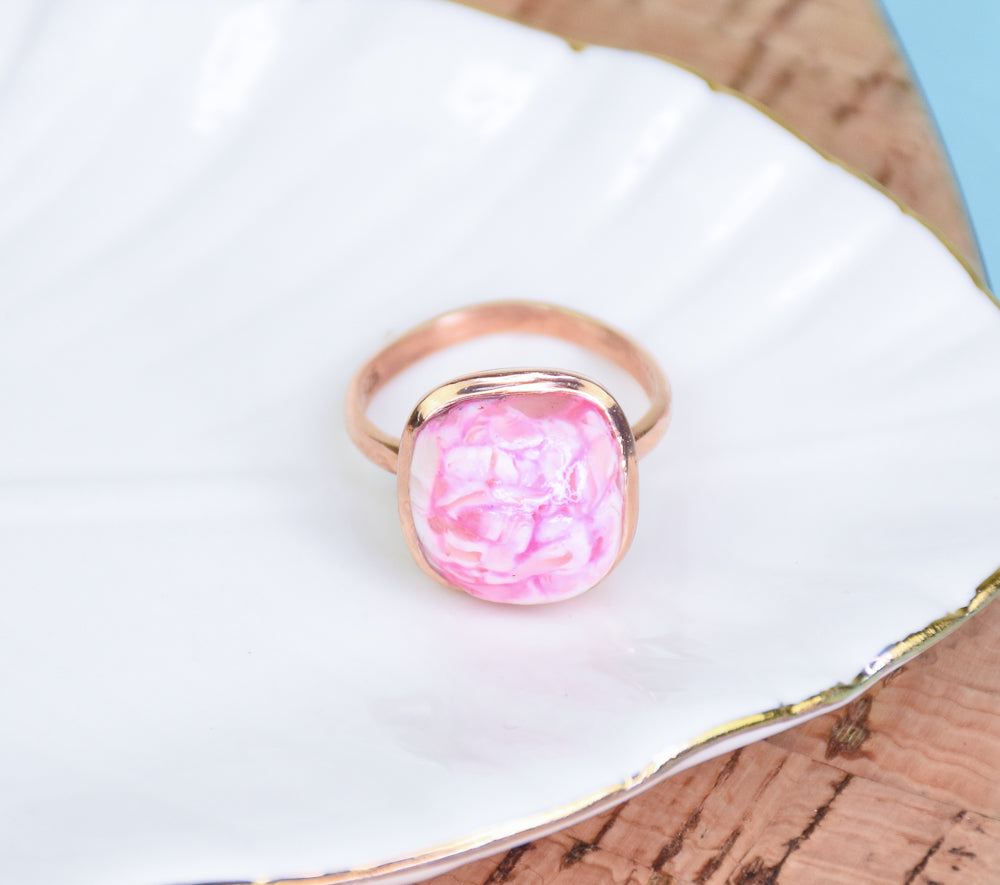
Sculpey Premo™ and Liquid Sculpey® team up once again to create this unique cocktail ring that you can create to wear tonight in just under an hour! COMPLETION TIME: 45 Minutes to make and bake Designed by Amy Koranek
Read Less
ADDITIONAL SUPPLIES
  • Small silicone cupcake liner
  • Paper towel
  • Ring blank(s) in the size of your choice
  • Silicone glue or instant drying glue
  • Scrap Clay
  • Rubbing alcohol
View full details
Project Instructions

Step 1

Getting Started:

Please make sure your work area is covered and you are not working on an unprotected surface. We recommend working on the Sculpey® Oven-Safe Work Mat, wax paper, metal baking sheet, or disposable foil. Uncured clay may damage unprotected furniture or finished surfaces. Be sure to cover your crafting area appropriately.

Start with clean hands, unwrap and knead clay until soft and smooth, or condition by running clay though a Pasta Machine. We recommend using a designated machine for clay purposes only. When working with multiple colors, clean hands with soap and water or baby wipes (we have found that baby wipes work best) before switching
colors. Shape clay, pressing pieces firmly together. Wash hands after use.

Baking (also called Curing):

Begin by preheating oven to 275 °F (130 °C). After you are done creating; for best results bake/cure clay on an oven-proof surface such metal, aluminum foil, an index card or the Sculpey® Clay Mat at 275°F (130 °C) for 30 minutes per 1/4" (6
mm) thickness according to package directions. Oven safe glass or ceramic
surfaces are also acceptable for baking/curing; however please note that the
baking/curing times may take longer as the glass or ceramic surfaces take
longer to heat up. For best baking results, use an oven thermometer. DO NOT USE
MICROWAVE OVEN. DO NOT EXCEED THE ABOVE TEMPERATURE OR RECOMMENDED BAKING TIME.

Step 2

Put a
nickel sized puddle of Fuchsia Liquid Sculpey® (LS) in the bottom of the
silicone cup.

Step 3

Use the
Clay Blade to chop 1/8 bar White and 1/8 bar Translucent Premo™ into little
bits.

Put the
little bits of solid clay in the cup with the LS.

Step 4

Stir the bits and the LS to coat all the bits.

Step 5

What we want is a sticky lump of clay cuts and LS. If there is too much LS, add more
bits.

Step 6

This is a good proportion of clay bits and LS - where there is no pooling of extra LS
in the bottom of the cup, yet each bit is coated.

Step 7

Use a Clay Tool or your fingertips to form a
ball.

Step 8

Push the lump into a cube.

Step 9

Remove the cube from the cup.

Divide the cube in half with the Clay Blade.

Step 10

Bring your ring blank or blanks into the work area. There is plenty of clay here to
make two rings.

Step 11

Add a drop of glue to the ring blank.

Trim the half cube of clay into a piece that will sit in the ring blank bezel.

Position the clay in the ring blank on top of the glue.

This is the large ring blank.

Step 12

This is the small ring blank.

For any ring size, we want the clay to stand up above the edges of the bezel like a
stone ring would.

Step 13

Use your fingertips to push the clay to fill up the bezel area.

Step 14

Add a little puddle of LS to the top of the “stone”. This will be moved around to
fill up cracks.

Step 15

Smear the LS all over the surface of the clay.

Step 16

Fold a paper towel into a thick pad.

Douse the pad with rubbing alcohol.

Clean the excess LS from the surface of the clay.

Step 17

Here’s a tip for holding the ring upright during baking. You can use a lump of scrap
clay to build a support for your ring. Then after baking, the lump support can
be used again for another ring.

Bake the rings following the baking instructions in Step 1 above.

Allow to cool completely before handling.