
Premo Lavender Holographic Moon Phase Earrings
Premo Lavender Holographic Moon Phase Earrings
Designed by Nidhal McMahon
Read More
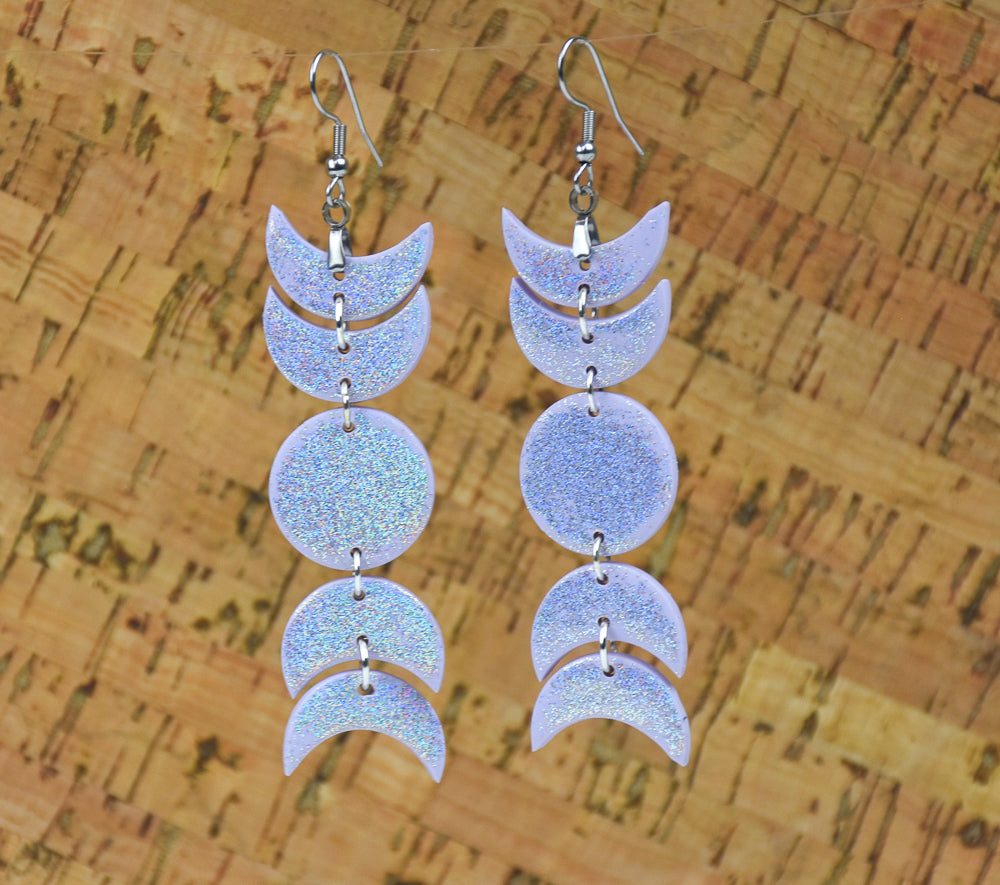
Sculpey Premo™ Lavender is the perfect color to create this wonderful set of "moon phase" earrings! The addition of holographic glitter or powder just enhances the "otherworldly" effect of the motif!
Time to complete: 25 minutes + baking time
Read Less
ADDITIONAL SUPPLIES
- Holographic fine glitter
- 7 mm silver-toned jump rings (8)
- Silver-toned fishhook or pinch bail earring posts (2)
- Jewelry pliers

Project Instructions
- Getting Started:
Start with clean hands, unwrap and knead clay until soft and smooth, or condition by running clay though a Pasta Machine. We recommend using a designated machine for clay purposes only. When working with multiple colors, clean hands with soap and water or baby wipes (we have found that baby wipes work best) before switching colors. Shape clay, pressing pieces firmly together. Wash hands after use.
- Baking (also called Curing):
Cut a 1/2 oz or 1/4 of a 2 oz package to condition. Roll clay to a 1/8-inch thickness. If a pasta machine is used, opt for a level 1 or 2 on your machine. This will make one pair of earrings.

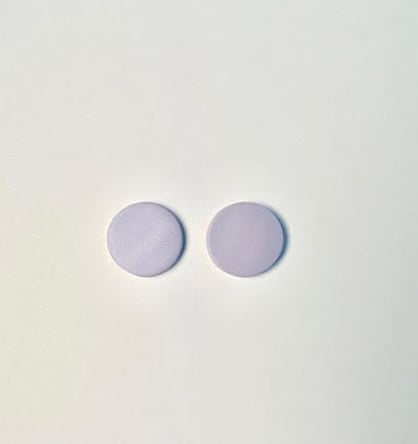
Use a one-inch round cutter to complete your moon phase earring. To start, cut ten 1-inch circles.

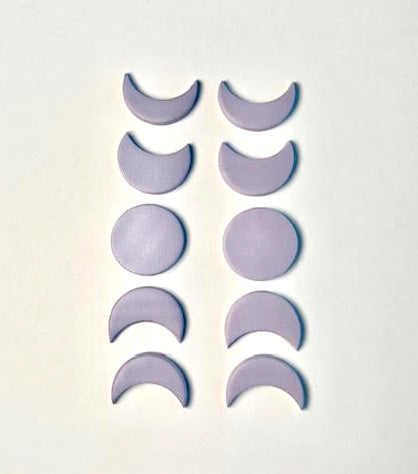
Set aside two of the circles. These whole circles will be the center of the moon phase earrings (full moon).
For the next 4 moon phases, select one of the circles and use the same 1-inch round cutter to cut away half of the circle to create a small moon.
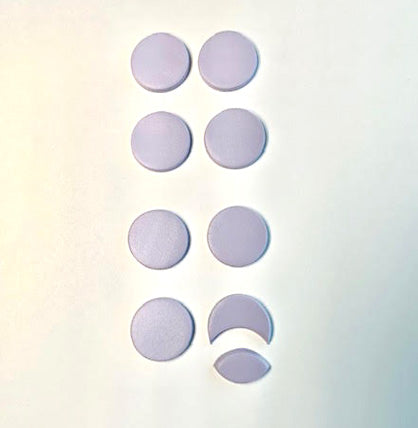
Use the cut piece of your first moon as a guide to cut the next three moons so that they all match. Do this by placing the excess clay onto the circle and use cutter to cut. Repeat this until 4 of your moons are cut.

Repeat the process for the remainder of the four moons by cutting slightly less clay away to create a bigger moon.

Assemble your moon phase as shown. The moon size will be smallest at the very top and bottom.
Use a holographic fine glitter or mica powder to give your moon phase earrings a galaxy effect! You can apply this using a soft paint brush or your finger.

Using a needle tool, each piece of the moon phase earring gets a top and bottom hole except the very bottom moon, which gets one hole at the top only. Bake according to directions in Step 1 above.

Get ready to assemble! You will need eight 7 mm jump rings and two silver-tone fishhook or pinch bail earring posts. Use jewelry pliers to attach the hardware and to tighten the pinch bail. Enjoy your “out of this world” holographic moon phase earrings!

- Choosing a selection results in a full page refresh.
- Opens in a new window.