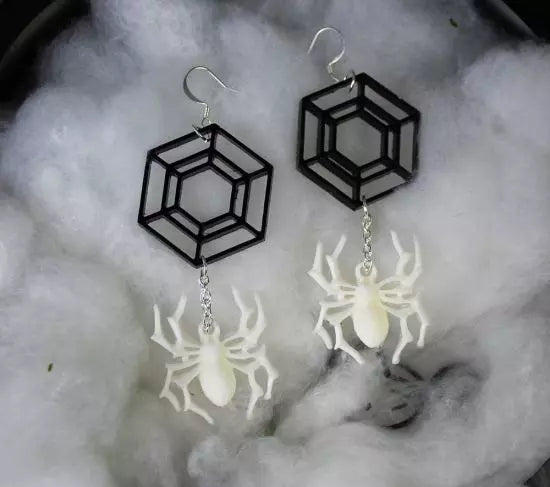


Liquid Sculpey® Spider & Web Earrings
Liquid Sculpey® Spider & Web Earrings
Designed by Amy Koranek
Read More
Read Less
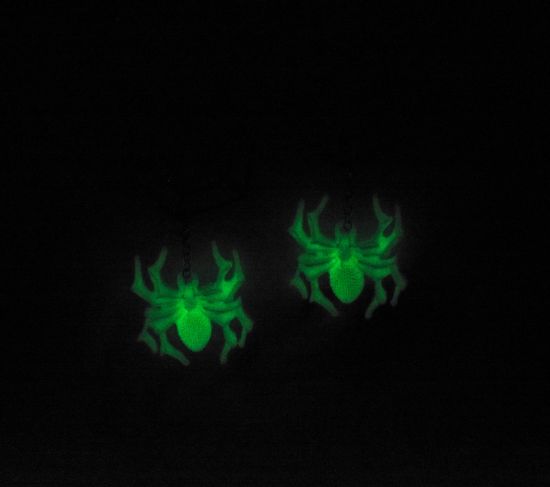
Create these super cool spider and web earrings in an afternoon with their special effect to Glow in the Dark!TIME TO COMPLETION:90 Minutes to make, bake, and assemble (bakes twice)
ADDITIONAL SUPPLIES
- Paper towel
- 91% Rubbing alcohol
- Small silicone baking cup for mixing Liquid Sculpey®
- Silicone Spider Mold: Halloween Spider Cobweb Silicone Mold for DIY Fondant Candy Making
- Geometric Mold for the spider web: I used a mold that I purchased from Joann Fabric Store. The mold has lots of geometric shapes on it and I improvised the hexagon shape as my web. I can no longer find this mold on their website.
- Small sharp scissors
- 2” Silver tone chain (2 pieces)
- 6 mm Silver tone jump rings (4)
- 4 mm Silver tone jump rings (2)
- Silver tone ear wires (2)
- Wire cutters
- Flat nose pliers

Project Instructions
Step 1
- Getting Started with Liquid Sculpey®:
-
Baking:
- It is important to use oven thermometer when you bake the liquids so that you can ensure your oven is at the correct temperature.
- Do not microwave the liquids. They must be baked in a Preheated oven at 275 ºF (130 ºC) for liquid colors and 300 ºF (149 ºC) for Clear – Do not exceed baking temperatures.
- If your piece is less than 1/4” bake for 15 minutes. For thicker pieces that are 1/4” or above bake for 30 minutes.
- If your liquid project has become yellowed or discolored in the oven, when you remake it, tent it by placing either – folding an index card in half and placing your project under it by using aluminum foil over your project.
Here’s a tip for baking perfectly in silicone molds. Dampen a dish towel with water and wring out as much of the water as you can. Fold the damp towel so that the molds can sit level on top of it. The damp towel will slow down the curing process so that the LS will cure evenly throughout and avoid warping.
Step 2
Designer Tip: When using Glow in the Dark Liquid Sculpey® (LS), I prefer to add just the smallest amount of White LS to the Glow, especially when molding items with very thin details like our spiders. Adding the White LS in a small amount makes the Glow LS more opaque but does not take away from the glow.In the bottom of a silicone baking cup place enough Glow LS to cover the bottom of the cup. My cup is very small - about the size of a half dollar coin.
To that add two drops of White LS. In the photo, the White is just that small lump off center.
Mix completely using a tool from the Clay Tool Starter Set.
Clean tools with paper towel.

Step 3
Fill the largest area of the spider body first with the Glow/White mixture.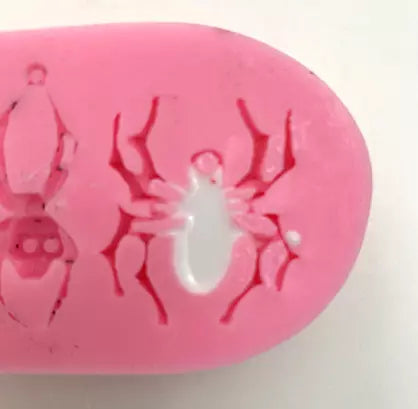
Step 4
When I fill a mold that is very intricate, I start with the largest area and then I help the LS creep into the thin areas by stretching and burping the mold. You can carefully tilt, stretch, and press the mold from the back (burp) it to help the LS move itself filling the areas.
Step 5
You can see here that the LS is moving out away from the body of the spider into the legs. It’s also good to tap the mold vigorously before adding more LS.
Step 6
Keep adding the LS only to the body repeating Steps 4-5 as much as needed to get the mold and all the details filled to level.You can use the plastic knife tool to squeegee excess LS from the flat parts of the mold.
You can also fold a paper towel into a thick pad, douse it with 91% rubbing alcohol, and use it carefully to remove excess LS from the flat parts of the mold.
Set the spider mold aside for now.

Step 7
I used a basic double hexagon mold shape for the web design.In molds like this I fill from the intersections of the lines. Push the open tip of the Black LS into an intersection and squeeze LS into this area.
Repeat at every intersection.

Step 8
Tap the mold on the work surface to release air bubbles.In very thin line molds like this I will use a Needle Tool to drag LS into all lines of the mold. LS has a tendency to form air bubbles in small areas like this, so work with the Needle Tool to help break them up.
If your mold is overfilled, you can use the plastic knife tool to squeegee excess LS from the flat parts of the mold.
You can also fold a paper towel into a thick pad, douse it with 91% rubbing alcohol, and use it carefully to remove excess LS from the flat parts of the mold.

Step 9
Bake both the spider mold and the web mold following the instructions for Liquid Sculpey®.Allow to cool completely before flexing the mold to release the pieces.

Step 10
If there are little bits of excess baked LS around the outside of the baked shapes, it can be easily cleaned up with small sharp scissors.
Step 11
Clean up the molds as needed by peeling away excess baked LS.Refill each mold following Steps 2-8 to make a second spider and web for the second earring.

Step 12
Here’s the layout for the earrings.I cut chain to about 2” long using wire cutters.
The chain was looped through the eye at the top of the spider and both ends connected with a jump ring to the web.

Step 13
Assemble with flat nose pliers using jump rings to connect the ear wires.