
Liquid Sculpey® Natural Bezel Dangles
Liquid Sculpey® Natural Bezel Dangles
Designed by Amy Koranek
Read More
This style can be achieved using any open metal bezels. Try mixing and matching the colors to create the perfect coordinating earrings or pendant for you.TIME TO COMPLETE:
75 Minutes to make, bake, and assemble
Read Less
ADDITIONAL SUPPLIES
- Paper towel
- Silicone or glass baking surface
- Goldtone open metal bezels (2)
- Goldtone metal flat beads (2)
- 1” Goldtone eye pins (2)
- Ear posts and backs (2)
- Silicone glue or instant drying glue
- Round nose pliers
- Wire cutters
- Flat nose pliers

Project Instructions
- Getting Started with Liquid Sculpey®:
-
Baking:
- It is important to use oven thermometer when you bake the liquids so that you can ensure your oven is at the correct temperature.
- Do not microwave the liquids. They must be baked in a Preheated oven at 275 ºF (130 ºC) for liquid colors and 300 ºF (149 ºC) for Clear – Do not exceed baking temperatures.
- If your piece is less than 1/4” bake for 15 minutes. For thicker pieces that are 1/4” or above bake for 30 minutes.
- If your liquid project has become yellowed or discolored in the oven, when you remake it, tent it by placing either – folding an index card in half and placing your project under it by using aluminum foil over your project.
Here’s a tip for baking perfectly in silicone molds. Dampen a dish towel with water and wring out as much of the water as you can. Fold the damp towel so that the molds can sit level on top of it. The damp towel will slow down the curing process so that the LS will cure evenly throughout and avoid warping.
Place the silicone or glass baking surface on top of a metal baking pan that will fit into your oven. Position the open bezels, face up, on the silicone or glass baking surface. Using this type of surface will make cleanup of extra Liquid Sculpey® (LS) easy to achieve. My silicone baking surface is teal/blue in color, so that is what you are seeing underneath the project

Squirt small amounts of the three liquids in a color block fashion inside the bezels. Don’t fill completely at this time.
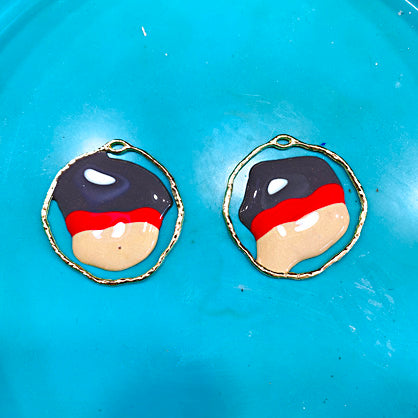
Carefully tip the metal baking pan with the silicone/glass surface on top, to allow the liquids to spread to the edges of the bezels. In the photo you can see that the Gold is leaking out a bit - this is okay.

Add just a bit of Brown LS in the Gold areas.

Use the Needle Tool to drag the Brown into the Gold creating cool patterns.

Drag some of the Red into the Brown as well.
Bake following the baking instructions for Liquid Sculpey®. Allow to cool completely before handling.
Bake following the baking instructions for Liquid Sculpey®. Allow to cool completely before handling.

Use the Knife Tool to trim away excess baked LS from around the outside of the bezels or peel carefully away with fingertips. Excess baked LS can be peeled off of the silicone or glass baking surface.

Poke out the eye area with the Needle Tool.

Make button tops for the earrings from a 1/8” thick sheet of Ivory Soufflé™.
Cut out two 1/2” circles.
Use the Needle Tool to poke one hole along the edge of each circle.
Bake following the baking instructions for Sculpey Soufflé™.
Allow to cool completely before handling.
Cut out two 1/2” circles.
Use the Needle Tool to poke one hole along the edge of each circle.
Bake following the baking instructions for Sculpey Soufflé™.
Allow to cool completely before handling.

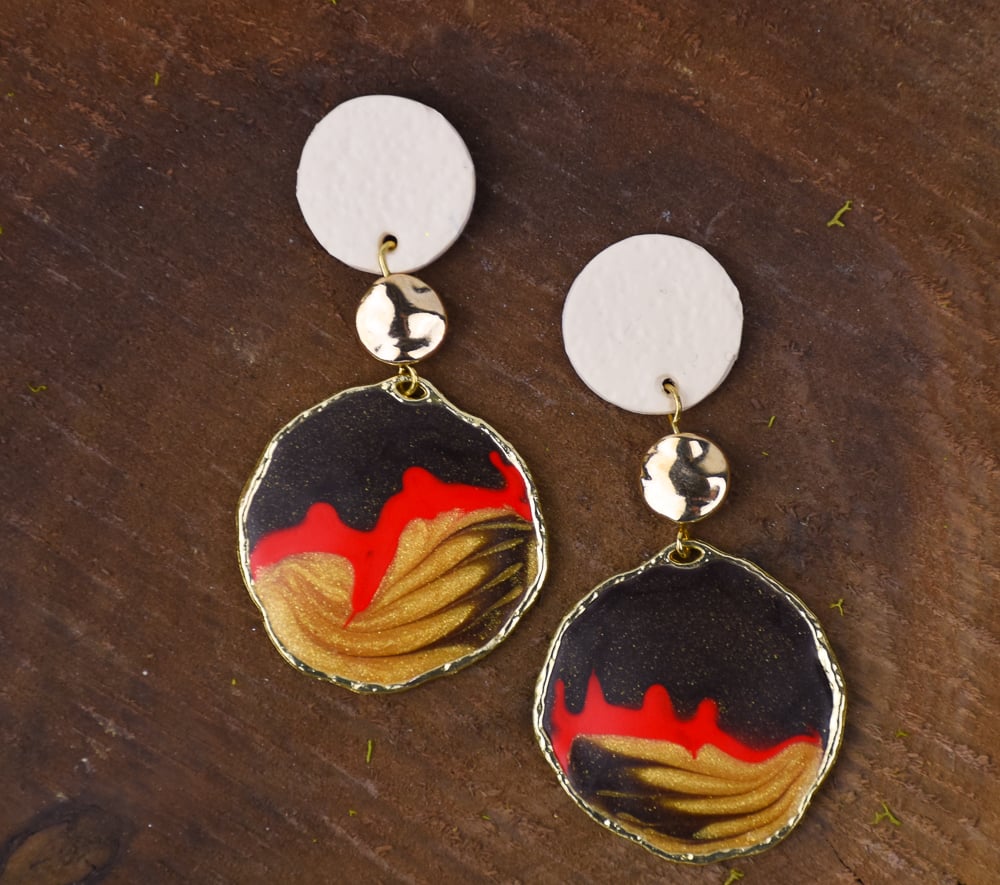
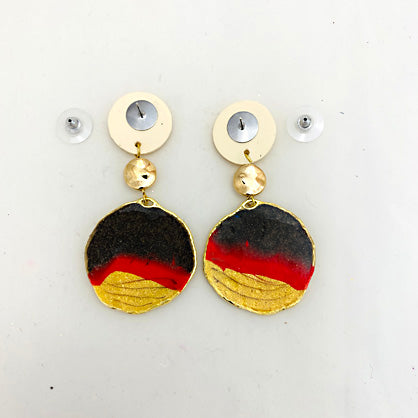
Here’s the layout for the earrings.

Thread the gold metal beads onto the eye pins and trim with wire cutters leaving a 3/8” tail.

Curl an eye in the tail with round nose pliers. Don’t curl too tightly because we will re-open them to attach to the other pieces in the following step.

Carefully open and close one eye at a time, using flat nose pliers, to connect the pieces together as shown. Now double check that your metal eyes are closed properly to ensure that the earrings will hold together securely.

Glue ear posts to the backs and allow glue to dry completely.
- Choosing a selection results in a full page refresh.
- Opens in a new window.