

Sculpey Premo™ and Sculpey Soufflé™ Framed Floral Pendant
Sculpey Premo™ and Sculpey Soufflé™ Framed Floral Pendant
Designed by Amy Koranek
Read More
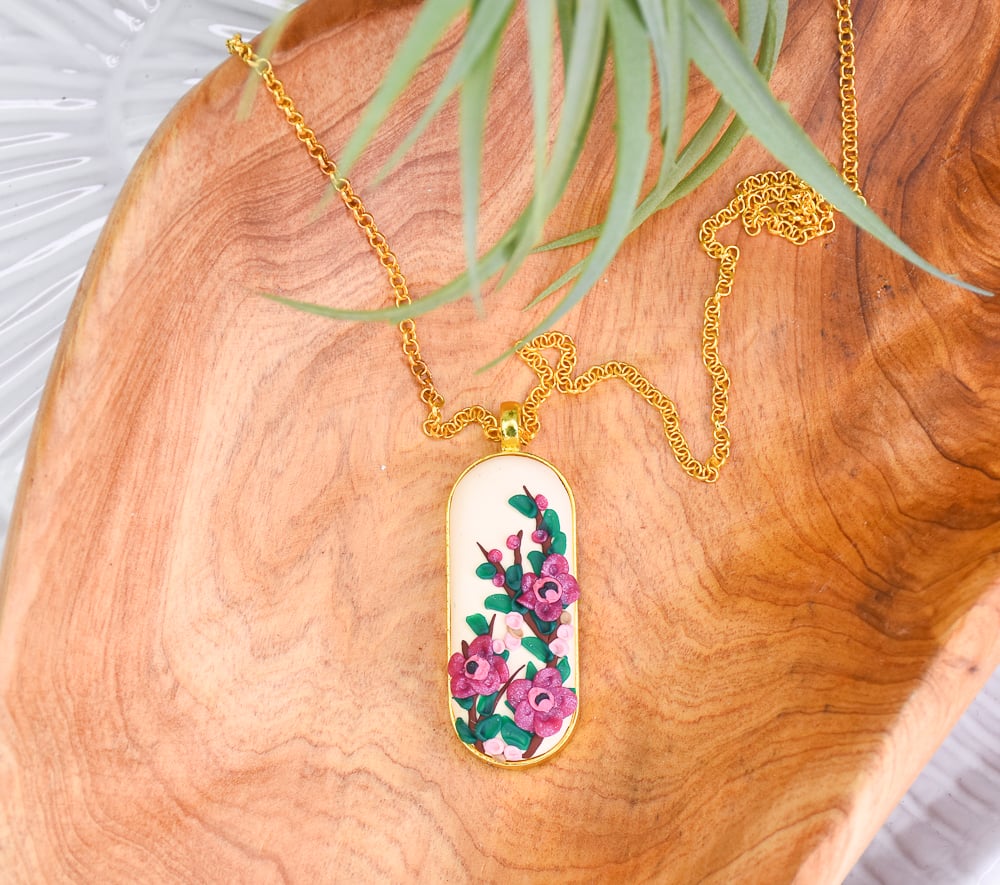
Sculpey Premo™ and Sculpey Soufflé™ team up once again to create this lovely floral pendant that has amazing detail but is really simple to create! The pendant is "built" right into the metal pendant finding and is highlighted with the sparkles from the Sculpey Premo™ Berry Pearl
COMPLETION TIME:
60 Minutes to make, bake, and assemble
Read Less
ADDITIONAL SUPPLIES
• Gold bezel pendant
• Gold chain
Project Instructions
- Getting Started:
Start with clean hands, unwrap and knead clay until soft and smooth, or condition by running clay though a Pasta Machine. We recommend using a designated machine for clay purposes only. When working with multiple colors, clean hands with soap and water or baby wipes (we have found that baby wipes work best) before switching colors. Shape clay, pressing pieces firmly together. Wash hands after use.
- Baking (also called Curing):
In this tutorial we are going to make the slab design right in place in the bezel.
Fill the pendant with Ivory Premo™ so that it mounds up a little bit and makes a nice background in the bezel.

Use tiny bits of Burnt Umber Premo™ to make really thin branches directly on the Ivory background

Add little oval shaped Forest Green Premo™ leaves to the sides of the branches. I like leaving the tips of the branches open for a detail. Use the Blunt Point end tool to press a bit of texture into each leaf. This pressure also helps the leaves stick into place.

Make little flat circles of Berry Pearl Premo™ and add these to the design in sets of five for flowers.

Add little bits of Guava Soufflé™ to the center of each flower and texture these areas with the Blunt Point tool.

Add little Black Premo™ beads to the centers of the flowers.
Lighten some Guava Soufflé™ with an equal amount of Ivory Soufflé™ to make an Ivory Guava color. Add small Ivory Guava buds in empty spaces.
Add small Latte Soufflé™ buds in empty spaces.
Add small Berry Pearl Premo™ buds in empty spaces.
Lighten some Guava Soufflé™ with an equal amount of Ivory Soufflé™ to make an Ivory Guava color. Add small Ivory Guava buds in empty spaces.
Add small Latte Soufflé™ buds in empty spaces.
Add small Berry Pearl Premo™ buds in empty spaces.

Bake the pendant following the baking instructions for Sculpey Soufflé™. Allow to cool completely and then add a chain.

- Choosing a selection results in a full page refresh.
- Opens in a new window.