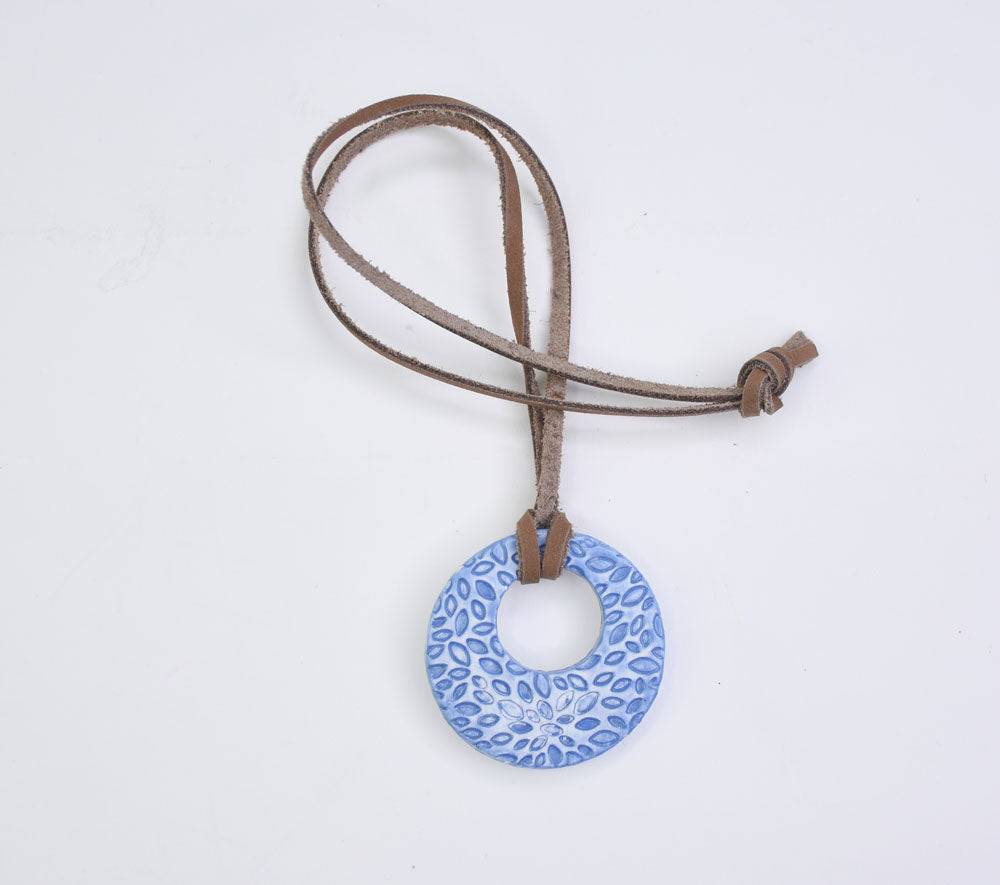


Sculpey® Air-Dry™ Ceramic Like Pendant
Sculpey® Air-Dry™ Ceramic Like Pendant
Read More
Use your favorite texture sheet or stamp to impress a design into Air Dry clay. Then “glaze” it with a mixture of acrylic paint and Sculpey Glossy Glaze for a hi shine finish like ceramic.
COMPLETION TIME:
15 Minutes plus drying time - recommended that you let pendant dry overnight before finishing.
Read Less
ADDITIONAL SUPPLIES
- Zip lock bag for clay storage
- Paintbrush
- Small mixing cup
- Blue acrylic paint
- 24” Faux suede cord
- Scissors

Project Instructions
Step 1
Step 2

Step 3

Step 4

Step 5

Step 6

Step 7

Step 8

Step 9

Step 10

Step 11

Step 12
