

Liquid Sculpey® Green & Gold Leaf Pendant
Liquid Sculpey® Green & Gold Leaf Pendant
Read More
Read Less
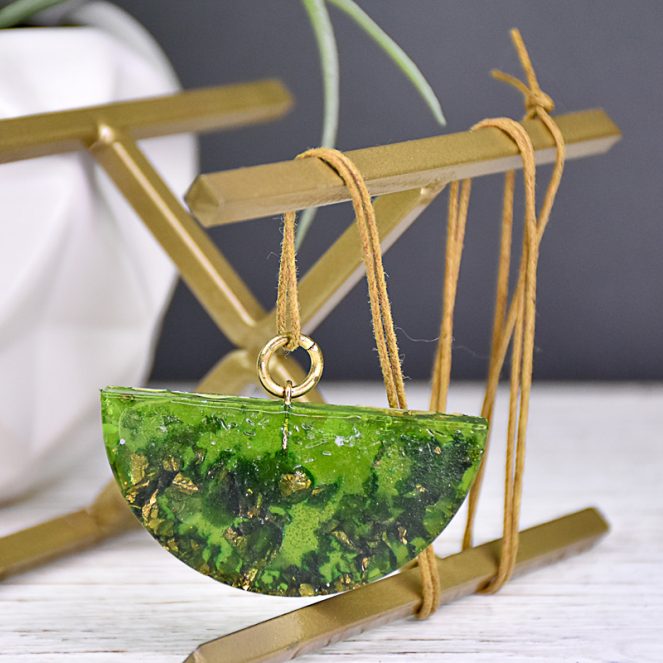
Liquid Sculpey® and Gold Leaf team up to create this half circle pendant piece that is so easy to make with the Sculpey three dimensional jewelry mold.
COMPLETION TIME:45 minutes to make and bake
ADDITIONAL SUPPLIES
• Silicone miniature cupcake liner for mixing Clear Liquid Sculpey
• Green alcohol ink
• Composite gold leaf
• Paper towel
• Sharp scissors or a craft knife
• Heat gun - optional
• 4mm Gold tone jump ring, double or single
• 6mm Gold tone jump ring
• Gold tone chain with clasp
• Flat nose jewelry pliers
Project Instructions
- Getting Started:
- Baking:
Fill a miniature silicone cupcake liner half way with Clear Liquid Sculpey (LS). Enough LS to fill the half round mold shape in the 3D Silicone Mold.

Drop two drops of green alcohol ink into the Clear LS.

Use one of the Purple Clay Tools to completely stir the alcohol ink into the LS.

Pinch off a bit of gold composite leaf and drop it into the tinted LS. For this project it is best to use composite leaf instead of pure gold leaf. Pure gold leaf will tarnish inside the LS but composite gold leaf will retain it’s shine.

Use the pointed Purple Clay Tool to mix the leaf into the LS. You can use the tip of the tool to help the leaf break up in the LS.

Add more gold leaf if desired to make the gold fleck saturation more concentrated.

Use the pointed Purple Clay Tool to mix the leaf in again. Clean the tool with paper towel.

Carefully pinch the silicone cupcake liner to make a little pour spout along the edge and carefully fill the half round shape with the mixture. Tap the mold on the work surface to make sure all air bubbles are released.

Place the 4mm jump ring on one of the rods that are included with the mold. For this project I’m using a double 4mm jump ring, sinking the bottom ring into the LS.

Identify the little raised stops on the mold that keep the rods in place. Drop the bottom half of the jump ring into the LS, positioning the rod carefully into the raised stops so that the rod is held perfectly in place. Double check that the jump ring is staying right in the middle of the LS in the mold as it hangs down from the rod.

Bake the mold following the baking instructions. If you wish you can also bake the silicone cupcake liner to cure the residual LS. After it’s baked, the residual LS can simply be peeled from the liner and discarded. When the mold is completely cool, remove the baked piece by pushing up from the bottom of the mold working the piece out slowly. If there are rough edges along the top of the molded piece, they can easily be trimmed away with small sharp scissors or a craft knife.

If you wish, you can bring out the clearness of the Clear LS and the depth of the green color by hitting the piece with a little more heat. Place the piece on a heat proof surface and turn the heat gun onto high. Move the heat over the piece at a distance of 4”-6” constantly moving the heat blast in a circular motion. You will see the piece go very shiny and glossy when it has reached maximum clarity. Turn off the heat gun immediately so you don’t burn the piece. Using a heat gun can definitely take some practice. Add the 6mm jump ring to the ring that is sticking out of the top of the baked piece with flat nose jewelry pliers.
Add a coordinating chain to complete your look.
