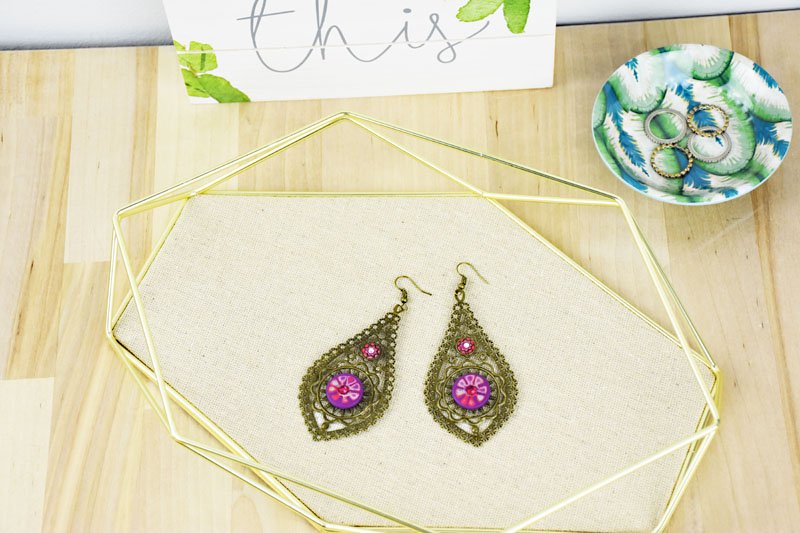

Sculpey Souffle™ Metal Filigree Earrings
Sculpey Souffle™ Metal Filigree Earrings
Designed by Amy Koranek
Read More
Read Less
Get the boho look with these easy to make earrings!
ADDITIONAL SUPPLIES
- Antique bronze filigree pieces (2)
- Four heat set crystals
- 2 fish hook earrings
- 2 jump rings

Project Instructions
- Getting Started:
Start with clean hands, unwrap and knead clay until soft and smooth, or condition by running clay though a Pasta Machine. We recommend using a designated machine for clay purposes only. When working with multiple colors, clean hands with soap and water or baby wipes (we have found that baby wipes work best) before switching colors. Shape clay, pressing pieces firmly together. Wash hands after use.
- Baking:
You will need such a very little bit of patterned clay - this is the perfect project for using some decorative scraps. For my earrings, I sliced off the edge of a stacked piece I had left over from the Twisted and Curved Focal Bead project. These are very, very thin layers - you can stack and run through a couple of times to kind of recreate with new clay. My scrap clay already has very thin layers of colors stacked up making it perfect for a small Mokume Gane pattern. First I impressed two dots into the stack with the 2mm ball tool. Next I pressed the smallest circle cutter around the holes. Then I made radiating marks around the holes and through the circle with the plastic knife tool.

Shave a thin layer of clay off of the top of the striped stack to reveal the pattern. Cut out two circle shapes from the patterned clay. Position the circle shapes in the center of the filigree and press them in enough that the filigree embeds into the clay.

My filigree pieces have a second circular design at the top so I will put some clay elements there as well. From the striped stack I will cut out two more circles using the domed end of the large Etch ‘n Pearl.

Push the domed side of these pieces into the filigree from the back.

Slice away a very thin layer of clay from the front of the little pieces you just pushed through from the back to reveal more colors. Add a small heat set crystal to the top piece of clay on each earring. Add a larger heat set crystal to the bottom piece on each earring.

Bake the filigree with the clay pieces on them. When they are completely cool, add ear wires with jewelry pliers.
