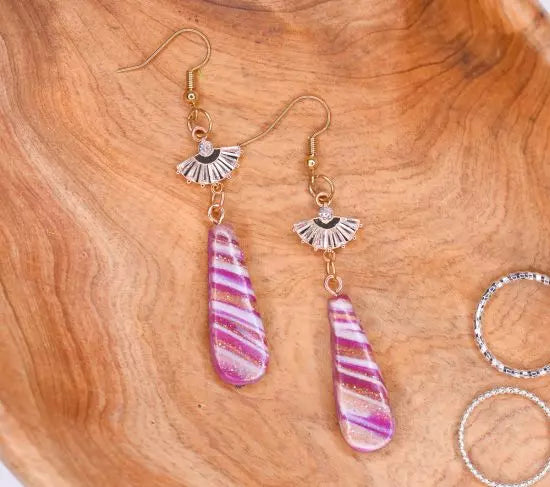
Sculpey Premo™ and Soufflé™ Marbled Pill Drop Earrings
Sculpey Premo™ and Soufflé™ Marbled Pill Drop Earrings
Designed by syndee holt
Read More
Read Less
These lovely earrings are a snap to make with a “twist” to achieve the marbled stripes. Add a couple blingy little fans to the top of the earrings to really bring the sparkle! TIME TO COMPLETION: 30 minutes to make, 40 minutes to bake and assemble
ADDITIONAL SUPPLIES
- Drop cutter in size you wish (mine is 1.25 inches) (available on Etsy)
- Pave fan connectors (2) (from Etsy)
- Gold toned screw eyes for the top of the earring (2)
- Gold toned jump rings – I used 6 mm ones (4)
- Gold toned ear wires (2) Note: I turned the connector loop on the wires using two pair of pliers- one to hold the ear wire and the other to turn the loop
- Small brush for the Gloss Glaze

Project Instructions
Step 1
- Getting Started:
Start with clean hands, unwrap and knead clay until soft and smooth, or condition by running clay though a Pasta Machine. We recommend using a designated machine for clay purposes only. When working with multiple colors, clean hands with soap and water or baby wipes (we have found that baby wipes work best) before switching colors. Shape clay, pressing pieces firmly together. Wash hands after use.
- Baking (also called Curing):
Step 2
Start with layers sheeted on a medium setting that are about 2x3 inches. Stack the layers with the darker Turnip color in the middle.
Step 3
Cut 4 matchstick pieces of the layered clay.Lay two of the pieces with the Champagne Pearl facing you.
Stack the remaining two pieces with the Rose Gold Glitter facing you.

Step 4
Gently press and stroke the pieces together. This is a look at the end of the stack.
Step 5
Grasp either end of the stack and twist the stack as shown. It’s gorgeous isn’t it? Work to tighten the twists as needed. Don’t worry if a clay color cracks a little.
Step 6
Gently smooth and lengthen the twisted clay on your worksurface as shown.Gently flatten the twisted clay by pressing on the top with your fingers.

Step 7
Run the twisted and flattened clay through the wide open setting on your clay machine.Cut the stack in half and stack together. Use your cutter to press firmly through the 2 stacked layers. Repeat for the second earring. You can smoosh the clay together, twist and rerun through the clay machine if needed!

Step 8
Once I picked my favorite pieces out (I had 4 to choose from), I used the tip of my needle tool to put a “starter hole” or a shallow hole in to the top of each earring for the screw eyepin to drill into once the clay was baked and cooled.
Step 9
The earring on the right is fully assembled and the earring on the left shows the hardware layout for assembly.
Step 10
As a last step, I put a thin coat of the Gloss Glaze on the surface to really bring up the sparkle. Don’t forget to glaze the edges as well!

