
Sculpey Air-Dry™ Light As Air Feather Earrings
Sculpey Air-Dry™ Light As Air Feather Earrings
Designed by Amy Koranek
Read More
Delicate and lightweight, these feather earrings are easy to make and easy to wear using Sculpey Air-Dry™.
COMPLETION TIME:
15 Minutes plus drying time - recommended that you let your earrings dry overnight before finishing.
Read Less
ADDITIONAL SUPPLIES
- Clear kitchen wrap or zip lock storage bag
- Water basin
- Folk Art Enamels Hydrangea acrylic paint
- Paintbrush
- 9 mm Silver tone jump rings (2)
- Silver tone ear wires (2)
- Flat nose pliers

Project Instructions
- Getting Started with Sculpey Air-Dry™ :
Start with clean hands, unwrap and knead clay until soft and smooth. Wash hands after use. Wrap any extra clay in then wrapper and then put in an airtight container.
Working: Knead your clay before you begin shaping it for your creations. Our polymer clay is already soft and pliable, but warming the clay with your hands is a good practice to spread the substance, condition the material and get a feel for what you’re working with.
Shaping: You can use a combination of your hands, crafting tools and multimedia materials to shape your clay into the design you desire, create unique patterns and textures and incorporate mixed media elements. Remember: you can create anything you can imagine! Just make sure the finished product is exactly what you want before allowing it to dry.
Drying: Lay or stand your air-dry clay projects on a nonporous surface with a clean and smooth finish in an area with low humidity. Let the projects remain untouched and undisturbed for about 24 hours to ensure complete hardening.
This project will just a small amount of Air-Dry™ clay so try to only remove what you need from the package. Wrap extra clay tightly and store in an airtight container or baggie for later use.
After conditioning the clay in your hands until it is soft and pliable, roll out a sheet with the Acrylic Clay Roller to a size of 4” x 3” and 1/8” thick. You can apply water to the clay with fingertips if needed to help blend rough spots.
Use the Flexible Clay Blade to cut out an organic ellipse shape about 3” tall.
The excess clay can be combined with the original unused clay for future projects.

Make two ellipse shapes using the Flexible Clay Blade. They don’t have to match perfectly because these are feathers and every feather is unique.

Bend one end of a feather shape around the tip of the Small Etch ‘n Pearl to form a quill.

Gently pull out the Etch ‘n Pearl and then use the tip to drag a line from the quill to the tip.

Poke a hole through the quill from side to side to make a hole for the earring construction.

Use the tip of the Etch ‘n Pearl to drag detail lines from the center line outward on both sides.

Repeat Steps 6 & 7 to design two feathers.

Use the tip of the Clay Blade to remove little triangles along the edges. These will look best if they are irregular in size and depth
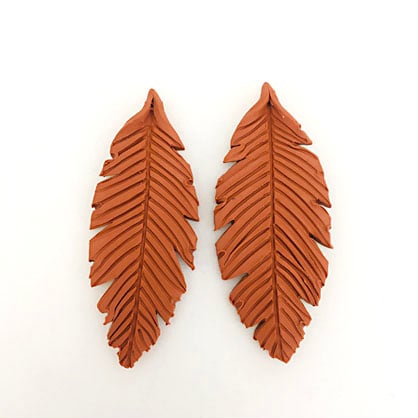
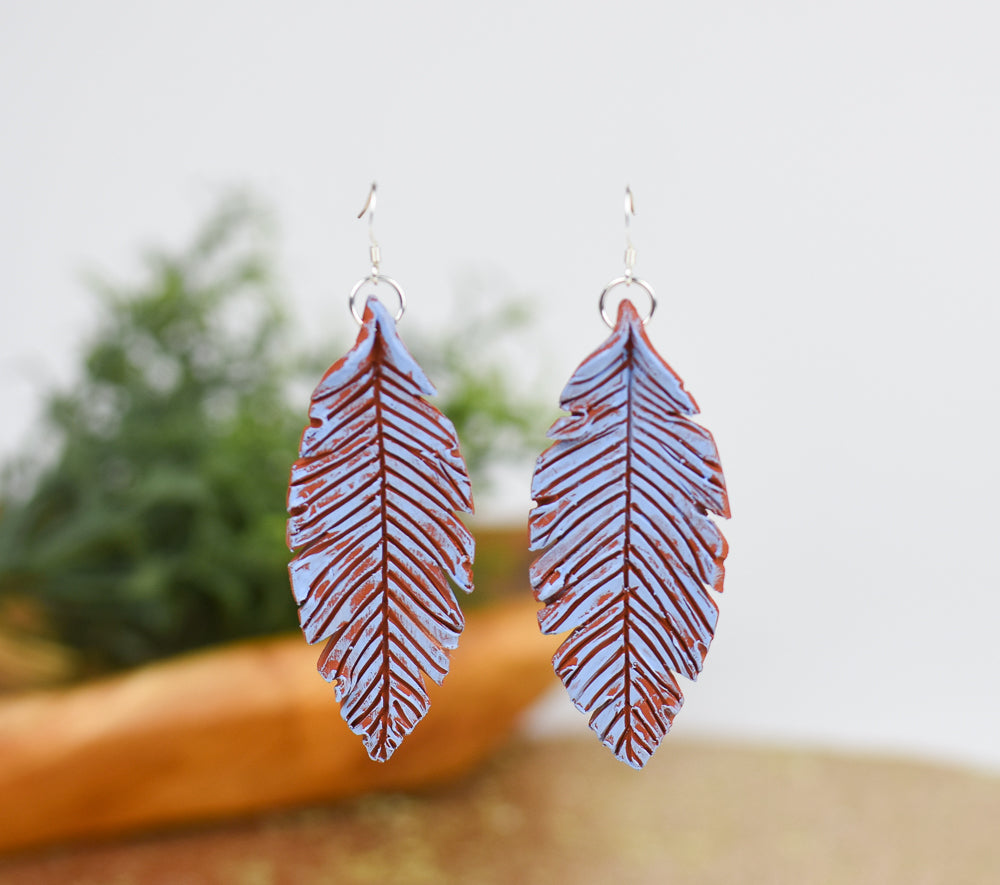
Allow the feathers to dry completely. Once dry, dry brush a thin layer of blue paint on each one.

Here is the earring layout for each earring.

Assemble the earrings as shown using flat nose pliers to open and close the jump rings.

- Choosing a selection results in a full page refresh.
- Opens in a new window.