

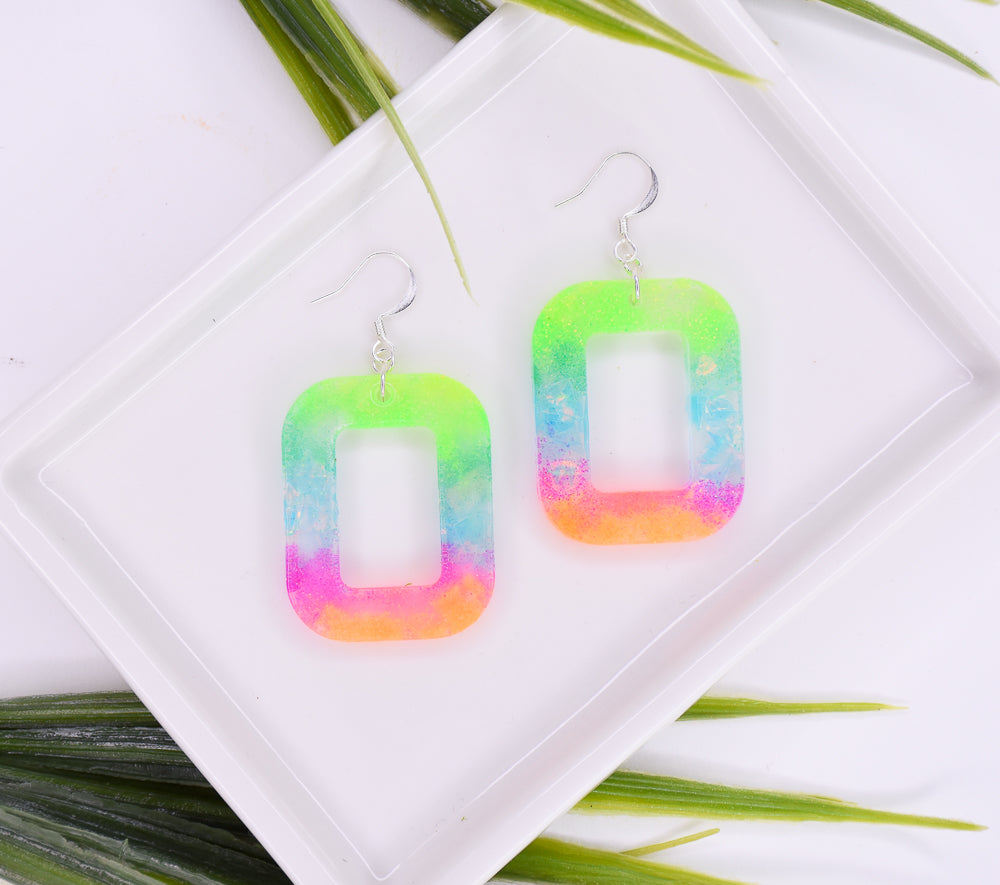
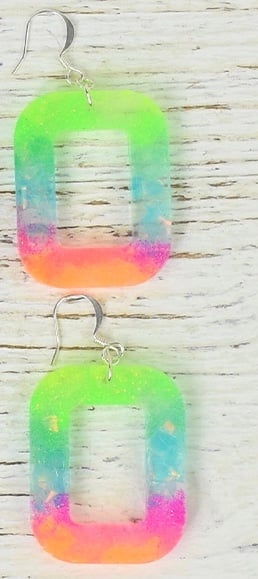
Liquid Sculpey® Glitter & Shine Earrings
Liquid Sculpey® Glitter & Shine Earrings
Designed by Amy Koranek
Read More
Create a clever pair of earrings with lots of personality, sparkle and shine in just an hour with this easy project.
TIME TO COMPLETE:
60 Minutes to make and bake
Read Less
ADDITIONAL SUPPLIES
- Paper towel
- UV Resin Craft earring shapes silicone mold
- Iridescent foil flakes
- Bright color super fine glitter
- Tweezers
- Heat gun - optional
- 8 mm Silver toned jump rings (2)
- 4 mm Silvertoned jump rings (2)
- Silver toned ear wires (2)
- Flat nose pliers
Project Instructions
- Getting Started with Liquid Sculpey®:
- Baking:
- It is important to use oven thermometer when you bake the liquids so that you can ensure your oven is at the correct temperature.
- Do not microwave the liquids. They must be baked in a Preheated oven at 275 ºF (130 ºC) for liquid colors and 300 ºF (149 ºC) for Clear – Do not exceed baking temperatures.
- If your piece is less than 1/4” bake for 15 minutes. For thicker pieces that are 1/4” or above bake for 30 minutes.
- If your liquid project has become yellowed or discolored in the oven, when you remake it, tent it by placing either – folding an index card in half and placing your project under it by using aluminum foil over your project.
Here’s a tip for baking perfectly in silicone molds. Dampen a dish towel with water and wring out as much of the water as you can. Fold the damp towel so that the molds can sit level on top of it. The damp towel will slow down the curing process so that the LS will cure evenly throughout and avoid warping.
Put a thin layer of Clear Liquid Sculpey® (LS) in the bottom of the rounded corners squares wells. Don’t fill the mold to level yet so that you have plenty of room to add the glitters.

Using tweezers, add some bits of iridescent foil to the horizontal center of each of the rounded corner squares.

Add fine glitter above and below the foils making a rainbow. My iridescent foil has a blue tint to it, so I added the glitters working out from the blue. Yellow, bright green and green above the blue; and purple, pink, and orange below.
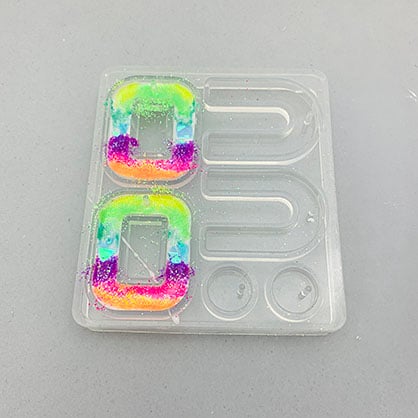
Add more Clear LS to fill the mold to level. Tap the mold on the work surface to release air bubbles.

Bake following the baking instructions for Liquid Sculpey®.
NOTE: Some artists prefer to use a heat gun to heat the surface of the baked LS to create a shine to the surface. Preheat the heat gun and keep it moving across the clay until you see the shine appear. Allow to cool completely.
NOTE: Some artists prefer to use a heat gun to heat the surface of the baked LS to create a shine to the surface. Preheat the heat gun and keep it moving across the clay until you see the shine appear. Allow to cool completely.

After the mold is completely cool, flex it to release the baked pieces. Use flat nose pliers to add jump rings and ear wires to finish the earrings.
- Choosing a selection results in a full page refresh.
- Opens in a new window.