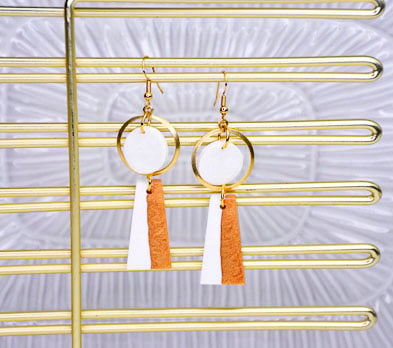

Liquid Sculpey® Color Block Earrings
Liquid Sculpey® Color Block Earrings
Designed by Khyrstyne Dunaway
Read More
Read Less
Looking for a good Mother’s Day gift? Well, all of the best gifts are made from the heart. This DIY gift isn’t your regular craft you used to give your mother from grade school. These earrings require no glue at all! Be sure to wow your mom with these beautiful gold dangle earrings!
ADDITIONAL SUPPLIES
- Toothpick
- Gold-toned findings hoop 7/8” (2)
- Gold-toned fish hook earrings (2)
- 8 mm gold-tone jump rings (4)
- Jewelry pliers

Project Instructions
Getting started:
Please make sure your work area is covered and you are not working on an unprotected surface. We recommend working on the Sculpey® Oven Safe Work Mat, wax paper, metal baking sheet, or disposable foil. Uncured Liquid Polymer Clay may damage unprotected furniture or finished surfaces. Be sure to cover your crafting area appropriately.
Getting Started with Premo Clay: change per brand
Start with clean hands, unwrap and knead clay until soft and smooth, or condition by running clay though a Pasta Machine. We recommend using a designated machine for clay purposes only. When working with multiple colors, clean hands with soap and water or baby wipes (we have found that baby wipes work best) before switching colors. Shape clay, pressing pieces firmly together. Wash hands after use.
Baking
Begin by preheating oven to 275 °F (130 °C). After you are done creating; for best results bake clay on an oven-proof surface such metal, aluminum foil, an index card or the Sculpey® Clay Mat at 275°F (130 °C) for 15 minutes per 1/4" (6 mm) thickness according to package directions. Oven safe glass or ceramic surfaces are also acceptable for baking; however please note that the baking times may take longer as the glass or ceramic surfaces take longer to heat up. For best baking results, use an oven thermometer. DO NOT USE MICROWAVE OVEN. DO NOT EXCEED THE ABOVE TEMPERATURE OR RECOMMENDED BAKING TIME.
Getting Started with Liquid Sculpey Stir Liquid Sculpey® completely. Thin with Sculpey® Liquid Clay Softener as needed - Wash hands after use (we have found that baby wipes work best) Baking: It is important to use oven thermometer when you bake the liquids so that you can ensure your oven is at the correct temperature. Do not microwave the liquids. They must be baked in a Preheated oven at 275 ºF (130 ºC) for liquid colors and 300 ºF (149 ºC) for Clear – Do not exceed baking temperatures. If your piece is less than 1/4” bake for 15 minutes. For thicker pieces that are 1/4” or above bake for 30 minutes. If your liquid project has become yellowed or discolored in the oven, when you remake it, tent it by placing either – folding an index card in half and placing your project under it or by using aluminum foil over your project.
Getting Started with Liquid Sculpey Stir Liquid Sculpey® completely. Thin with Sculpey® Liquid Clay Softener as needed - Wash hands after use (we have found that baby wipes work best) Baking: It is important to use oven thermometer when you bake the liquids so that you can ensure your oven is at the correct temperature. Do not microwave the liquids. They must be baked in a Preheated oven at 275 ºF (130 ºC) for liquid colors and 300 ºF (149 ºC) for Clear – Do not exceed baking temperatures. If your piece is less than 1/4” bake for 15 minutes. For thicker pieces that are 1/4” or above bake for 30 minutes. If your liquid project has become yellowed or discolored in the oven, when you remake it, tent it by placing either – folding an index card in half and placing your project under it or by using aluminum foil over your project.
Take your Sculpey mold and your Gold Liquid Sculpey (LS). Pour one line from top to bottom slowly and carefully. Do not worry about making it perfectly straight or filling the entire mold.

Now take your White LS and pour it carefully and slowly from top to bottom on the other side. You still will not have a full mold at this point. The White LS will look like it is taking over the Gold a little bit but don’t worry, this is ok.

You will now take the Gold LS and pour another line on its side from top to bottom. You will see in the image that the mold is almost full but not quite. Do not worry about perfectly even lines.

Take your White LS and pour one more line from top to bottom to fill the mold.
Now take both your White and Gold LS and add one drop at a time on each side until it looks pretty even and the mold is completely filled. You will know that the mold is completely filled when each corner is full.
Use your toothpick here to get rid of any bubbles. You can also work with the LS to make the lines look more straight. You are now ready to bake!

Once your piece has baked and cooled, take the piece out and repeat steps 2-5 to get a matching pair.

While the second piece of the liquid clay is baking, roll out a piece of White Sculpey III. Cut two small circles of clay with circle cutter.

Take your toothpick and make a hole in each of the small white circles. Bake these pieces according to the directions above.

Take one of your gold-toned jump rings and connect your Gold and White LS molded piece to the gold-toned hoop finding. You can use a pair of jewelry pliers to open and close the jump rings. Repeat this step for the other earring as well.
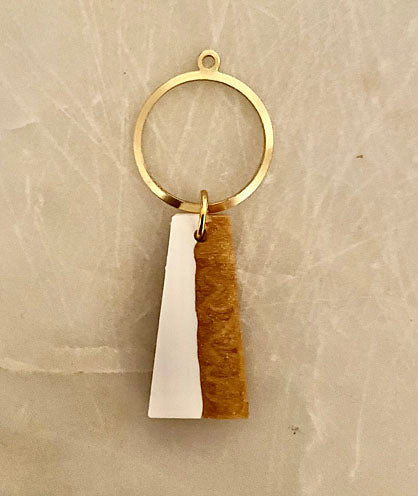
Take your other gold-toned jump ring and connect your small White clay circle to the top of the gold-toned hoop finding. You can use a pair of jewelry pliers to open and close the jump rings. Repeat this step for the other earring.


Finally, take your pliers and open the dangle earring backs to fit through the top of the gold hoop finding. Do this to the other earring as well. Your earrings are complete!

- Choosing a selection results in a full page refresh.
- Opens in a new window.