
Liquid Sculpey® and Sculpey Soufflé™ Geo Earrings
Liquid Sculpey® and Sculpey Soufflé™ Geo Earrings
Designed by syndee holt
Read More
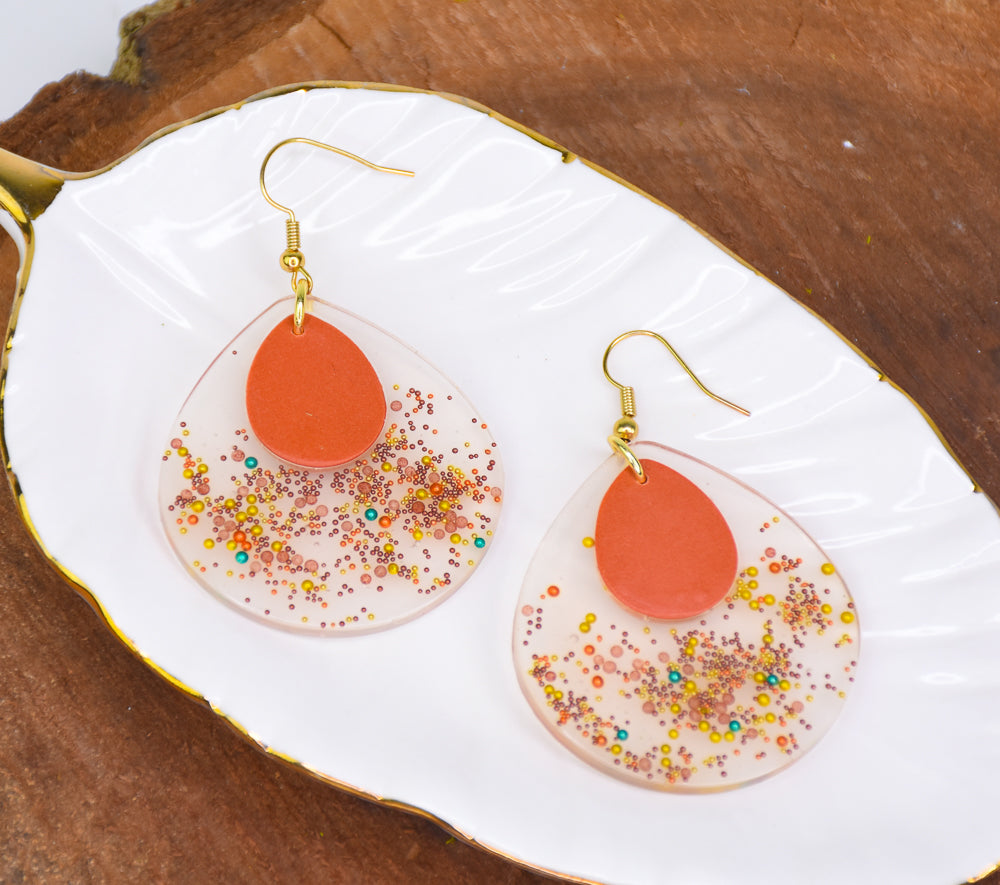
Combining Clear Liquid Sculpey® with the velvety texture of Sculpey Soufflé™ Cinnamon creates such a counter contrast! The addition of some colorful mini bead balls into the Clear LS really amps up the textural quality of these earrings.
TIME TO COMPLETION:
40 minutes to make 40 minutes to bake
Read Less
ADDITIONAL SUPPLIES
- Earring mold (created for resin)
- Small Mini beads (mine are from ArtGlitter.com)
- Toothpick
- 8 mm gold-toned jump rings (2)
- Gold-toned ear wires
- Jewelry drill and drill bit to fit the gage of your jump rings OR needle tool to make hole before baking
- OPTIONAL: heat gun to further shine the clay
- Small piece of dampened rag to place the mold on for baking
- Small silicone bowl, cup or foil cupcake wrapper to stir the Clear LS in

Project Instructions
- Getting Started:
Start with clean hands, unwrap and knead clay until soft and smooth, or condition by running clay though a Pasta Machine. We recommend using a designated machine for clay purposes only. When working with multiple colors, clean hands with soap and water or baby wipes (we have found that baby wipes work best) before switching colors. Shape clay, pressing pieces firmly together. Wash hands after use.
- Baking (also called Curing):
Getting Started with Liquid Sculpey
Stir Liquid Sculpey® completely. Thin with Sculpey® Liquid Clay Softener as needed - Wash hands after use (we have found that baby wipes work best) .
- Baking:
Squeeze your Clear Liquid Sculpey (CLS) into a small bakeable bowl, making sure you get all the material out of the bottom of the bottle. Stir well for a few moments. After thoroughly stirring your CLS, carefully pour it back into the bottle, add the lid and squeeze a small amount of CLS into the mold. I am using the toothpick to help spread it throughout the mold and into the narrow top portion. At this point, we do NOT want to fill the mold completely.

Once the first earring mold is half filled, repeat for the second earring.
At this point I HIGHLY recommend that you position the mold onto the dampened cloth on your baking tray. Once the beads are added, the mold need to remain stationary and level or the beads will move within the Clear LS.
At this point I HIGHLY recommend that you position the mold onto the dampened cloth on your baking tray. Once the beads are added, the mold need to remain stationary and level or the beads will move within the Clear LS.

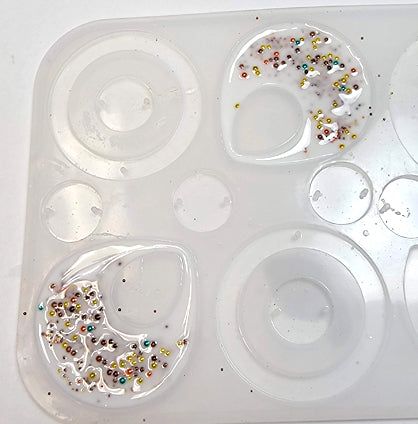
I opted to put a small amount of the micro beads in my hand and gently sprinkle them into the molds. (Yes, I made sure that I had 4 of the Turquoise beads in each mold! I used my toothpick to pick them up from my palm and position them in the molds)

Here is a look at my molds at this point. Now we will carefully fill the top of the mold.
Slowly add more CLS over the beads and allow the CLS to flow through the mold. Use the toothpick to encourage flow into the upper part of the design again CAREFULLY so you don’t disturb the beads.
Bake according to the directions above.
Bake according to the directions above.

Once the clay has baked and cooled, place it with the front of the earring face down on a clean piece of paper. Roll a small ball of Cinnamon about the size of a pea. Gently press the clay into the teardrop shape to fill the shape. A small amount of trimming may need to be done. If there seems to be a lot of excess Cinnamon, I advise removing the clay and starting with a smaller amount of clay.
Gently use your clay blade to slide underneath the earring to remove it from the paper and flip it right side up.
NOTE: I drill my beads after baking, if you prefer you can use your needle tool to put a hole in the Cinnamon for hanging before baking.
Repeat for the other earring and bake the pieces according to the directions in Step 1 above for Souffle.

Once the earrings have cooled, drill a hole in the top of the Cinnamon teardrop portion of the earring.
Note that I drill on a small piece of wood instead of my work surface to help keep my drill bit sharp!
Note that I drill on a small piece of wood instead of my work surface to help keep my drill bit sharp!

Here is the layout for assembly. You may need to turn the loop on your ear wires or add a second smaller jump ring.
To turn the loop at the bottom of the ear wire, grasp the top portion of the ear wire so that the pliers are holding BOTH sections of the wire securely. Then use a second pair of pliers to gently turn the bottom loop 90 degrees.
To turn the loop at the bottom of the ear wire, grasp the top portion of the ear wire so that the pliers are holding BOTH sections of the wire securely. Then use a second pair of pliers to gently turn the bottom loop 90 degrees.

Here is a look at my final earrings!

- Choosing a selection results in a full page refresh.
- Opens in a new window.