

Sculpey Premo™ Iridescent Hollow Bead Bracelet
Sculpey Premo™ Iridescent Hollow Bead Bracelet
Designed by Amy Koranek
Read More
Read Less
This focal bead, created with Sculpey Premo™ Iridescent, looks so intricate but the designer shows us a clever way to create the design.
COMPLETION TIME:60 Minutes to make and bake
ADDITIONAL SUPPLIES
- 400 Grit Sandpaper
- Xacto knife
- Super glue gel
- 2” Silvertone eye pin
- 1” Silvertone eye pins (2)
- 7” Navy faux leather cord (2)
- Aqua bicone crystal beads (4)
- Silvertone flat spacer beads (4)
- Silvertone flying saucer beads (2)
- Silvertone ribbon crimps (4)
- 6mm Silvertone jump rings (6)
- Silvertone lobster clasp
- 1” tail chain
- Scissors
- Round nose pliers
- Flat nose pliers
- Wire cutters

Project Instructions
- Getting Started:
Start with clean hands, unwrap and knead clay until soft and smooth, or condition by running clay though a Pasta Machine. We recommend using a designated machine for clay purposes only. When working with multiple colors, clean hands with soap and water or baby wipes (we have found that baby wipes work best) before switching colors. Shape clay, pressing pieces firmly together. Wash hands after use.
- Baking:
From 1/4 bar of each of the Iridescent colors create little logs. Stack the logs together sides touching as shown.

Roll and twist the log until smooth and striped.

Keep rolling and twisting to make a really long striped rope approximately 30” long.

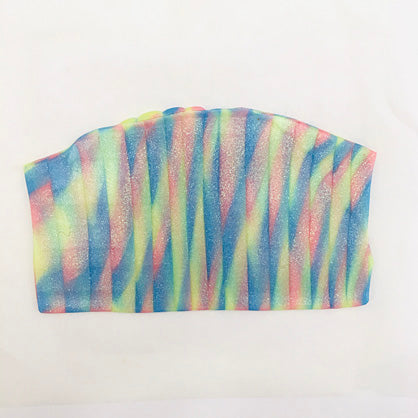
Cut the rope into pieces that are 1.5”-2” long. Lay them all side by side as shown.

Roll over the ropes to flatten them slightly and to stick them together with the Acrylic Clay Roller.

Press through the pasta machine on the thickest setting to create a little sheet.

Fold the sheet in half again across the seams and sheet through the pasta machine one more time, fold first, to blur the colors together a bit.
Use the 1.5” circle cutter to cut out two circles. Press the circles onto the largest domes of the Hollow Bead Maker and bake following the baking instructions for Premo.
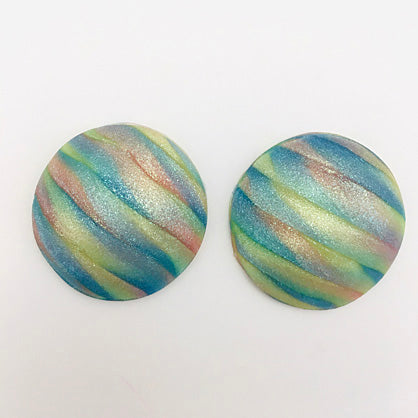
When the pieces are completely cool sand the bottom edges flat with sandpaper.

Check the fit of the two circles to make sure they sit really flat and tight to each other. Make a little nick with the Xacto knife in the edge of the circles so you will have a place to put the eye pin through. Make another nick opposite from the first one across the diameter of the circles. Line the nicks in the circles up and glue them together with super glue gel or your favorite instant glue.

Insert the 2” eye pin through the little nicks in the sides. Trim the tail end to 3/4” and curl it into a loop with the round nose pliers.

Make two little connectors with the 1” eye pins, two crystals, two flat spacers, and a flying saucer bead - one for each side of the bracelet. Curl a loop into the tail end of the eye pins with the round nose pliers. Connect to the hollow bead with a jump ring on each side.

Fold each of the leather cords in half and join them to the connectors with a jump ring at the fold. Lay the bracelet out flat and measure it to make sure it will be a good fit. You would need to trim the leather pieces at this time if you want it to be shorter.

Smash each end of a leather cord into a ribbon crimp securing them in place with super glue and using the flat nose pliers to press them closed. Finish off the bracelet by adding a lobster clasp to one side and the tail chain to the other side with jump rings.
