

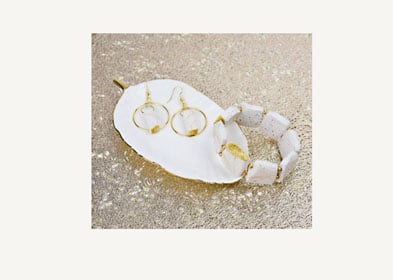
Sculpey Premo™ and Liquid Sculpey® Tumbled Marble Ruins Set
Sculpey Premo™ and Liquid Sculpey® Tumbled Marble Ruins Set
Designed by Amy Koranek
Read More
How fun to create some tumbled-look faux marble for an extraordinary earring/bracelet set!
COMPLETION TIME:
2 Hours to make and bake and assemble
Read Less
ADDITIONAL SUPPLIES
- Deli sheets or wax paper or other barrier paper
- Flat mixing surface like a flat silicone mold (as shown) or glass surface which can easily be wiped clean
- Paper towel
- Bright gold glitter
- Rubbing alcohol
- Dremel drill
- Heat gun
- Decorative gold tone connectors (2)
- 10 mm Gold tone jump rings (2)
- 4 mm Gold tone jump rings (2)
- Gold tone ear wires (2)
- Gold E-beads or other spacers beads (16)
- Ruler
- 10” Stretchy bead cord (2)
- Scissors
- Flat nose pliers
Project Instructions
GETTING STARTED WITH PREMO AND LIQUID CLAY:
Please make sure your work area is covered and you are not working on an unprotected surface. We recommend working on the Sculpey® Oven Safe Work Mat, wax paper, metal baking sheet, or disposable foil. Uncured Liquid Polymer Clay may damage unprotected furniture or finished surfaces. Be sure to cover your crafting area appropriately.
Getting Started with Premo Clay:
Start with clean hands, unwrap and knead clay until soft and smooth, or condition by running clay though a Pasta Machine. We recommend using a designated machine for clay purposes only. When working with multiple colors, clean hands with soap and water or baby wipes (we have found that baby wipes work best) before switching colors. Shape clay, pressing pieces firmly together. Wash hands after use.
Getting Started with Liquid Sculpey
Stir Liquid Sculpey® completely. Thin with Sculpey® Liquid Clay Softener as needed - Wash hands after use (we have found that baby wipes work best) .
Please make sure your work area is covered and you are not working on an unprotected surface. We recommend working on the Sculpey® Oven Safe Work Mat, wax paper, metal baking sheet, or disposable foil. Uncured Liquid Polymer Clay may damage unprotected furniture or finished surfaces. Be sure to cover your crafting area appropriately.
Getting Started with Premo Clay:
Start with clean hands, unwrap and knead clay until soft and smooth, or condition by running clay though a Pasta Machine. We recommend using a designated machine for clay purposes only. When working with multiple colors, clean hands with soap and water or baby wipes (we have found that baby wipes work best) before switching colors. Shape clay, pressing pieces firmly together. Wash hands after use.
- Baking:
Getting Started with Liquid Sculpey
Stir Liquid Sculpey® completely. Thin with Sculpey® Liquid Clay Softener as needed - Wash hands after use (we have found that baby wipes work best) .
- Baking:
Partially mix together 1 bar Premo™ White Granite with 1/2 bar Premo™ Frost White Glitter. I used a pasta machine to sheet my two colors together. You can use a pasta machine, or an Acrylic Clay Roller or you can hand mix. But stop short of the colors being completely mixed so that you have some areas that are more whiter than others.

Push the partially mixed clays together into a square shaped log.

Reduce the log into a log that is approximately 4” X 1” X 3/4”. This log should not be perfect because we want to turn it into pieces that are not perfect but would more resembled old pieces of tumbled marble.

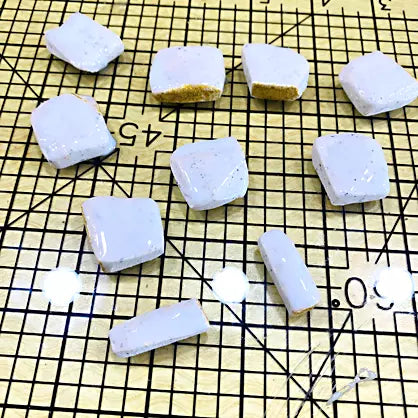
From the log slice off several thick pieces to make the bracelet beads. You will probably need at least eight pieces for the bracelet and an extra piece for the earrings. The top row shows the pieces laying flat and the bottom row shows the pieces being sliced from the log. My slices are around 1/4” thick.

Burnish each piece front and back with deli paper, or wax paper, or other smooth paper.

Use a clay blade to shave inconsistent sides and corners on each piece. The piece on the left is the original shape and the piece on the rights has been randomly shaved.

Repeat this shaving process with all the bracelet pieces. Shave some of the corners as well so that all the pieces have a tumbled look.

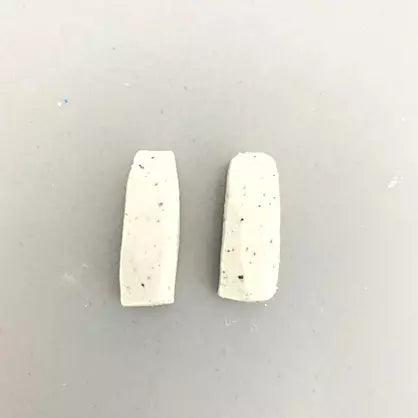
Slice one of the pieces in half so that they are long and narrow. Shave the sides and corners. These will be the earring pieces.
Squirt a small amount of Gold Liquid Sculpey® (LS) onto a surface that is easy to wipe clean. I’m using a flat silicone coaster mold.

Add a dash of gold bright glitter to the LS.

Mix the glitter and the LS together completely.

Use the flat edge of a tool to pick up some of the LS. Drag excess LS off onto the surface of the LS holder.

Transfer the LS on the flat edge of the tool randomly in veins into each bead piece. Pick up more LS as needed. Push the vein in slightly into the background clay.

Here’s a closeup of some of the random veining.

You can experiment with other shapes of tools that have flat edges. Some will make thinner lines than others.

Create random veins in all of the pieces.

Wipe excess LS from the surface of each piece with paper towel.

To remove even more LS from the surface, douse the paper towel in a little rubbing alcohol and wipe again.

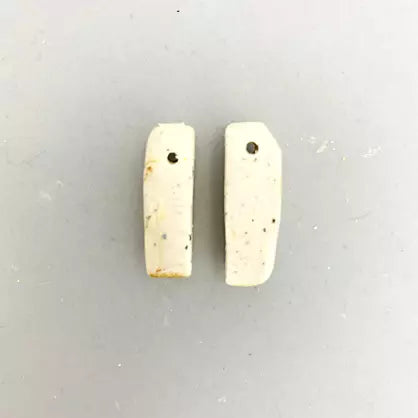
Decide if you will be drilling the pieces with holes before or after baking. I will be drilling mine with a Dremel drill after baking. If yours will be pre-drilled, you should poke holes in them now. If you accidentally mess up the veins you can touch them up now. Also decide how you want to string the bracelet pieces. I’m going to drill 2 holes in each bracelet bead so they will lay flat and right side up on my wrist. The earrings will only have 1 hole each from side to side.
Dip random edges of the beads into the glitter and LS mixture to make some interesting edges.
Dip random edges of the beads into the glitter and LS mixture to make some interesting edges.

Lay the pieces on a baking surface. Top coat each one with a thick layer of Clear LS. As thick as will stay on the top surface of each piece.
Bake the pieces following the baking instructions for Premo™.
Bake the pieces following the baking instructions for Premo™.
When the pieces are done baking, move them while hot (using hand protection) to a safe area where you can add more heat with a heat gun. Turn the heat gun on HI and move it over the baked beads until the Clear LS really shines. Then turn off the heat gun and allow the pieces to cool completely.

After my pieces were cool, I drilled them with my Dremel drill. My earring pieces were drilled side to side and my bracelet pieces were doubled drilled with parallel holes from side to side as well.
Here’s the layout for the earrings.
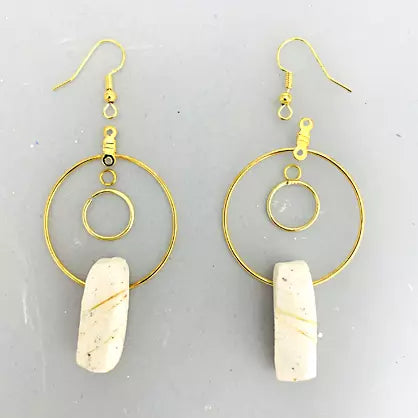
Connect the bead pieces to the large jump rings using flat nose pliers. Connect the large jump rings to the connectors with the small jump rings. Add ear wires.

Lay out the bracelet beads on a ruler to get an idea of the spacing needed between each bead to achieve the length of bracelet that you want. Standard bracelet size is 7” but I always go larger for myself so the bracelet can spin freely on my wrist.

String one set of holes with gold spacer beads as shown.

Then string the second set of holes with gold spacer beads as well, but making sure to string them with the shiny side facing out.
Measure for fit and then loosely tie knots and a final tighten before trimming off excess stringing material.
Measure for fit and then loosely tie knots and a final tighten before trimming off excess stringing material.

- Choosing a selection results in a full page refresh.
- Opens in a new window.