

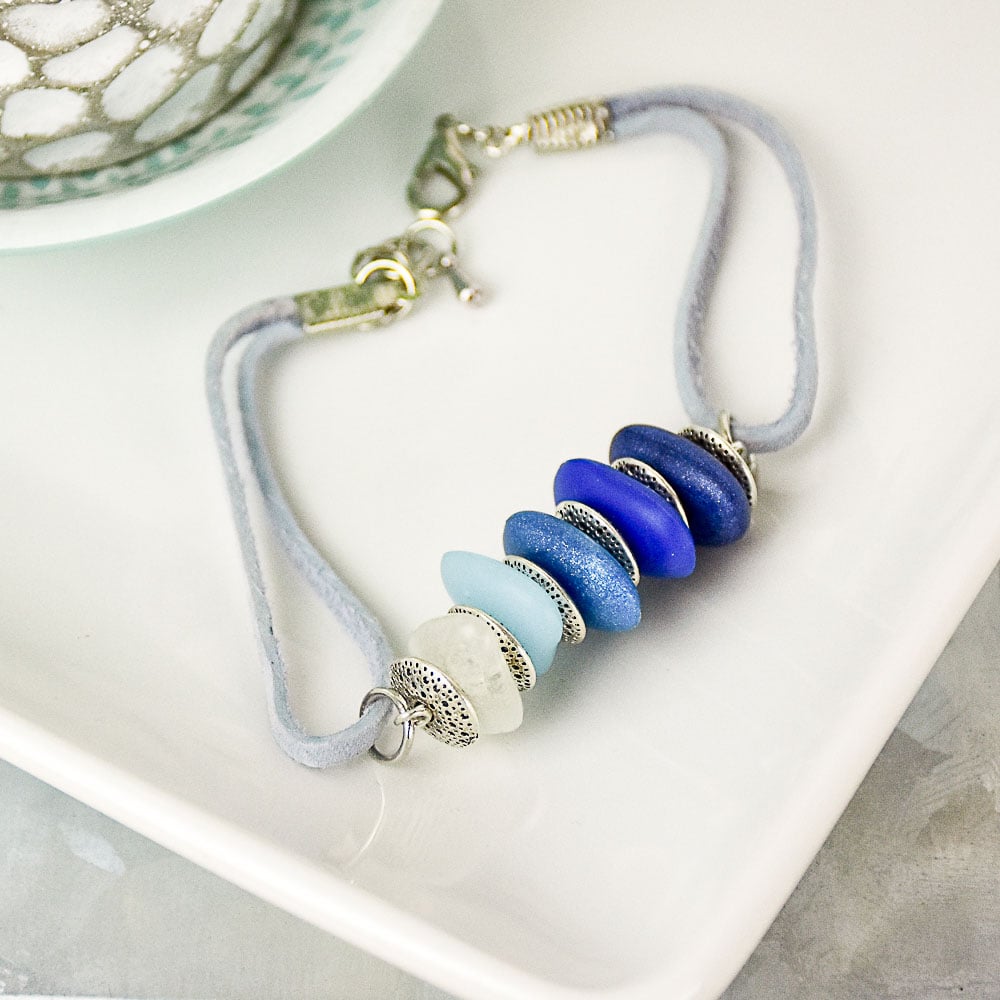
Liquid Sculpey® Pebbles of Blue Bracelet
Liquid Sculpey® Pebbles of Blue Bracelet
Designed by Amy Koranek
Read More
Read Less
This simple little project illustrates how you can make little pebble shapes from Liquid Sculpey® without the use of a mold.
TIME TO COMPLETE:
75 Minutes to make and bake
10 Minutes to assemble
ADDITIONAL SUPPLIES
- Paper towel
- Smooth clean piece of glass
- Optional - Dremel drill or pin drill
- 6” Blue faux leather cord (2)
- Silver tone lentil shaped spacer beads (6)
- 6 mm Silver tone jump rings (4)
- 2” Silver tone eye pin
- Silver tone ribbon crimps (2)
- Super glue gel
- Silver tone lobster clasp
- 5” Silver tone tail chain
- Flat nose jewelry pliers
- Round nose jewelry pliers
Project Instructions
- Getting Started with Liquid Sculpey:
- Baking:
Place glass in the preheated oven for at least 15 minutes. By preheating the glass that we are working on, the liquids will keep from spreading and be more controlled into the shapes that we want.
While the glass is preheating, remove the caps from the bottles of Liquid Sculpey® (LS) and stir each one with the knife tool. Clean tool with paper towel between each color. The Clear LS will probably have a lump of sediment in the bottom of the bottle. Mix this lump in completely to the liquid. Replace the caps on the bottles.
Carefully remove the hot glass from the preheated oven with oven mitts. While the glass is warm, drop just a little lump of each one of the liquid colors onto the glass. Immediately bake the liquid lumps on the glass following the baking instructions for LS.
When the glass is cool, carefully peel each little lump off of the glass. You will notice that the side of the liquid that was touching the glass will be perfectly flat while the top of the piece is slightly domed. Flip each piece over so that the flat side is now up. Carefully drip small amounts of the matching liquid color on the flat sides matching the base shape as closely as possible.
Bake again following the baking instructions for LS.

When the pieces are completely cool, you will have perfectly shaped little imperfect pebbles. See how nicely they look side by side with their random shapes. Drill or poke a hole right through the flat center of each pebble with either the needle tool, Dremel drill, or pin drill.

String the pebbles and the spacer beads onto the eye pin as shown. Curl a second eye loop into the end of the eye pin to secure both ends.

Attach a jump ring to each end of the pebble section with flat nose pliers.
Fold each 6” piece of faux leather cord in half. String one cord half way onto each jump ring.
Secure both ends of one cord together inside a ribbon crimp with super glue gel. Secure both ends of the second cord together inside a ribbon crimp with super glue gel as well.
Add jump rings to each ribbon crimp.
Open a jump ring and add a lobster claw to one side of the cord.
On the other side of the cord, open the jump ring and add the tail chain to make the bracelet adjustable.
