

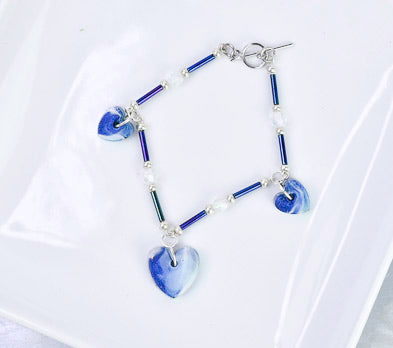
Liquid Sculpey® Marbled Hearts Bracelet
Liquid Sculpey® Marbled Hearts Bracelet
Designed by Amy Koranek
Read More
Read Less
The whole “Blue Family” of Liquid Sculpey® team up to help create this lovely bracelet that will help chase your “what-to-wear-blues” away!
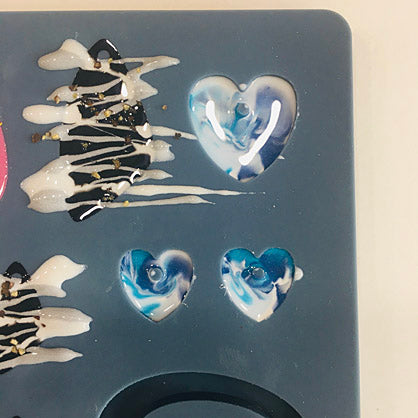
NOTE: In the photos you will see that other cavities are filled with Liquid Sculpey® (LS) besides the ones I am currently working on. In this way I can completely fill the mold and all the pieces can be cured at the same time.
ADDITIONAL SUPPLIES
- Paper towel
- Silicone baking cup
- 9 mm Bright silver tone jump rings (3)
- 6 mm Bright silver tone jump rings (7)
- 4 mm Bright silver tone jump rings (5)
- Bright silver tone toggle and loop clasp
- 2” Bright silver tone eye pins (4)
- Crystal lentil shaped beads (4)
- Dark blue tube beads (8)
- Silver seed beads (16)
- Wire cutters
- Round nose pliers
- Flat nose pliers
Project Instructions
- Getting Started with Liquid Sculpey:
- Baking:
In the bottom of a small silicone baking cup, add equal amounts of Translucent Turquoise, Navy Metallic, Peacock Pearl, and White.
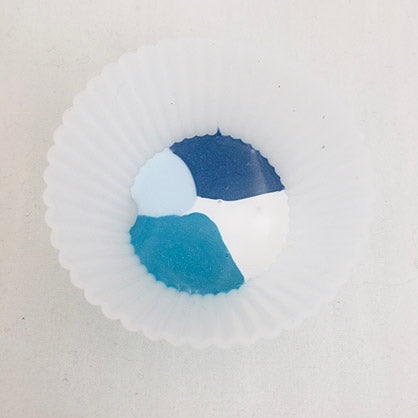
Add a second layer of the colors on top of the first.

Flex the silicone cup so you can pour the liquid into the heart cavities. Fill the large heart to level. As the liquid spills out of the cup, it will marble slightly creating a unique pattern.
Fill each of the small hearts to level with the marbled mix. When the mold is completely full, bake the mold following the baking instructions for LS. Please note this image shows another project that I was working on at the same time. For this project just concentrate on the heart shapes.
Fill each of the small hearts to level with the marbled mix. When the mold is completely full, bake the mold following the baking instructions for LS. Please note this image shows another project that I was working on at the same time. For this project just concentrate on the heart shapes.
Make four connectors using the 2” eye pins. On an eye pin string a seed bead, tube bead, seed bead, crystal, seed bead, tube bead, and finally another seed bead. Curl the tail end into an eye with round nose pliers. String the connectors in line with the small jump rings. This photo shows all four connectors with two of them hooked together.

When the mold is completely cool, remove the hearts by gently flexing it. If there are rough edges around the backs, these can be easily trimmed away with small sharp scissors. Add large jump rings to each of the heart pieces.

Connect the hearts to the small jump rings with large jump rings.

If the bracelet should be longer, you can assemble extensions with alternating medium and small jump rings. Attach the toggle and loop clasp to the ends of the bracelet with jump rings. When the bracelet is worn the eye pin connectors can be bent slightly to conform to the shape of the wrist.
