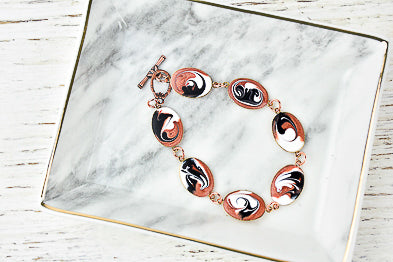

Liquid Sculpey® Marbled Copper Bracelet
Liquid Sculpey® Marbled Copper Bracelet
Designed by Amy Koranek
Read More
Read Less
Liquid Sculpey® teams up with some pre-made metal bracelet bezel pieces to create a one-of-a-kind bracelet!
TIME TO COMPLETE: 45 Minutes to make, bake, and assemble
ADDITIONAL SUPPLIES
- Paper towel
- Copper tone 1” oval shaped bezels (7)
- Copper tone loop and toggle clasp
- 6 mm Copper tone jump rings (8)
- Flat nose pliers

Project Instructions
- Getting Started with Liquid Sculpey:
- Baking:
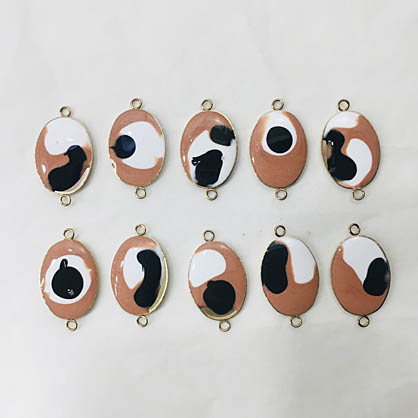
The bezels that I used came in a pack of ten so I filled all of them so I could pick my favorite ones.
Place a drop or two of Copper Metallic Liquid Sculpey® (LS) into each of the oval shaped bezels.
Place a drop or two of Copper Metallic Liquid Sculpey® (LS) into each of the oval shaped bezels.

Place a drop of White LS into each bezel as well. Your drops can be as uniform or as random as you like. My patterns are completely random.

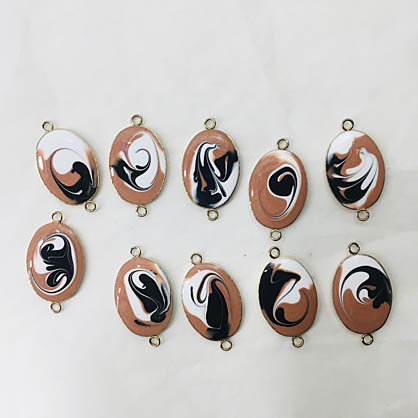
Place a drop of Black LS into each bezel as well. Don’t overfill the bezels because we don’t want the LS to spill out during the next step. You can see that some of my bezels even have open spaces in them which will fill up during the swirling.
Dip the tip of the Needle Tool into one of the dots of color. Without lifting the tool, swirl the tip through each color. You can swirl a little or a lot but pay attention to the patterns that you are making so that you can stop swirling when you like the way they look.
Carefully lift the tool out of the design and clean it with paper towel before going onto the next bezel.
Repeat for each bezel.
Carefully lift the tool out of the design and clean it with paper towel before going onto the next bezel.
Repeat for each bezel.
Bake the bezels following the baking instructions for LS.
Please note that I chose not to use any type of adhesive to keep the baked LS inside the bezels. It really is not necessary to glue the pieces in. They will stay in as long as you don’t intentionally try to peel them out.
Allow the bezels to cool completely before assembly.
Connect all the bezels together with the jump rings using flat nose pliers. Attach the toggle to one end and the loop to the other to finish the bracelet design.

- Choosing a selection results in a full page refresh.
- Opens in a new window.