

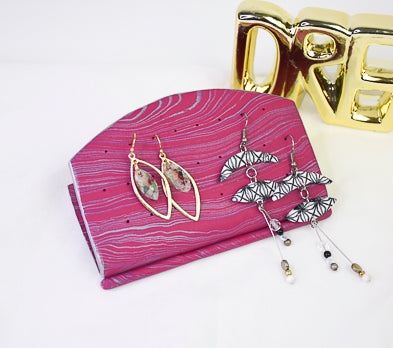
Sculpey Soufflé™ Wild Orchid Jewelry Stand
Sculpey Soufflé™ Wild Orchid Jewelry Stand
Designed by Amy Koranek
Read More
Sculpey Soufflé™ Wild Orchid teams up with a classic Sculpey Premo™ color of Silver to create this dramatic addition to display your jewelry collection. Why not make one for your BFF as well?
COMPLETION TIME:
75 Minutes to make, bake, and assemble the cardboard form
Read Less
ADDITIONAL SUPPLIES
- Ruler
- Heavy duty cardboard larger than the finished size of your stand
- Pencil
- Xacto-type craft knife
- Clear packing tape
- Silver acrylic paint
- Paintbrush
Project Instructions
- Getting Started:
Start with clean hands, unwrap and knead clay until soft and smooth, or condition by running clay though a Pasta Machine. We recommend using a designated machine for clay purposes only. When working with multiple colors, clean hands with soap and water or baby wipes (we have found that baby wipes work best) before switching colors. Shape clay, pressing pieces firmly together. Wash hands after use.
- Baking:
We will start by creating a sturdy form to give the jewelry stand its shape during baking. I am using strong corrugated cardboard. I cut a piece of cardboard that is much larger than my finished stand will be. The cardboard will lend to support to the piece and provide an angle for the stand, so it is not important to be of an exact size, just larger than the desired size of the finished stand.
Measure and draw a line down the center of the cardboard.
Measure and draw a line down the center of the cardboard.

Use a sharp craft knife to score a line down the center following the line you drew in Step 2.

Cover the flat sides of the cardboard where the clay will touch it with clear packing tape. This will create a barrier that the baked clay will pop right off of.
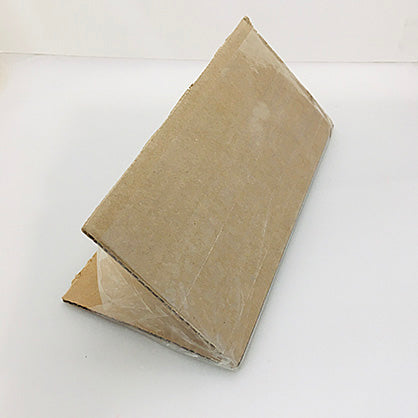
Determine the angle that you would like the finished stand to sit at and fix the cardboard form with this angle using packing tape on the ends.
NOTE: I learned that during baking, the weight of my clay stand caused this angle to close up a bit. To avoid this happening to your stand, you can prop the inside angle up a bit with crumpled foil or even crumpled heavy duty paper.
NOTE: I learned that during baking, the weight of my clay stand caused this angle to close up a bit. To avoid this happening to your stand, you can prop the inside angle up a bit with crumpled foil or even crumpled heavy duty paper.

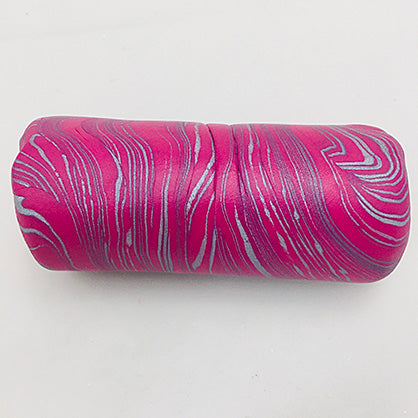
Set the form aside for now. Next, from two bars of Wild Orchid, create a thick log.

From 1/4 bar of Silver, make thin flat ropes. Press these into the side of the log so that it looks striped all the way around. Leave thicker spaces of the Wild Orchid showing between the Silver stripes if you want the Wild Orchid to be the predominant color and the Silver to be the accent color.

Twist and roll the log as shown to make twisted stripes. Roll and twist until the rope is about 10” long.

Fold the rope in half and then in half again. This folding process will help multiply the little stripes.

Roll and twist the log again until it is about 10” in length.

Fold the log in half and in half again.

Roll and twist the folded log until the sides are smooth. This time try to keep the log really compact instead of letting it get long and skinny. You can help it stay compact by applying pressure on both ends with your palms as you roll it smooth.
Use the Clay Blade to dissect the thick log into two halves.

From here on out, I was very careful to shape my pieces so that the stripes would end up going horizontally across the face of the finished piece. It’s important from now on to make sure you know which way the stripes will end up.
Next, roll each half of the log into a thick rectangle. As you roll it flat, use your hands to push inward around the edges so that the patty you create has a rectangular shape to it.
Next, roll each half of the log into a thick rectangle. As you roll it flat, use your hands to push inward around the edges so that the patty you create has a rectangular shape to it.

Next use the Roller to keep flattening and stretching the rectangle shape from Step 14 into more of a rectangular sheet.

Make both halves of the log into a similar rectangular shape. At this point my clay is still over 1/8” thick and my pieces are close to 5.5” x 3” each.

Cut a straight edge along one of the long edges on each rectangle piece.

Line the two straight edges up next to each other.

Smooth the seam between the two pieces with your fingertips. Roll over both pieces gently with the Roller to smooth them and make sure they are similar in thickness.

From now on we will work with the project as one large piece (instead of two rectangles). Trim the bottom edge and two sides straight with the Rigid Blade. My total shape is about 5” wide and 6” high.
Gently flex the Flexible Blade to create a nice curved line across the top. Smooth all cut edges with your fingertips.
Gently flex the Flexible Blade to create a nice curved line across the top. Smooth all cut edges with your fingertips.

Use a ruler to help you mark holes for earrings with the Needle Tool. You can mark tiny lines along the sides of the stand to use as guides for your ruler. I made my first row of holes to line up with the bottom of the curved edge. The holes are 3/4” apart. Make sure the holes are clean enough to insert ear posts into after baking.

You can make as many rows of holes as you wish. You can make the holes in a custom pattern to suit whatever sizes and styles of earrings you have. I kept the rows of holes on just the top half of the clay because the bottom half of my design will be what supports the stand. If you designed your stand to stand on the short edges, you could include holes on both of the larger clay portions.

Carefully position the seam between the original two pieces down the middle of the cardboard form at the fold.

Carefully bend the clay tightly to the angled form creating a neat fold down the middle and making sure the sides lay as flat as possible. Press air bubbles out from between the clay and the form. The packing tape will create a nonstick barrier that will make the clay come off from the form easily.

From the scraps that were trimmed away from the edges in Step 20, roll up a little log.
Roll and twist the log to make a neat rope.
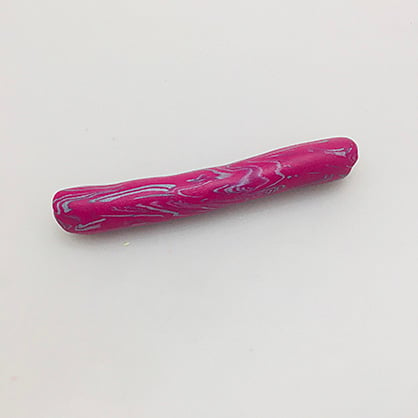
I used this piece to create a nice detail of a little foot at the bottom front of my piece. Trim the ends to finish nicely with a Clay Blade.

Bake the piece on the cardboard form following the baking instructions above. Allow the piece to cool completely before removing it from the cardboard form.

Paint the edges of the stand with silver acrylic paint and allow to dry completely.

- Choosing a selection results in a full page refresh.
- Opens in a new window.