Skip to product information
1 of 1

Sculpey Soufflé™ Color Block Tile Planter

Sculpey Soufflé™ Color Block Tile Planter

Read More
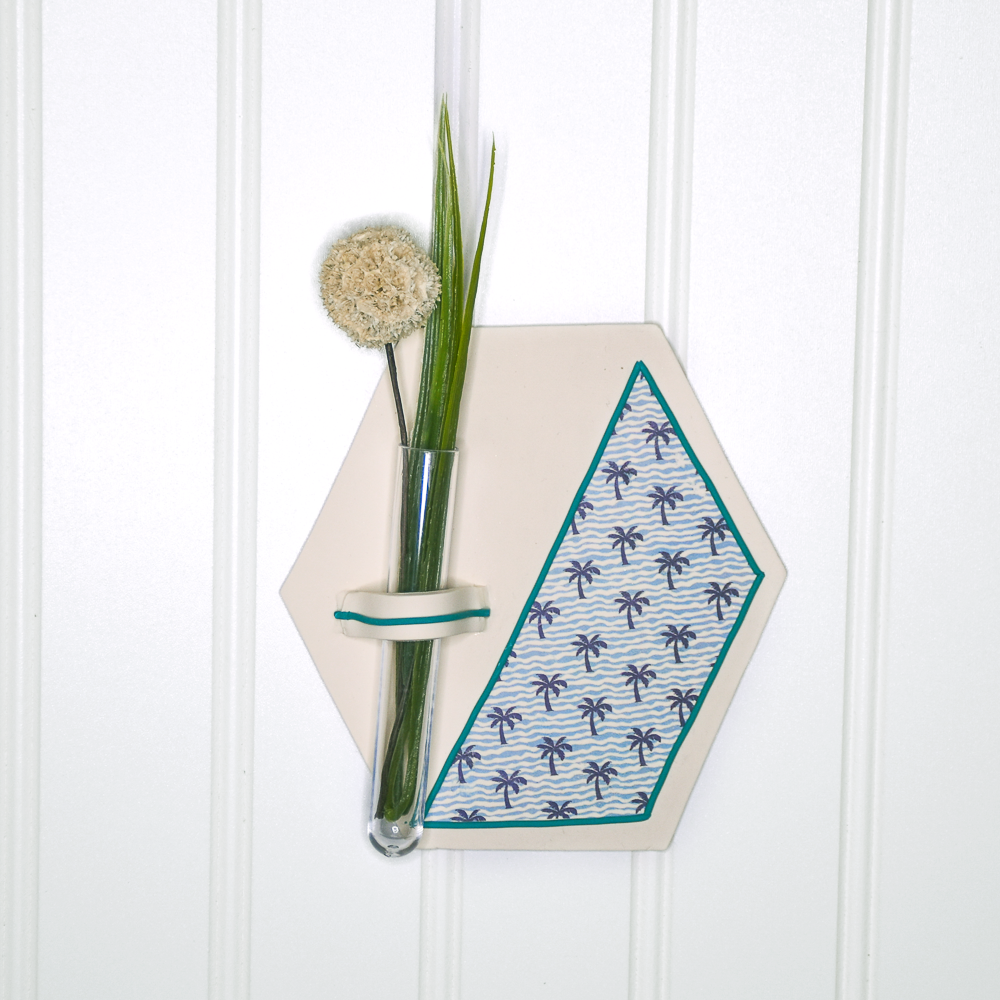
Surprise a friend or family member with a unique handmade wall planter created with Sculpey Soufflé™. Be sure to make an extra one for yourself! Souffle has a unique surface that mimics a bisque-type surface. TIME TO COMPLETION: Apx 1 hour including baking/curing
Designed by Precious Nunez
Read Less
ADDITIONAL SUPPLIES
  • Water transfer image
  • Paper/cardstock
  • Ceramic tile
  • Water
  • Test tube
  • Micro marker
  • Ruler
  • Scissors
  • Mounting putty (optional)
  • X-Acto knife
  • Paper towel
View full details
Project Instructions

Step 1

Getting Started:

Please make sure your work area is covered and you are not working on an unprotected surface. We recommend working on the Sculpey® Oven-Safe Work Mat, wax paper, metal baking sheet, or disposable foil. Uncured clay may damage unprotected furniture or finished surfaces. Be sure to cover your crafting area appropriately.

Start with clean hands, unwrap and knead clay until soft and smooth, or condition by running clay though a Pasta Machine. We recommend using a designated machine for clay purposes only. When working with multiple colors, clean hands with soap and water or baby wipes (we have found that baby wipes work best) before switching colors. Shape clay, pressing pieces firmly together. Wash hands after use.

Baking (also called Curing):

Begin by preheating oven to 275 °F (130 °C). After you are done creating; for best results bake/cure clay on an oven-proof surface such metal, aluminum foil, an index card or the Sculpey® Clay Mat at 275°F (130 °C) for 30 minutes per 1/4" (6
mm) thickness according to package directions. Oven safe glass or ceramic
surfaces are also acceptable for baking/curing; however please note that the
baking/curing times may take longer as the glass or ceramic surfaces take
longer to heat up. For best baking results, use an oven thermometer. DO NOT USE
MICROWAVE OVEN. DO NOT EXCEED THE ABOVE TEMPERATURE OR RECOMMENDED BAKING TIME.

Step 2

Draw and cut out a larger hexagon I made mine 5x5 inches. Make a mark from one corner to another as shownin the photo.

Step 3

Roll a large sheet of buttercream through the clay machine on the thickest setting and place on your ceramic tile. Place the hexagon on top of the slab and cut the
edges with your long blade.

Step 4

Cut out the mark you make in Step 2 and cut a quarter inch off each side. Use this cut out as a stencil for your image transfer. Turn the image upside down with the image facing down. Cut the image transfer from the stencil you made as shown in the photo.

Step 5

Place the image transfer face down on the clay slab and secure it to the slab by rolling it several times with the acrylic roller.

Step 6

Run water over the slab, return to your work area and gently rub the excess paper off to reveal the image. After doing this, gently brush the long blade over the slab to catch any residue you missed to have a clean design. Pat dry if needed.

Step 7

Roll out a few long skinny snakes of sea glass and make a border along the image.

Step 8

Cut out a thick strip of butter cream and loosely wrap it over the test tube.

Trim any excess clay on the strip and place on the base as shown in the photo. Blend the sides to secure, carefully slide the test tube off the base. Secure as needed. Add a hole at the top of the planter if you’d like to hang it that way (I like to use extra strength mounting putty).

Step 9

Bake according to Step 1 above. Allow to cool before adding your favorite water-rooted plant or artificial plant.