

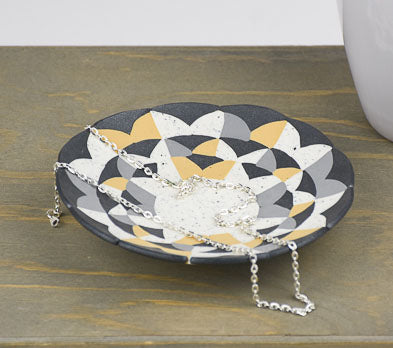
Sculpey Premo™ White Granite Mosaic Dish
Sculpey Premo™ White Granite Mosaic Dish
Designed by Amy Koranek
Read More
The simplicity of this neutral pallet really shows off the beauty of the White Granite Premo. Because the entire dish is made of pieced together cut tiles, you get to enjoy the lovely patterns both inside and out.
COMPLETION TIME:
90 Minutes to make and bake
Read Less
ADDITIONAL SUPPLIES
- Pasta machine
- Deli sheets or wax paper or scrap paper
- Pencil
- Ruler
- Hemispherical baking bowl or matte metal oven safe dish form
Project Instructions
- Getting Started:
Start with clean hands, unwrap and knead clay until soft and smooth, or condition by running clay though a Pasta Machine. We recommend using a designated machine for clay purposes only. When working with multiple colors, clean hands with soap and water or baby wipes (we have found that baby wipes work best) before switching colors. Shape clay, pressing pieces firmly together. Wash hands after use.
- Baking:
I used a pasta machine for this project because it is important that each piece in the design is exactly the same thickness. First, sheet the bar of White Granite through the pasta machine on the thickest setting.
Mark a piece of paper with perpendicular center marks that are at least 6” long. We will use these lines as a guide for laying out the design.
Cut out a center circle from the White Granite using the 1.5” circle cutter. Place the center circle on the perpendicular center marks on the paper. The paper will help you control the pieces as you are putting them into place keeping them from sticking to your work surface and keeping them lined up. If you use wax paper, it has a tendency to wrinkle, so you’ll have to make sure it remains very flat under the pieces of clay so that you don’t transfer a wrinkled texture to the clay pieces.

Also sheet the bars of Concrete, Graphite Pearl, and Ecru through the pasta machine on the thickest setting. Cut out four 3/4” circles from each of the colors including White Granite.

Cut each of the 3/4” circles in half with the Clay Blade. Arrange the half circles as shown in a circle with the sides touching as shown.

Use the 1.5” circle cutter to trim the half circles as shown.

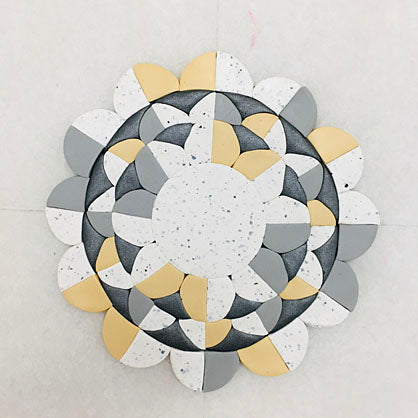
Arrange the half circles around the center circle with sides touching as shown.

Cut the Graphite Pearl circles from Step 3 into fourths. Push these pieces into the gaps around the outside of the design.

Push the little Graphite Pearl triangles firmly into place making sure the points of the triangles are filling the gaps. As you push on the triangles, force them to keep to the circle shape of the dish. Roll over the entire design with the Acrylic Clay Roller to smooth it and keep it level.

Cut more 3/4” circles to form the next row of White Granite, Ecru, and Concrete. Cut the circles into fourths and organize them as shown. Push them tightly up against the previous row so there are no gaps between pieces.

Next, use the 1” cutter to cut out Graphite Pearl circles. Cut these into fourths and position them in the gaps as shown.

Push the Graphite Pearl pieces into the gaps firmly with your fingertips and them trim away the excess from the outside edge with the Clay Blade.

Keep trimming the Graphite Pearl pieces with the Clay Blade, only removing small amounts at a time, until they make a nice circle shape. Roll over the entire design gently with the Acrylic Clay Roller to make sure it remains level.
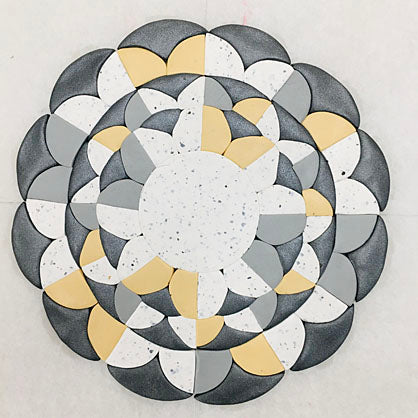
Use the 1.25” cutter to cut out more circles from White Granite, Ecru, and Concrete. Cut these circles into fourths. Arrange the pieces around the outside as shown.
Use the 1.25” cutter to cut out more circles from White Granite, Ecru, and Concrete. Cut these circles into fourths. Arrange the pieces around the outside as shown.
Cut out 1.25” circles from Graphite Pearl and cut these into quarters. This time, shape each triangular shaped piece by pinching the point to a scallop shape.

Place the scallops between the gaps as shown. Make sure the pieces fill the gaps really well.
Place another deli sheet or wax paper or scrap paper over the top of the design.
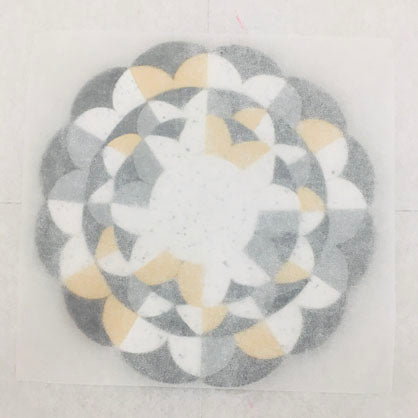
Roll over the paper with the Acrylic Clay Roller to really smooth it and to help the pieces fill in gaps. If you are using deli paper, you will be able to see the design underneath the paper. Flip the entire paper/clay/paper sandwich over and roll from the other side as well.

Carefully peel the paper away from the bottom surface of the clay design. This will be the side with the pencil markings on it.

Use the Clay Blade to trim away the excess from the outer edge. This photo shows the first trim that I made to the outside.

This photo shows the next cuts that I made to the outer edge.

Finally smooth the outer edge with your fingertips so it looks really neat.

Flip the design upside-down on the bowl form with the paper on top. I like to use baking bowls that are made of brushed aluminum so that the clay does not pick up any shine like it would if I used glass or shiny metal.

Peel the remaining paper away from the top surface of the clay. Use hand pressure to form the clay carefully to the bowl form. Make sure no excess air is trapped between the clay and the form.
If you need to, sheet more White Granite through the pasta machine on the thickest setting. Cut out two 1.25” circles from the sheet of White Granite. Stack these so that they are double thick. Position them right on the center circle of the design to make a foot for the dish.
Carefully turn the bowl form right side up and gently push down on the foot on the work surface so that the foot will be flat.

Flip the bowl form with the clay on it so that the foot is on top. Bake the clay on the bowl form following the baking instructions for Sculpey Premo™. Allow the form and the clay to cool completely before removing from the form.
