

Sculpey Premo™ Waterless Vase
Sculpey Premo™ Waterless Vase
Designed by Amy Koranek
Read More
Read Less
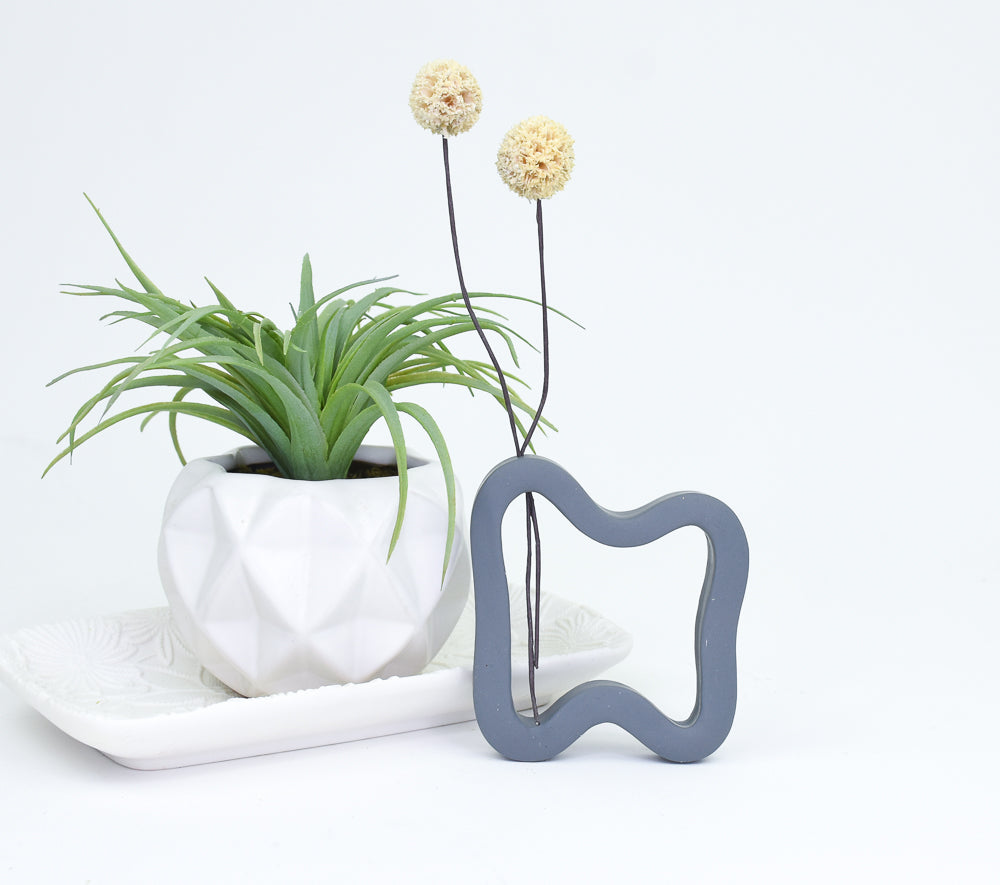
Create this very on-trend waterless vase in less than an hour! This is a great gift idea for a friend…or yourself!
COMPLETION TIME:
60 Minutes to make and bake
Designed by: Amy KoranekADDITIONAL SUPPLIES
- Skinny knitting needle
- Ruler or straight edge
Project Instructions
- Getting Started:
Start with clean hands, unwrap and knead clay until soft and smooth, or condition by running clay though a Pasta Machine. We recommend using a designated machine for clay purposes only. When working with multiple colors, clean hands with soap and water or baby wipes (we have found that baby wipes work best) before switching colors. Shape clay, pressing pieces firmly together. Wash hands after use.
- Baking (also called Curing):
I prefer to make a large piece like this from a single ball so that it does not have a seam. Instead we create a continuous flow that doesn’t have the weak link of a seam. Roll the entire 2 oz. Slate Gray into a smooth round ball.

Press the ball to the work surface slightly smashing it. Push a divot in the center with your thumb.

Push a hole in the center of the divot with the 12 mm Ball Tool.

Lift the clay off the work surface and push the 12 mm Ball Tool all the way through.

We will next make the center of the clay into a very large hole by carefully stretching it. Roll the clay on the work surface on its side with the tool going through the center. The tool will smooth the inside while rolling the outside on the work surface to smooth it.

Here’s a look at the piece with the hole enlarged,

Roll the clay again with the small rolling tube in the center, smoothing the inside and the outside again.

Here’s another look at the piece with the hole more enlarged.

Roll the clay again with the Acrylic Clay Roller in the center hole.

The inside hole has opened up even more.

Stand the clay on its side and push with your thumb on the inside to keep stretching the clay and thinning the wall.

We are getting there!

Keep stretching the both the inside and outside wall until a 5” diameter circle is formed that is 1/2” thick.

Next begin creating the shape that you want. Push the top center down with your fingers.

Push the bottom up as well.

Use a flat edge like a ruler to make sure the bottom of the clay piece is level and flat. Poke a hole all the way through the top edge at an angle that you want a stem to be displayed at with a thin knitting needle.
Bake the piece laying down as shown following the baking instructions for Sculpey Premo™. Allow to cool completely before handling.
Bake the piece laying down as shown following the baking instructions for Sculpey Premo™. Allow to cool completely before handling.
