

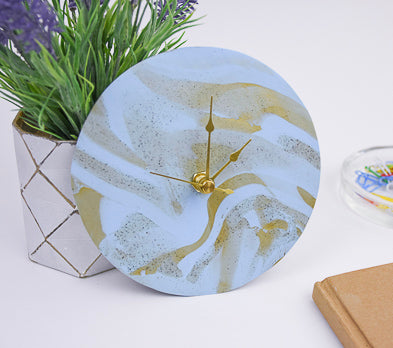
Sculpey Premo™ Pale Blue Marbled Clock
Sculpey Premo™ Pale Blue Marbled Clock
Designed by syndee holt
Read More
I often run out of time, so my answer through the years is to MAKE time – or more accurately – Sculpey clocks! This mid-century modern vibe clock is a great addition to my “extra time” I’ve created through the years.
TIME TO COMPLETION: 90 minutes to 2 hours
Read Less
ADDITIONAL SUPPLIES
- Clock set (found in wood craft section of hobby stores)
- Bowls to use to cut shape –6.5 inches in diameter for face, 4 inch diameter to cut backing and the largest of the Sculpey Circle cutter set for the washers.
- 8x8 smooth ceramic tiles (3)
- Plain paper
- Deli sheet
- Craft knife (Exacto)
Project Instructions
- Getting Started:
Start with clean hands, unwrap and knead clay until soft and smooth, or condition by running clay though a Pasta Machine. We recommend using a designated machine for clay purposes only. When working with multiple colors, clean hands with soap and water or baby wipes (we have found that baby wipes work best) before switching colors. Shape clay, pressing pieces firmly together. Wash hands after use.
- Baking:
Roll about 3/4 package of each color into a coil and twist the coil as tightly as possible. Flatten the coil with your acrylic roller.

Run the twisted clay through the clay conditioning machine on the wide setting with the stripes facing vertically. Fold and repeat.

I sliced pieces from the edges and laid them at angles on the clay to add “movement” to the marbling. I rerolled the clay and repeated until I was pleased with the result!

Carefully place your bowl and trace around the edge with your craft knife.

Put the deli sheet over the cut clay and lightly rub the edge to smooth the cut edge slightly.

Use your scraps and remaining clay to cut another circle of clay that is about 4 inches in diameter and then cut several circles with the largest (2 inch) Sculpey circle cutter. These will act as “washers” for the clock post, which is designed for thicker wood clock faces.

I baked my larger clay discs on the smooth tiles. The smaller circles were baked on my normal bake surface (cardboard).

While the clay is baking, I prepared my cooling area by locating a heavy(ish) box (of clay) and a smooth floor. Then once the bell dinged for the oven, I quickly removed the hot tile with the large piece, placed it on a piece of cardboard, put a sheet of plain paper on top, another tile and then the heavy box. It was overkill, but I wanted to make sure that it finished curing as flat as possible with no bubbles.

Assemble the clock using the clay washers first, then the smaller disc and finally, your large circle and the clock hands. Add a battery and hang your new clock!
