
Original Sculpey White Cute Monster
Original Sculpey White Cute Monster
Designed by Phoebe Doehring
Read More
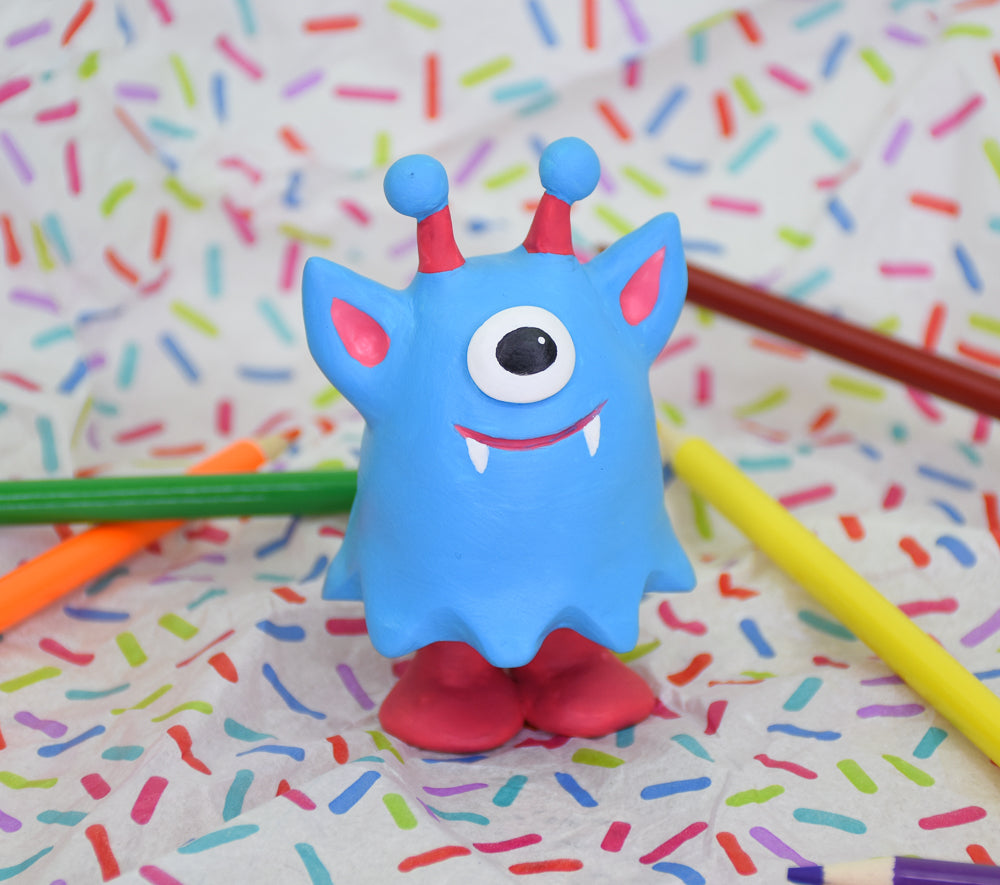
Create this cute little monster in just about 1-1/2 hours! What a fun guy to decorate your desk or your night table.
TIME TO COMPLETION: 30 minutes to make / 30 minutes to bake
Read Less
ADDITIONAL SUPPLIES
- Wet/ Dry Sandpaper 400grit
- Toothpick
- Acrylic Paints (Americana Deco): Turquoise Blue, White, Black, Wild Berry
- Paintbrush

Project Instructions
- Getting Started:
Start with clean hands, unwrap and knead clay until soft and smooth, or condition by running clay though a Pasta Machine. We recommend using a designated machine for clay purposes only. When working with multiple colors, clean hands with soap and water or baby wipes (we have found that baby wipes work best) before switching colors. Shape clay, pressing pieces firmly together. Wash hands after use.
- Baking (also called Curing):
Condition 1/3 brick of Original Sculpey White. Create the following:
• Large oval shape (size of an Extra Large egg)
• 2 – 1/4” sized balls (for the tops of the antennae)
• 2 – 1/2” sized balls (for the ears)
• 2 – snakes 1/2” x 2” in size (legs)
• Large oval shape (size of an Extra Large egg)
• 2 – 1/4” sized balls (for the tops of the antennae)
• 2 – 1/2” sized balls (for the ears)
• 2 – snakes 1/2” x 2” in size (legs)

Start with the oval body shape. Use your fingers and pinch two antennae 1/2” tall and 1/8” thick.
Shape the base of the monster into a bell shape. Use the back end of your paintbrush and made evenly spaced indents around the base. Form the clay in between these indents into points. Smooth with your fingertips.
Shape the base of the monster into a bell shape. Use the back end of your paintbrush and made evenly spaced indents around the base. Form the clay in between these indents into points. Smooth with your fingertips.

Shape the two 1/2” sized balls into teardrop shaped ears. Attach one on either side of the head and with your fingertips. Marry the seams and smooth. Use the back end of your paintbrush and create an indent inside each ear.
Take your two snakes that you shaped and round the bottom of each and then bend to make a foot. Flatten and make them into rounded feet. Insert a toothpick into the bottom of the monster, one for each leg. Insert half the toothpick into the body and leave half out so that you can push the leg onto it. Marry the seams of the top of each leg to the body of the monster. Make sure your Monster can stand up nicely.
Attach the two 1/4” balls to the top of each antennae. Make sure they are on firmly.

Roll a small 1/4” sized ball for the eye. Flatten and press into the center of the head. Use your 5 in 1 tool and make a happy mouth indentation under the eye.
Smooth your monster and make sure it is stable before baking.
Bake according to package directions.
Smooth your monster and make sure it is stable before baking.
Bake according to package directions.

Sand your monster smooth using the Wet/Dry sandpaper under running water. Dry off completely before painting.
Paint the entire body of the monster Turquoise Blue. You will need two coats.
Paint the antennae and the legs Wild Berry.
Paint the tops of the antennae Turquoise Blue.
Mix a little White and Wild Berry to make Pink. Paint the inside of the ears and the mouth Pink.
Paint the eyeball White and two sharp teeth on either end of the mouth.
Paint the pupil of the eye Black. Add a little White dot to the pupil.

- Choosing a selection results in a full page refresh.
- Opens in a new window.