


Original Sculpey® Painted Teddy Bear
Original Sculpey® Painted Teddy Bear
Designed by Amy Koranek
Read More
Spend a great afternoon building these charming teddy bears with your BFFS!
COMPLETION TIME:
45 Minutes to make and bake
Read Less
ADDITIONAL SUPPLIES
- Acrylic paint in brown, off white, black, and pink
- Paintbrush

Project Instructions
- Getting Started:
Start with clean hands, unwrap and knead clay until soft and smooth, or condition by running clay though a Pasta Machine. We recommend using a designated machine for clay purposes only. When working with multiple colors, clean hands with soap and water or baby wipes (we have found that baby wipes work best) before switching colors. Shape clay, pressing pieces firmly together. Wash hands after use.
- Baking:
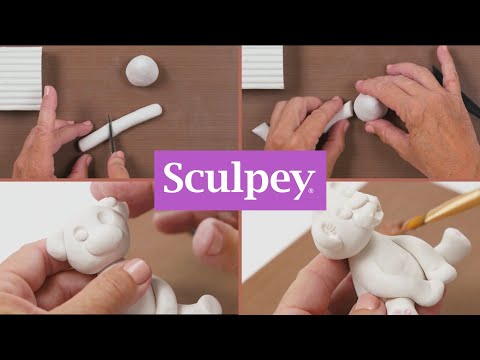
Start with the body making a pear shape about 2” tall. Flatten the bottom on the work surface so that it sits nicely.

Make arms and legs in proportion to the body. The arms will be tapered clubs that are bent up on the end. The legs will be flat clubs.

Press the arms and legs to the body. Position the arms so the paws are resting on the space between the legs. Do your best to smooth the seams between the limbs and the body so that they are really well connected to each other.
Bend the ends of the legs up slightly to look like feet.
Add a little teardrop shape to the back of the body for a tail.
Bend the ends of the legs up slightly to look like feet.
Add a little teardrop shape to the back of the body for a tail.

Push a toothpick down through the neck leaving at least 3/4” of the toothpick exposed.

Make the head, muzzle, and ears next in proportion to the body.

Push the head all the way down onto the toothpick making sure it connects well to the neck area. The toothpick will give added support to the head.
Add the ears and muzzle to the head. Make sure they are well connected to the head.
Add the ears and muzzle to the head. Make sure they are well connected to the head.

Push in eye sockets and ear cavities with the ball ended tool. Add a triangle shaped nose.

Add more details with the tools. Add paw prints with the ball ended tool. Add little balls for the eyes to the eye sockets.
Use the pointed tool to drag hair along the front of the ears. Add a tuft of hair detail to the center of the forehead.
Push the scoop shaped tool into the center of the muzzle and pull down gently to make an open mouth. Use the knife tool to score the sides of the mouth into a smile and to divide the muzzle in half from the mouth to the nose.

Bake the teddy bear for 30 minutes since he is pretty thick. Allow to cool completely before painting as shown. For the dark colors, your bear may need more than one coat of paint.

- Choosing a selection results in a full page refresh.
- Opens in a new window.