

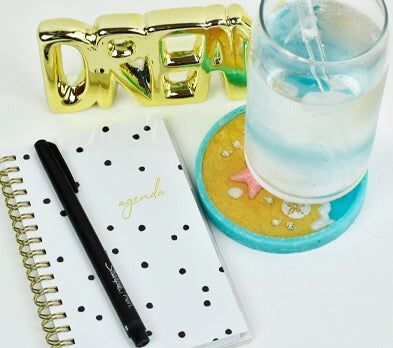
Liquid Sculpey®, Sculpey® III and Resin Underwater Coaster
Liquid Sculpey®, Sculpey® III and Resin Underwater Coaster
Designed by Amy Koranek
Read More
Read Less
Create a beachside scene on your coaster with this great team of Sculpey® products and Alumilite Amazing Clear Cast Resin.
TIME TO COMPLETE: 2 Hours to make and bake 24 Hours curing time for resin
ADDITIONAL SUPPLIES
- Small glass, silicone, or metal dish large enough to hold 2 ounces
- Small glass, silicone, or metal dish large enough to hold 1/2 ounce
- Metal measuring spoons
- 4” Silicone coaster mold with a rim
- Sharp craft knife
- Paper towel
- Aqua alcohol ink
- Pink alcohol ink
- Tiny sea shells
- Alumilite Amazing Clear Cast
- Disposable measuring cups
- Disposable mixing cup
- Disposable paintbrush
- Optional - heat gun
- Optional - spritz bottle filled with 91% isopropyl alcohol
Project Instructions
- Getting Started:
- Baking:
In the bottom of a mini silicone baking cup or very small glass dish or very small metal dish place two tablespoons of Pearl Liquid Sculpey® (LS). Add one half teaspoon of Sculpey® Liquid Clay Softener. Stir completely with one of the Purple Modeling Tools. Wipe the measuring spoons clean with paper towel.

Place a small amount of the thinned Pearl LS into the Sand Dollar and the Conch Shell shapes.

To make absolutely sure that all the little details in the Sand Dollar get filled without any air bubbles, I flex the mold backwards. Sort of turning the mold inside out so that the raised details are apparent. If there are any air bubbles they will be released by the flexing of the mold.

In the leftover thinned Pearl LS add a few drops of pink alcohol ink to make a pale pink color.

Stir the ink in completely with one of the Purple Modeling Tools.

Fill the Starfish shape with the Pink Pearl LS. Tap the mold firmly on the work surface to release air bubbles. Squeegee off excess LS from the mold with the squeegee that is included with the silicone mold. Allow the mold to rest while you fill the coaster mold.

Empty the entire contents of the 2 ounce Translucent Liquid Sculpey® (TLS) into a silicone, or glass, or metal dish. I removed the top portion of the bottle with a sharp craft knife and scraped all of the TLS out of the bottle with one of the Purple Modeling Tools. We will not be returning the medium to the bottle so the bottle can be discarded.

Add a tablespoon of Sculpey® Liquid Clay Softener to the TLS in the dish. Mix completely.

Add 2-3 drops of aqua alcohol ink to the TLS.

Mix completely with a Purple Modeling Tool. It is my experience that with blue tints, they usually darken when baked so I like to err on the side of lighter.

Fill the edge or lip of the coaster mold first. When the lip is full, run the tip of an Etch ‘n Pearl around both the inner edge and the outer edge several times in a circular motion. That way air bubbles will be released and a nice crisp edge can be made in the rim of the coaster. Then back fill the mold completely using all but a tablespoon full of the blue tinted TLS.

Bake the filled coaster and the Sea Life mold following the baking instructions for LS. Allow the molds to cool completely. In this photo you can see how the blue color in the coaster mold has darkened considerably.

Gently flex and release the baked TLS piece from the coaster mold. Flip the piece over so that the rim is facing up. My baked piece has some air bubbles in the top surface. This won’t matter at all because we will be covering that up with our sea life scene.

Pinch off little bits from the Jewelry Gold SIII and press them really flat into the inside of the coaster. Keep pinching thin bits and pressing into the coaster making an uneven line at the edge over half way across. Smooth your fingertip across all the little bits smoothing them into each other.

Continue until the area is filled with “sand” a little over half way. This area should be very thin so that the other decorative elements can also be placed on top without breaking the level of the rim of the coaster.

Position the baked Starfish, Sand Dollar, and Conch. Press them down into the Jewelry Gold. Check to make sure that they do not stick up above the depth of the edges of the coaster

Add little shells randomly and push them into the Jewelry Gold.

Stipple the sand with the 2mm Ball Tool. Squirt a foamy line along the edge of the sand with the Pearl LS from the bottle.

Add the rest of the blue tinted TLS to the area between the Pearl LS foam and the edge of the coaster.

Carefully spread the TLS to fill this area. Bake the mold again following the baking instructions for Sculpey®III.

Read all the instructions for the Alumilite and make sure you understand how to use the resin if you’ve never used it before. Mix 1/2 ounce each of parts A and B thoroughly. Use a disposable paint brush to cover all the textured surfaces with a thin coating of the resin. This will help relieve air bubbles that will form between the clay and the resin.

Keep applying a thin coating of the resin over all the clay surfaces to keep air bubbles from forming between the clay and the resin to a minimum.
You can also use a low temperature heat gun to release air bubbles. Blow air back and forth across the surface of the resin on low heat. You will see the little bubbles twinkle and pop. Once they stop popping you can go to the next step.
A second way to release air bubbles from the surface is to spritz the surface of the resin with a fine mist of alcohol. The bubbles will pop immediately and the alcohol will dry quickly.

Once you have painted the thin layer across the clay areas, you can go ahead and flood the entire area with the remainder of the resin. Be careful to only fill to the level edge of the coaster. If you notice air bubbles, use one of the bubble releasing techniques described in Step 23.

Allow the resin to cure completely, 24-48 hours, before touching.

- Choosing a selection results in a full page refresh.
- Opens in a new window.