

Premo Sculpey® Splash of Green Pendant
Premo Sculpey® Splash of Green Pendant
Designed by Amy Koranek
Read More
It is so fun to combine all these elements into one dynamic pendant!
TIME TO COMPLETION: 45 minutes including baking
Read Less
ADDITIONAL SUPPLIES
- Glossy black acrylic paint
- Pearl white acrylic paint
- Water basin large enough to accommodate the silk screen
- Paper towel
- 8 mm Antique gold jump ring
- 4 mm Antique gold jump rings (2)
- 24” Antique gold chain
- Decorative antique gold toggle and loop clasp
- Flat nose pliers

Project Instructions
- Getting Started:
Start with clean hands, unwrap and knead clay until soft and smooth, or condition by running clay though a Pasta Machine. We recommend using a designated machine for clay purposes only. When working with multiple colors, clean hands with soap and water or baby wipes (we have found that baby wipes work best) before switching colors. Shape clay, pressing pieces firmly together. Wash hands after use.
- Baking:
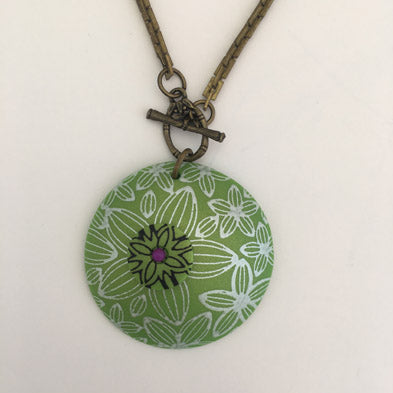
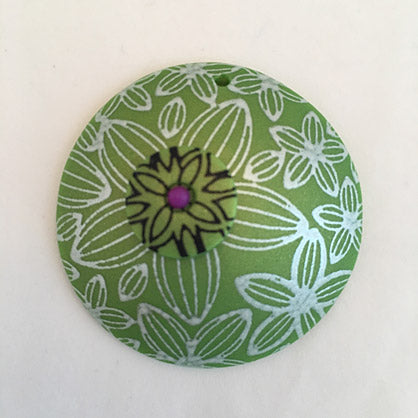
Sheet Bright Green Pearl through the Clay Conditioning Machine to the second thickest setting. Lay the sheet flat on the work surface and make sure it is really smooth. Burnish the silk screen shiny side down onto the clay so that the Flowers and the Lattice work screens are completely on the clay.

Squirt a line of pearl paint across the top of the Flowers screen area

Carefully and evenly drag the paint across the screen with the squeegee.

Squirt a line of black paint across the top of the Lattice work screen area. Carefully and evenly drag the paint across the screen with the squeegee. Peel the silk screen up from the corner and immediately place it in a basin of water. Clean the screen as soon as possible with water so that you can use it again and again. Blot it dry with paper towels

Allow the screened paint to dry completely on the clay. Cut out a circle around the pearl flowers that matches the outside dimension of the screened area. Cut out a .5” circle from the Lattice Work screened area.

Press the flower design onto the largest dome of the Hollow Bead Maker. Make sure it follows the shape of the dome and that no air bubbles are trapped between the clay and the dome.

Place the small circle on top of the large disk and press it into place

Roll a little ball of Purple Pearl. Pick it up with the small Etch ‘n Pearl and position it in the center of the design as shown.

Use the 2 mm ball tool to poke a hole in the green disk where you would like to place the jump ring later. This will be the top of the pendant. Bake the pendant on the Hollow Bead Maker following the baking instructions for Premo.

When the clay piece is completely cool, carefully pop it off of the Hollow Bead Maker with your fingertip.
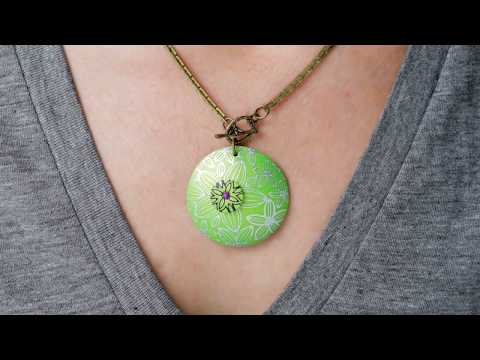
Hook the toggle and the loop to either end of the chain with the small jump rings. Place the toggle through the loop. Use the larger jump ring to hook the clay pendant to the loop and close it with pliers.

- Choosing a selection results in a full page refresh.
- Opens in a new window.