

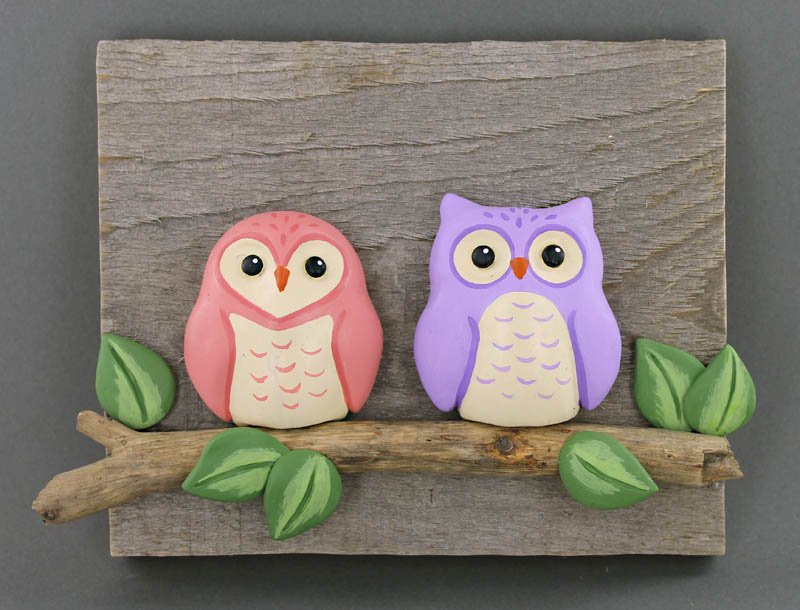
Original Sculpey Reclaimed Wood Owls Plaque
Original Sculpey Reclaimed Wood Owls Plaque
Designed by Phoebe Doehring
Read More
Read Less
Reclaimed wood is a popular trend in home decor. No wood around your house? You can even buy it at the craft stores now!
ADDITIONAL SUPPLIES
- Re-claimed Wood
- Branch
- Americana Acrylic Paints: Black, Buttermilk, White, Burnt Orange, Terra Coral, Purple, Houser Med. Green, Foliage Green
- Paintbrushes
- Loctite Super Glue
Project Instructions
- Getting Started:
Start with clean hands, unwrap and knead clay until soft and smooth, or condition by running clay though a Pasta Machine. We recommend using a designated machine for clay purposes only. When working with multiple colors, clean hands with soap and water or baby wipes (we have found that baby wipes work best) before switching colors. Shape clay, pressing pieces firmly together. Wash hands after use.
- Baking:
Select your piece of reclaimed wood and the branch for it. I recommend that the branch be slightly longer than the piece of wood.

Roll two balls of Original Sculpey approximately 1 1/2 to 2” in size. (this may change depending on the size of your wood greater or smaller) Shape your first owl into an oval and flatten slightly on your table so the back is flat but there is still a nice 3 dimensional roundness to your owl.Using your fingers, make a heart shaped indentation for the face. Using your 5 in 1 tool make indentations for the wings. Smooth with your fingers.Use the end of your paintbrush and indent two holes for the eyes. Roll two small equal sized balls and press into the holes. The second owl is made in the same way as the first except give this owl some pointed ears. Instead of the heart shaped face just make two round indentations for the eyes with your finger. Finish the wings and eyes just as you did on the first owl.

For the leaves, roll six equal sized balls of clay about 1/2“ in size each. Shape each ball into a leaf shape and press flat. Using the 5 in 1 tool, make a line down the center of each leaf.

Place your branch on your wood. Arrange the owls on the branch and press them down to they look as though they are really sitting on the branch. Arrange and press the leave on the branch where you like them best. Cluster two leave together here and there. Remember where you placed them. Maybe sketch it on a piece of paper because you will want to glue them on to the same spot after they are baked and painted.Bake the owls and leaves and allow to cool. If you want them to be nice and smooth use some wet/dry sand paper and gently sand the pieces under water until smooth. Dry the pieces with a paper towel.
Paint the Owls. Start with the Buttermilk color and paint the eyes and the belly of the owls. Paint the eyes Black. Give each eye a White dot. Paint the beaks Burnt Orange. Mix a little White paint with the Terra Coral color and paint the heart shaped owl. You will probably need two coats. Mix some White with Purple and paint the pointed ear owl. Paint the wing indents and around the eyes of the heart shaped face owl with Terra Coral. Paint the wing indents and around the eyes of the pointy eared owl with some purple.Paint the leaves with the Houser Green. Allow to dry and then paint some lighter Foliage green on each leaf for some highlights.


Once all the paint is dry you can assemble your piece. Glue your branch in place with the Loctite Super Glue. Give a couple of minutes to set. Refer to your sketch and then glue the rest of the pieces in place, starting with the owls on the branch and then the leaves. Allow the glue to dry before hanging!
