

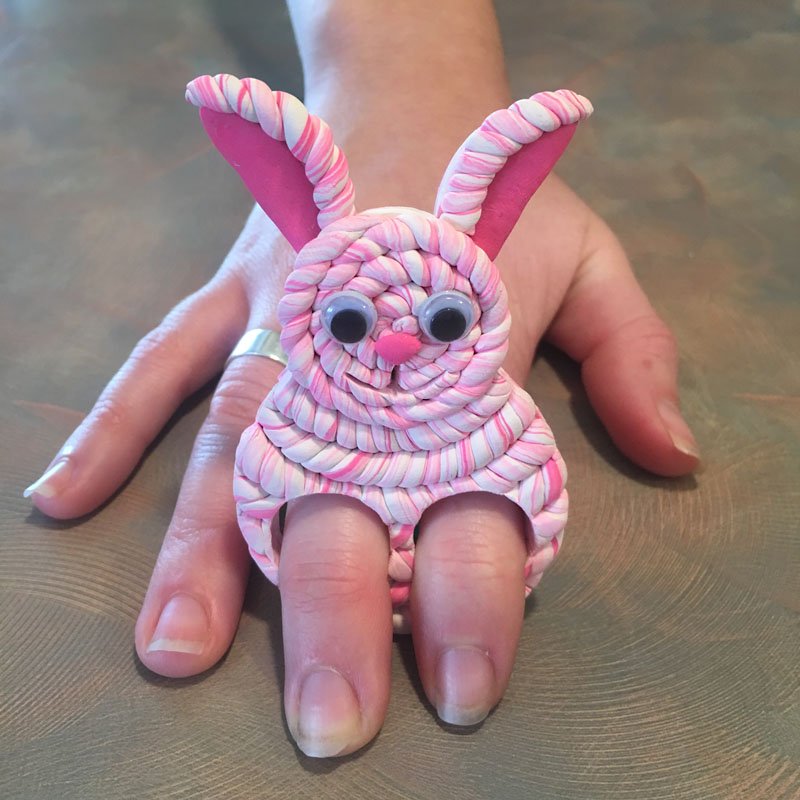
Bake Shop by Sculpey® Knitted Bunny Finger Puppet
Bake Shop by Sculpey® Knitted Bunny Finger Puppet
Designed by Amy Koranek
Read More
Read Less
Simply twisting the ropes of clay in different directions is an easy way to make your finger puppet look like its been knitted.
ADDITIONAL SUPPLIES
- Google eyes
Project Instructions
- Getting Started:
Start with clean hands, unwrap and knead clay until soft and smooth, or condition by running clay though a Pasta Machine. We recommend using a designated machine for clay purposes only. When working with multiple colors, clean hands with soap and water or baby wipes (we have found that baby wipes work best) before switching colors. Shape clay, pressing pieces firmly together. Wash hands after use.
- Baking:
This project will require one 1oz. bar of White and 1/4 bar of Pink.

From some of the Pink, make two little tapered pieces for the inside of the ears and a little triangle for the nose. Set these pieces aside for now.

Take all the remaining Pink and White and twist them together to marble them.

Roll the marbled clay flat with the roller to 1/8” thick.

Using the 2” circle cutter, cut out one body shape. Using the 1.25” circle cutter cut out one piece for the head and another piece for the ears. For the ears, slice off two sides from the circle and set the remaining part aside. Cut out two finger holes using the 3/4” cutter.

Add the Pink tapered pieces from Step 3 to the ear shapes.


Take all the remaining marbled clay and twist it into a long rope 1/4” thick

Cut the twisted rope in half. Keep rolling and twisting this half of the rope until it is about 1/8” thick. Bend the skinny rope in half and twist it.

Cut the twisted rope in half. Keep rolling and twisting this half of the rope until it is about 1/8” thick. Bend the skinny rope in half and twist it.

Cut the remaining piece of marbled clay from Step 10 into four equal pieces. Roll each one thinner to 1/8” thick.

Group the pieces into pairs. Twist one pair up from the left end. Twist the other pair up from the right end.

The twists should look like they go in opposite directions.

Alternate the twisted pieces across the body. Trim the ends and smooth the seams on the sides so that the twisted pieces follow the circle shape.

Cut the finger holes out again using the 3/4” circle cutter. Add the nose and make a smile with the knife tool. Gently press the google eyes into place making little indents where the eyes should go. Carefully remove the google eyes for baking.

Bake the bunny following the baking instructions. Allow the bunny to cool completely on a flat surface so that it won’t bend during baking. When the bunny is completely cool, glue the google eyes into place.
