

Sculpey Premo™+ Sculpey Souffle™ Camouflage Hoops
Sculpey Premo™+ Sculpey Souffle™ Camouflage Hoops
Designed by Amy Koranek
Read More
Create these khaki style earrings with just a hint of sparkle from the Premo™ 18k Gold. The bead shapes help add to the design element of the overall earring. COMPLETION TIME:
60 Minutes to make, bake, and assemble
Read Less
ADDITIONAL SUPPLIES
- Gold tone hoop connectors with T shaped crimp assembly (2)
- Gold tone ear wires (2)
- Gold seed beads (20)

Project Instructions
- Getting Started:
Start with clean hands, unwrap and knead clay until soft and smooth, or condition by running clay though a Pasta Machine. We recommend using a designated machine for clay purposes only. When working with multiple colors, clean hands with soap and water or baby wipes (we have found that baby wipes work best) before switching colors. Shape clay, pressing pieces firmly together. Wash hands after use.
- Baking:
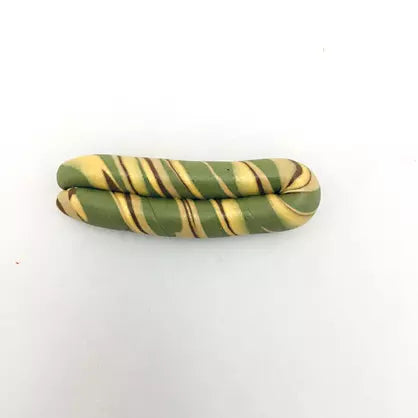
For this design we will use 1/8 bar of Khaki Green shaped into a thick rope. Shape 18K Gold, Cowboy, and Latte into thin strings the same length as the Khaki Green rope.

Bundle the ropes together sides touching. Place all the ropes together along one side of the thick Khaki Green rope so that the new log is predominantly Khaki Green on one side.
Roll and twist the log to smooth the colors together.

Roll and twist to create stripes and thin the log to double in length. Fold the rope in half.

Repeat Step 5 to multiply the stripes.
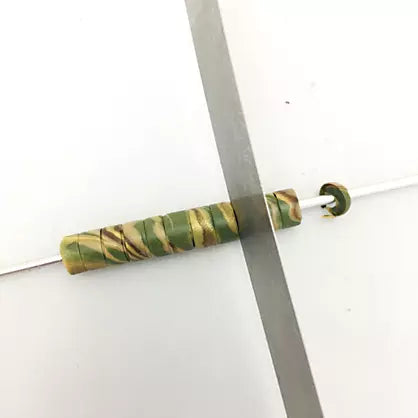
Roll the twisted rope into a thick short log. Cut the log in half with the Clay Blade.

Pierce the log with the Small Etch ‘n Pearl, threading the log all the way to the center of the tool.

Roll the clay on the tool to lengthen and thin the rope to about 3/8” diameter while keeping it on the tool.

Carefully roll the clay on the tool while slicing through it with the Clay Blade. As you roll the cut will be made all the way around the clay until the Clay Blade hits the Etch ‘n Pearl. Make cuts at 1/8” intervals along the clay rope.
Remove the spacer beads that you have made in Step 10 and lay them flat on your work surface. Flatten each one slightly with your finger so that they spread out just a bit and thin nicely. In this photo the five beads on the right side of the photo have been flattened slightly. You will need 10 total spacer beads for the earring set. If you need more beads, you can make more from the half of the clay that we set aside in Step 7.

Next we will make the ball beads. From 1/8 bar of Khaki Green, create a little log 1/4” thick. Cut sections from the log 1/4” long. By keeping the thickness of the log consistent and making each cut the same size, each piece will be the same volume of clay so that each bead will be the same size.

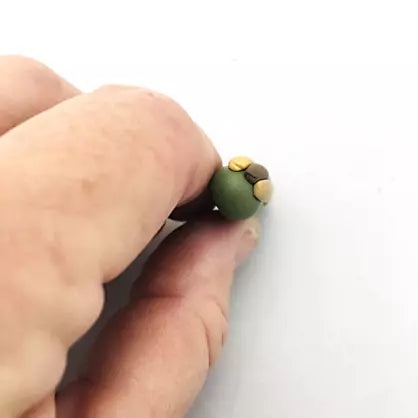
Roll each piece into a little ball in the palms of your hands.

Pierce each ball bead with the Small Etch ‘n Pearl. Bake the spacers and the ball beads following the baking instructions for Sculpey Soufflé™. Allow to cool completely before handling.

Here is the layout for the earrings. The large connectors featured here are simple wires that form a hoop connected at the T. One side of the T is already crimped in place and the other side is functional with the ability to slide in and out of the connector T. Each earring will be assembled by alternating the seed beads, spacers, and ball beads on the open end of the wire.

Once the beads are placed on the open end of the wire, re-insert the wire into the T connectors and pinch the connector onto the wire crimping it permanently in place with pliers.

Assemble both earrings as shown using flat nose pliers to open and close ear wires connecting them to the top of the T.

- Choosing a selection results in a full page refresh.
- Opens in a new window.