
Sculpey Soufflé™ Polka Dotted Rainbow Arches
Sculpey Soufflé™ Polka Dotted Rainbow Arches
Designed by Khyrstyne Dunaway
Read More
Rainbow arches are all the rave these days. Ready for a new trend? Add dots to your rainbow arches to add an extra sense of style. These adorable colors are bound to fit any style and personality!
TIME TO COMPLETION:
30 minutes to make/30 minute to bake
Read Less
ADDITIONAL SUPPLIES
- Black fine tip paint marker
- Toothpick
- E6000 glue
- Earring findings
- Jump rings
- Rainbow Cutter
- Small circle cutter such as the one available in the Sculpey Mini Geometric set
- Exacto tool or orther sharp tool to cut the clay

Project Instructions
- Getting Started:
Start with clean hands, unwrap and knead clay until soft and smooth, or condition by running clay though a Pasta Machine. We recommend using a designated machine for clay purposes only. When working with multiple colors, clean hands with soap and water or baby wipes (we have found that baby wipes work best) before switching colors. Shape clay, pressing pieces firmly together. Wash hands after use.
- Baking (also called Curing):
Take Igloo clay and run it through your clay machine on setting 2. This will give you a medium sized slab of flat white clay. Roll your acrylic roller across it gently to help it bond to your work mat.

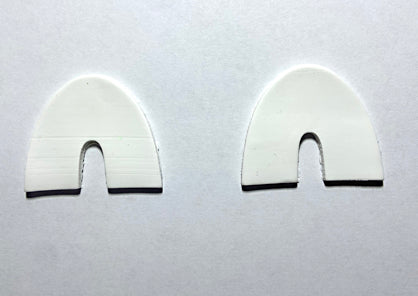
Use a clay rainbow arch shaped cutter to cut 2 shapes out of your prepared Igloo clay.
Run a small portion of the Guava through your pasta machine on setting 2. Use your acrylic roller to bond the Guava clay to your work mat.

Use your circle cutter to cut 2 pink clay circles.

Take 3 small balls of Guava, Bluestone, Jade. Roll them all out into very thin snakes. Start with the top of the arch and the Bluestone snake and lightly press your finger into the clay to bond them. Use your clay tool to cut the access pieces off.

Now add the Guava snake and press it into the center of the rainbow arch. Use your clay tool to cut the access pieces off.

Take your Jade snake and press it into the inside edge of the rainbow arch. Use your clay tool to cut the access pieces off.

Use a toothpick to place holes in the tops of the rainbow arches and the bottoms of the circles. You are now ready to bake!

Once your clay is out of the oven and cooled, take your paint pen and draw dots in the middle section of the rainbow arches.

You are now ready to glue your earrings. Take your glue and earring findings, glue the findings to the tops of the circles.

Use your jump rings to connect the circle to the arches. You are all done!

- Choosing a selection results in a full page refresh.
- Opens in a new window.