
Sculpey Soufflé™ Gold Leaf Terrazzo Earrings
Sculpey Soufflé™ Gold Leaf Terrazzo Earrings
Designed by syndee holt
Read More
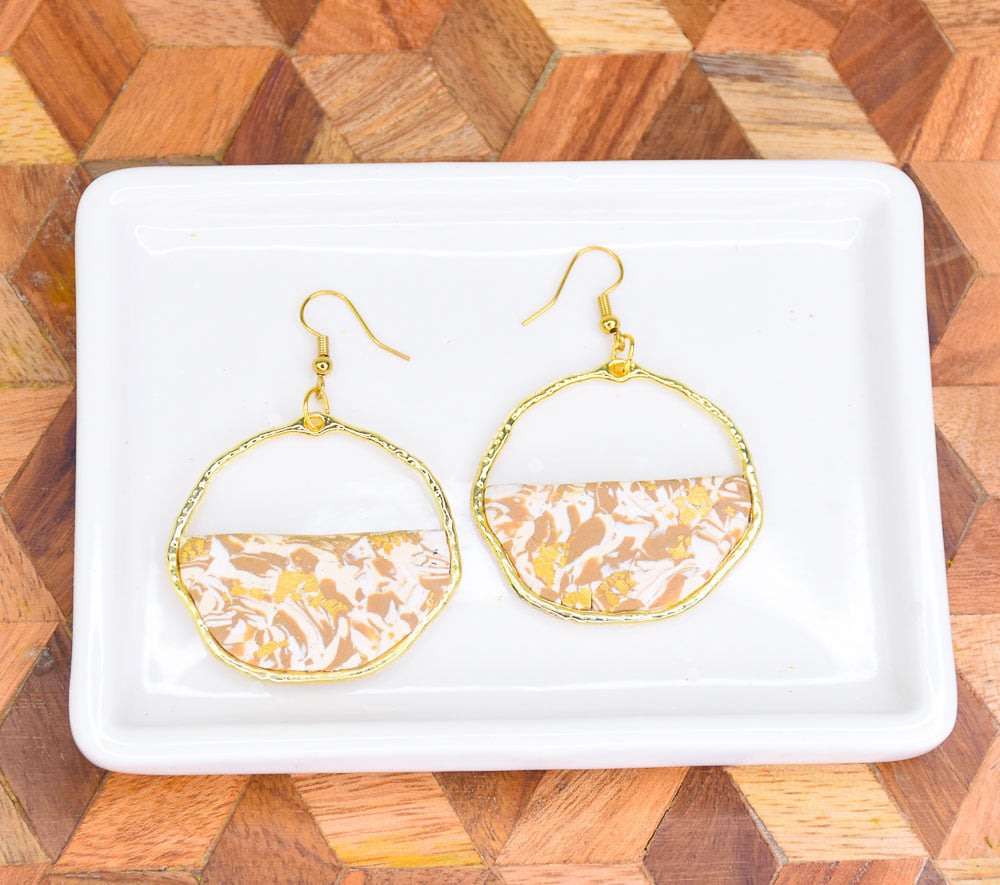
Thick gold hoops like this are just BEGGING to have some gorgeous clay mounted in them, right? Well, Sculpey Soufflé™ Latte, Ivory and Igloo did a little teamwork with some gold leaf to create these dynamics earrings!
COMPLETION TIME: 30 minutes to make, 30 minutes to bake
Read Less
ADDITIONAL SUPPLIES
- Gold leafing material
- Gold-toned thicker gold hoops
- Gold-toned jump rings (2)
- Gold-toned ear wires (2)
- Small pieces of plain paper or Patty Paper (2)
- Something to flatten clay – I’m using a coffee tamper, but I’ve used the bottle of a glass just as easily
- Instant glue – I prefer the Gorilla glue with the brush option

Project Instructions
- Getting Started:
Start with clean hands, unwrap and knead clay until soft and smooth, or condition by running clay though a Pasta Machine. We recommend using a designated machine for clay purposes only. When working with multiple colors, clean hands with soap and water or baby wipes (we have found that baby wipes work best) before switching colors. Shape clay, pressing pieces firmly together. Wash hands after use.
- Baking also called Curing:
Condition a small piece of each of the 3 colors. Roll the clays through the Clay Conditioning Machine (pasta machine) on the next to widest setting (about 1/8 inch or a little less if rolling by hand) I’ve selected my Latte to be most dominant, followed by Ivory and Igloo.

Gently press one of the colors against a sheet of gold leaf. I’ve selected my Ivory sheet because it is the medium sized sheet (and also my favorite clay!)

Cut thin slices off each color and chop them into smaller bits, mixing as you add each color. Notice that my bits are now on a smaller piece of paper!

Continue chopping and mixing until you have a pile that is about the size you think you can cut two pieces from.

Place another small piece of paper on top of the pile and use your tamper (or water glass) to push firmly straight down. (I call this my arm and stomach workout!). The goal is to push the pile down into a workable thickness for the earrings.

Once I am at a workable thickness, I check out my terrazzo-look clay. It is gorgeous, but the pattern is a little too big for the earrings.

So, I’m going to slice and chop up this new piece to create a smaller pattern.

While I was chopping, I decided to wrap a couple of the slices in more gold leaf to really get a metallic glimmer in the final terrazzo.

You can see that there is MUCH finer detail now in this stack!

Once again, paper on top, and push, push, push! (Rolling will spread the pattern too much).

Oh, NOW we have a MUCH finer pattern to work with our gold-tone hoops! And LOTS of gold glimmers…

Gently press the gold toned finding into a section of the clay (you can cut the terrazzo piece in half if you wish to work each earring).
Use the craft knife to trim around the outside edge of the hoop. Since I had cut this piece off my larger piece already, I had a straight line of clay to line up at the top.
Trim off any excess clay that shows, but there should be a little lip of clay on the back of the finding so that we can glue it into place after baking.

Repeat for the second earring.
Bake according to the directions above in Step 1 and allow to cool.
Gently pop the cooled clay off the finding and apply a small amount of glue to the edge of the clay before replacing in the finding.
Bake according to the directions above in Step 1 and allow to cool.
Gently pop the cooled clay off the finding and apply a small amount of glue to the edge of the clay before replacing in the finding.

Apply a thin coat of Sculpey Satin (or Gloss) glaze to help seal the foils.

I prefer to use oval jump rings, since they give me a little more space between the pieces and the opening is on the long edge.

And here are my finished earrings!

- Choosing a selection results in a full page refresh.
- Opens in a new window.