Skip to product information
1 of 1

Sculpey Soufflé™ Foiled Cabochon Pendant

Sculpey Soufflé™ Foiled Cabochon Pendant

Read More
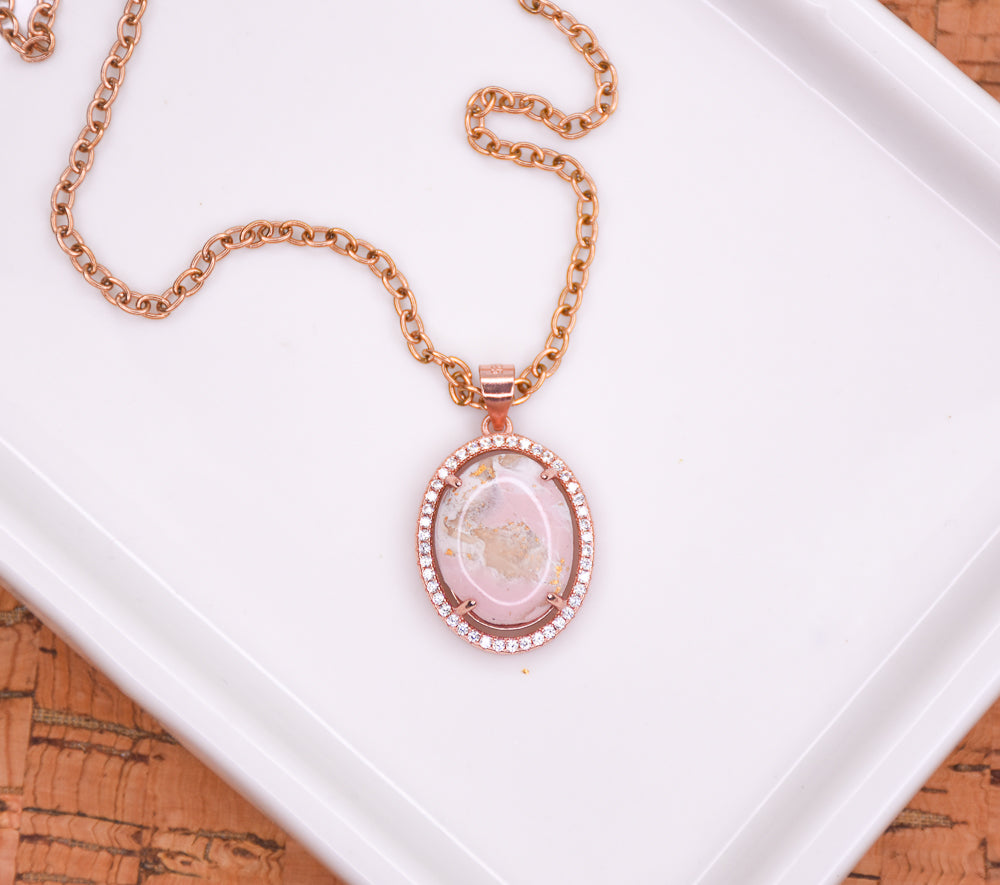
Sculpey Soufflé™ teams up with Sculpey Premo™, a little acrylic paint and a dash of Gold-toned foil to create this dramatic faux terrazzo pendant. Designed by Hollee Gaytan
Read Less
ADDITIONAL SUPPLIES
  • Acrylic white paint
  • Gold leaf
  • Metal cabochon
  • Rose Gold chain
  • UV resin
View full details
Project Instructions

Step 1

Getting Started:
Please make sure your work area is covered and you are not working on an unprotected surface. We recommend working on the Sculpey® Oven-Safe Work Mat, wax paper, metal baking sheet, or disposable foil. Uncured clay may damage unprotected furniture or finished surfaces. Be sure to cover your crafting area appropriately.


Start with clean hands, unwrap and knead clay until soft and smooth, or condition by running clay though a Pasta Machine. We recommend using a designated machine for clay purposes only. When working with multiple colors, clean hands with soap and water or baby wipes (we have found that baby wipes work best) before switching colors. Shape clay, pressing pieces firmly together. Wash hands after use.


Baking (also called Curing):
Begin by preheating oven to 275 °F (130 °C). After you are done creating; for best results bake/cure clay on an oven-proof surface such metal, aluminum foil, an index card or the Sculpey® Clay Mat at 275°F (130 °C) for 30 minutes per 1/4" (6 mm) thickness according to package directions. Oven safe glass or ceramic surfaces are also acceptable for baking/curing; however please note that the baking/curing times may take longer as the glass or ceramic surfaces take longer to heat up. For best baking results, use an oven thermometer. DO NOT USE MICROWAVE OVEN. DO NOT EXCEED THE ABOVE TEMPERATURE OR RECOMMENDED BAKING TIME.

Step 2

Begin with 1/2” balls of Sculpey Soufflé Ballet, Sculpey Premo Translucent, and Sculpey Soufflé Igloo.

Step 3

Cut each ball into many smaller pieces and loosely mix together.

Step 4

Add a small amount of white acrylic paint to the pieces. Gently move the pieces around so they are lightly coated in paint. Allow to dry.

Step 5

Once dry, add gold leaf to the coated clay pieces by placing it on top and stirring with fingers.

Step 6

Form the clay into a mound or cane by squishing it together with hands.

Step 7

Using your clay blade, slice a piece of clay in the desired thickness for your cabochon. The slice pictured is about 1/4”. Flatten with acrylic roller or pasta machine.

Step 8

Measure your cabochon setting and cut out a piece of marbled clay in the correct size.

Step 9

Smooth the edges down with fingers or a tool to create a beveled effect before baking. Bake as directed in Step 1 above. Add UV resin to clay or polish for shine.

Step 10

Place clay cabochon into your setting and bend prongs into place to secure

Step 11

Attach cabochon setting to necklace chain to complete the finished project.