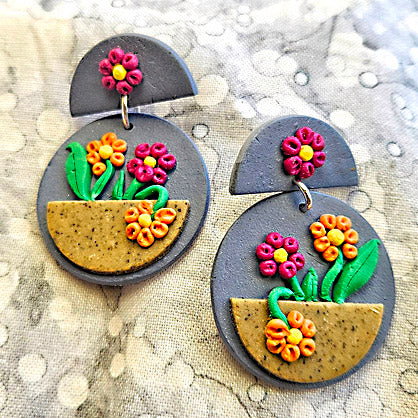
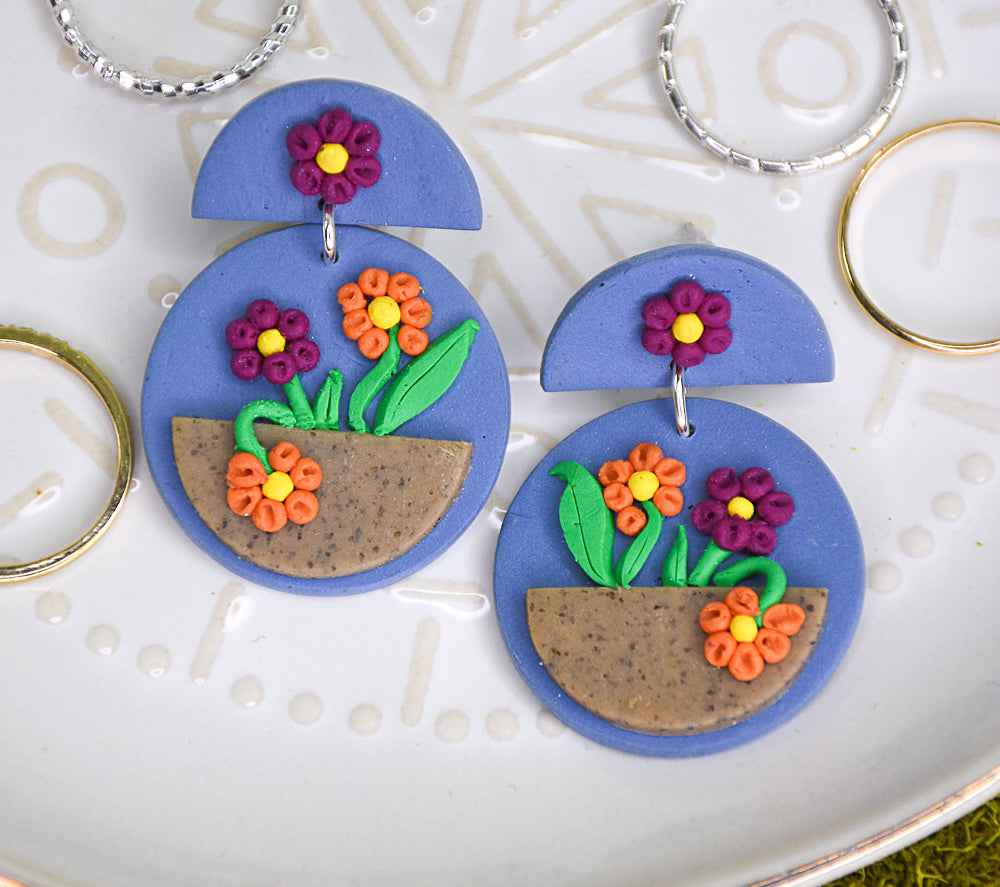
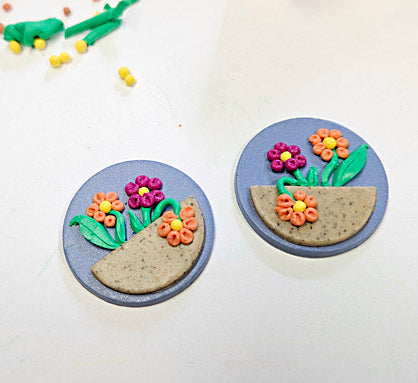
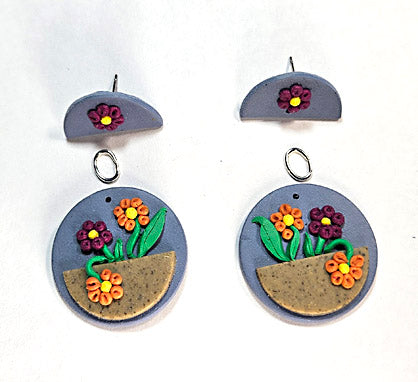
Sculpey Soufflé™ Cleverful Floral Earrings
Sculpey Soufflé™ Cleverful Floral Earrings
Read More
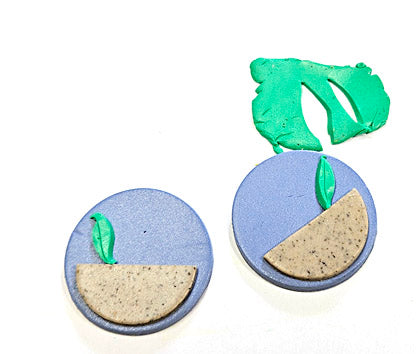
Tools make our claying lives easier and I jumped at the chance to team my beloved Sculpey Soufflé™ up with some clever new tools from CreateAlong to create these colorful and fun post earrings.
TIME TO COMPLETION: 30 minutes to make, 30 minutes to bake/cure
Read Less
ADDITIONAL SUPPLIES
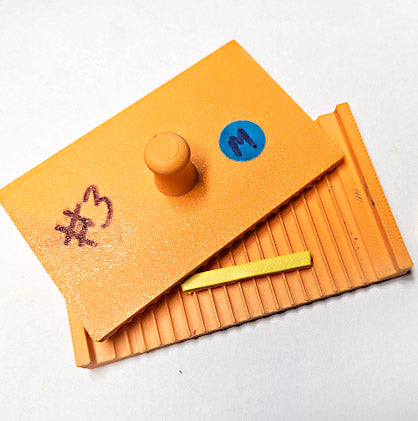
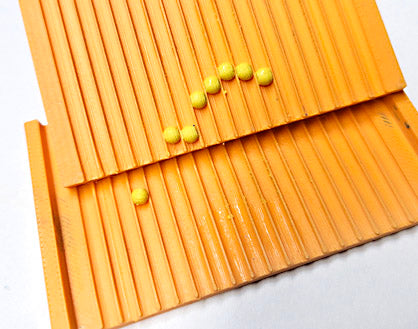
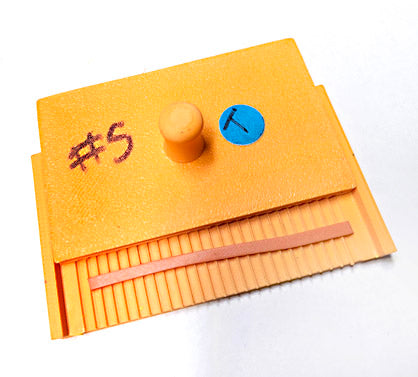
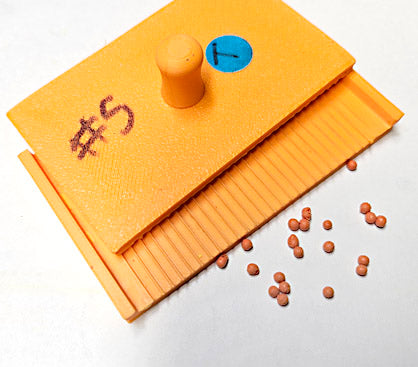
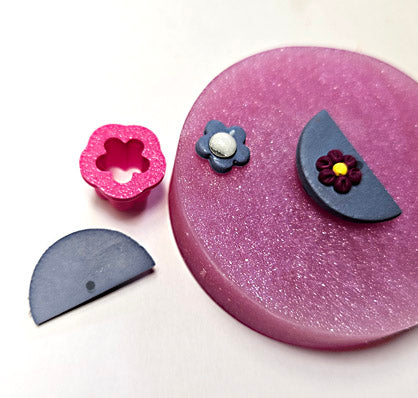
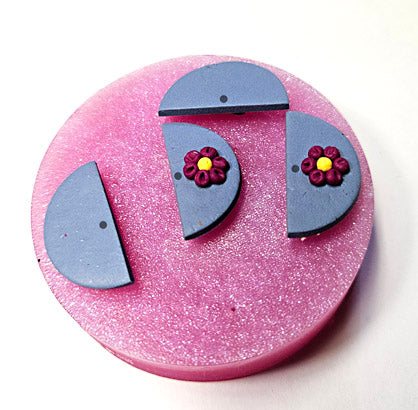
- CreateAlong Stud Puck™
- CreateAlong Tiny and Medium Baller Tool
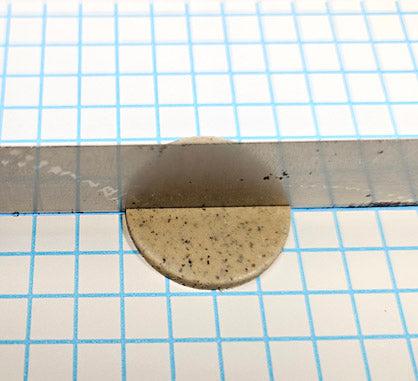
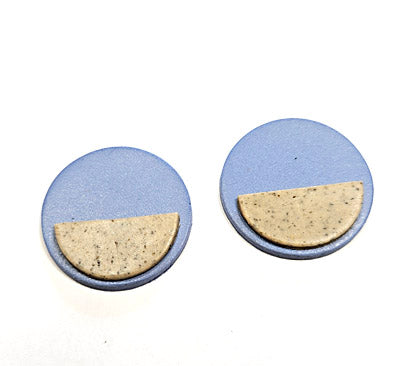
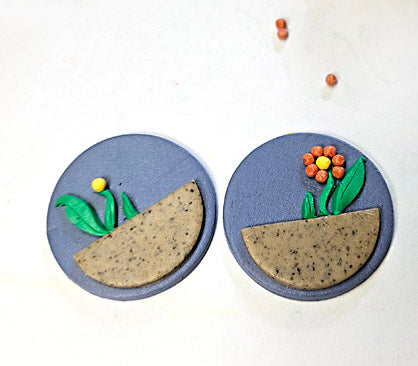
- Circle Cutters – I’ve used 3 sizes – 1-1/4 inch, 1 inch, ¾ inch
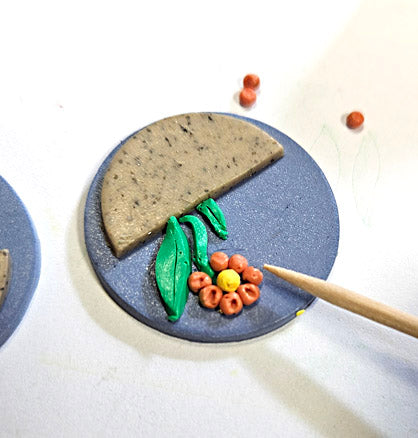
- Toothpick (or your favorite detail tool)
- 6 mm jump ring (2)
- Posts with earring backs (2)
- Bakeable Adhesive or Liquid Sculpey®
- Clay roller or clay-dedicated pasta machine
- Exacto Blade for cutting
Project Instructions
Step 1
Step 2
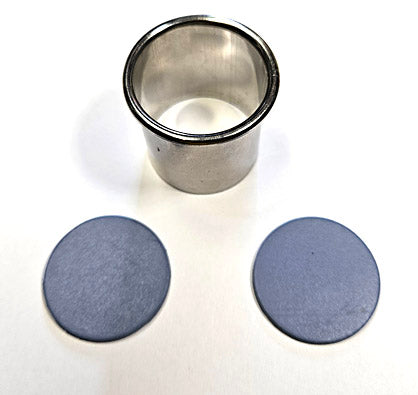
Step 3

Step 4
Step 5
Step 6
Step 7
Step 8
Step 9
Step 10
Step 11
Step 12
Step 13
Step 14

Step 15
Step 16
Step 17