Sculpey Premo™ Lemon Slice Coasters
Sculpey Premo™ Lemon Slice Coasters
Designed by Gretchen Amberg
Read More
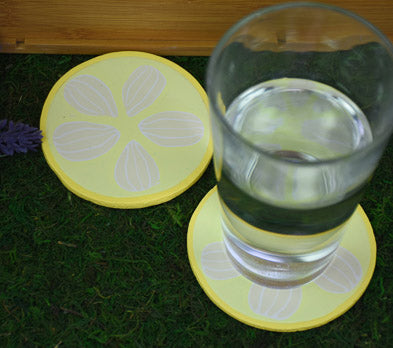
The newest addition to the Sculpey Premo™ Yellow family, Butter Yellow, teams up with Sculpey Premo™ Sunshine to create this clever lemon slice coaster that is sure to WOW your guests!
TIME TO COMPLETION: 1.5 hours including baking
Read Less
ADDITIONAL SUPPLIES
- 4” diameter circle cutter or bowl with sharp edge

Project Instructions
- Getting Started:
Start with clean hands, unwrap and knead clay until soft and smooth, or condition by running clay though a Pasta Machine. We recommend using a designated machine for clay purposes only. When working with multiple colors, clean hands with soap and water or baby wipes (we have found that baby wipes work best) before switching colors. Shape clay, pressing pieces firmly together. Wash hands after use.
- Baking:
Condition 1-block of Butter and 1/2-block of White clay. Compress the Butter clay into a log of clay which is approximately 1.25” in diameter and 3” long.
Roll the White clay into a medium-thick sheet and cut to a size which is at least the width of and long enough to wrap around the log of Butter clay with some overlap.
Lay the log of Butter on top of the White sheet of clay so the long edge is against one trimmed edge of the White sheet.
Roll the White clay into a medium-thick sheet and cut to a size which is at least the width of and long enough to wrap around the log of Butter clay with some overlap.
Lay the log of Butter on top of the White sheet of clay so the long edge is against one trimmed edge of the White sheet.

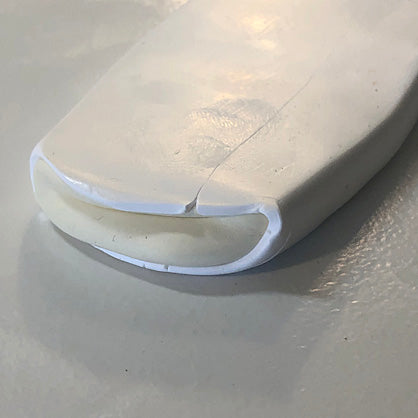
Apply light pressure and roll the White clay around the log of Butter. Use the clay blade to cut away the overlap. Use your fingertip to blend the seam

Pick up the acrylic roller and roll along the length of the log of clay until you have a long strip of clay which is 3/8” thick.
Cut the strip of clay into 4 equal parts and stack on top of each other. Compress the stack into a square shape.

Shape the stack made in Step 5 into a teardrop shape.

Combine 1/2-block each of White, Butter, and Sunshine clay. Condition the three colors together until you have a solid color, no streaks.
Roll the clay into a medium-thick sheet. Cut a piece from the sheet which is wide and long enough to wrap around the teardrop cane formed in Step 6. Set the rest of the sheet of clay to the side to be used later.
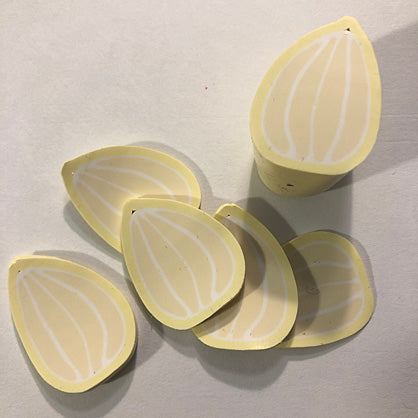
Place the pointed edge of the cane along the long edge of the sheet of light-yellow clay. Wrap the sheet around the cane and pinch the two ends of the sheet of clay against the point of the cane.
Cut 5 slices from the cane which are approximately 1/16” to 2mm thick.
Roll the clay into a medium-thick sheet. Cut a piece from the sheet which is wide and long enough to wrap around the teardrop cane formed in Step 6. Set the rest of the sheet of clay to the side to be used later.
Place the pointed edge of the cane along the long edge of the sheet of light-yellow clay. Wrap the sheet around the cane and pinch the two ends of the sheet of clay against the point of the cane.
Cut 5 slices from the cane which are approximately 1/16” to 2mm thick.
Roll the remaining portion of the sheet of clay made in Step 7 into a new sheet which is a medium-thin sheet. Make sure the sheet of clay is at least 4” square. Lay the sheet of clay onto your work surface. Pick up the cane slices from Step 8. Place them onto the sheet of clay with the points facing towards each other. Try to position the slices so they are equidistance apart.
Use the acrylic roller to roll the cane slices smooth into the surface of the sheet of clay. Tip: To have the cane slices stretch as evenly as possible roll over the surface in one direction a few times and turn the sheet 90-degrees before continuing to roll. Continue the process of turning and rolling until the cane slices are level with the sheet of clay.
Use the acrylic roller to roll the cane slices smooth into the surface of the sheet of clay. Tip: To have the cane slices stretch as evenly as possible roll over the surface in one direction a few times and turn the sheet 90-degrees before continuing to roll. Continue the process of turning and rolling until the cane slices are level with the sheet of clay.

Condition the rest of the Sunshine clay and roll out a sheet which is a medium thickness. Lift the cane slice sheet of clay and place on top of the sheet of Sunshine. Center the circle cutter over the section of cane slices and cut out a circle.

Lift away the excess clay and set it to the side. Turn the circle of clay over and use the pointed end of a tool from the Starter Set to make small dimples over the entire surface of the clay. Bake the piece for 30-minutes and let cool completely.

Roll a long strip of Sunshine clay on a medium-thin setting. Make sure the strip is a little wider than the thickness of the coaster and long enough to wrap around the outside of the coaster with some overlap. Apply a thin coat of Oven Bake Clay Adhesive around the edge of the coaster. Wrap the strip of Sunshine clay around the coaster and trim through the overlap layers. Remove the excess clay and use your fingertip to blend the seam.
Use the side of the blade to trim the clay strip flush with the top and bottom surfaces of the coaster. Use the same tool from Step 10 and add dimples to the outside edge of the coaster and the bottom where the strip of clay was added.
Bake the coaster for 30 minutes and let cool completely
Use the side of the blade to trim the clay strip flush with the top and bottom surfaces of the coaster. Use the same tool from Step 10 and add dimples to the outside edge of the coaster and the bottom where the strip of clay was added.
Bake the coaster for 30 minutes and let cool completely
