Skip to product information
1 of 1

Sculpey III® Kitty Kat Earrings

Sculpey III® Kitty Kat Earrings

Read More
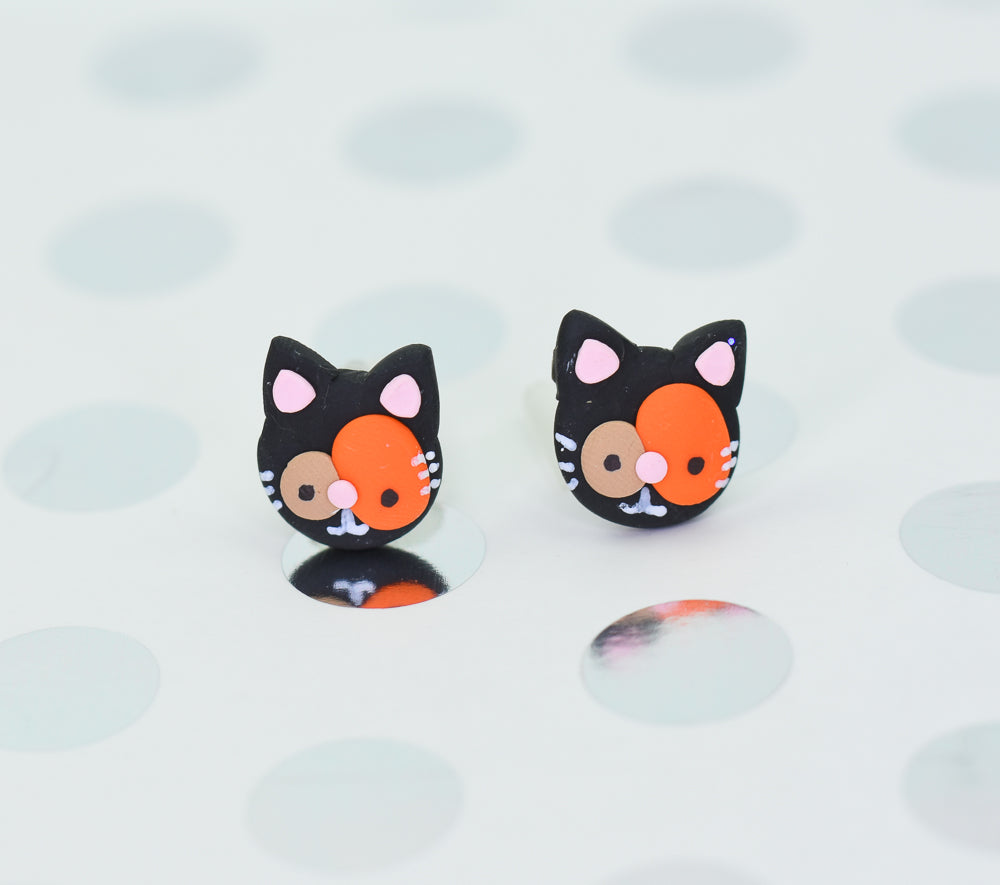
These cat earrings are perfect for the cat lover in your life. Feel free to switch out the colors to match your own fur baby in your life. Sure to get compliments from animal lovers everywhere! TIME TO COMPLETION: about 30 minutes to make, 15 minutes to bake DESIGNED BY: Khyrstyne Dunaway
Read Less
ADDITIONAL SUPPLIES
      • White fine tip paint marker
      • Black fine tip paint marker
      • E6000 glue (if choosing to attach studs)
      • Earring findings
View full details
Project Instructions

Step 1

Getting Started:

Please make sure your work area is covered and you are not working on an unprotected surface. We recommend working on the Sculpey® Oven-Safe Work Mat, wax paper, metal baking sheet, or disposable foil. Uncured clay may damage unprotected furniture or finished surfaces. Be sure to cover your crafting area appropriately.

Start with clean hands, unwrap and knead clay until soft and smooth, or condition by running clay though a Pasta Machine. We recommend using a designated machine for clay purposes only. When working with multiple colors, clean hands with soap and water or baby wipes (we have found that baby wipes work best) before switching colors. Shape clay, pressing pieces firmly together. Wash hands after use.

Baking (also called Curing):

Begin by preheating oven to 275 °F (130 °C). After you are done creating; for best results bake/cure clay on an oven-proof surface such metal, aluminum foil, an index card or the Sculpey® Clay Mat at 275°F (130 °C) for 15 minutes per 1/4" (6
mm) thickness according to package directions. Oven safe glass or ceramic
surfaces are also acceptable for baking/curing; however please note that the
baking/curing times may take longer as the glass or ceramic surfaces take
longer to heat up. For best baking results, use an oven thermometer. DO NOT USE
MICROWAVE OVEN. DO NOT EXCEED THE ABOVE TEMPERATURE OR RECOMMENDED BAKING TIME.

Step 2

Make 2 small black balls and flatten them into the work mat.

Step 3

Take 4 extra small black balls and roll them into tiny circles.

Step 4

Press each small black clay ball into the black circles and shape them into triangles. Use your clay tool to help shape them.

Step 5

Use your finger to smooth out the ears and blend them into the cat head.

Step 6

Make 2 very small orange clay balls and place them into the cat face to make an eye on both cats.

Step 7

Make 2 even smaller tan clay balls and place them on the other side of the cat face.

Step 8

Now make 6 of the smallest clay balls you can possibly make in baby pink! They will be used to make the ear details and the nose.

Step 9

Press the first 2 pink clay balls into the face to make small cat noses. Shape the others into triangles and place them on the inside of the ears. Smooth them out with your fingers to help them shape correctly. You are now ready to bake!

Step 10

Once your clay is baked and cooled, take your
paint pens and draw eyes and whiskers on the cat faces.

Step 11

Glue the earring backs to the back of the cat earrings. Allow at least 20 minutes for them to set and dry. All done!