Skip to product information
1 of 1

Sculpey Air-Dry™ Porcelain Kitty Ring Dish

Sculpey Air-Dry™ Porcelain Kitty Ring Dish

Designed by Amy Koranek
Read More
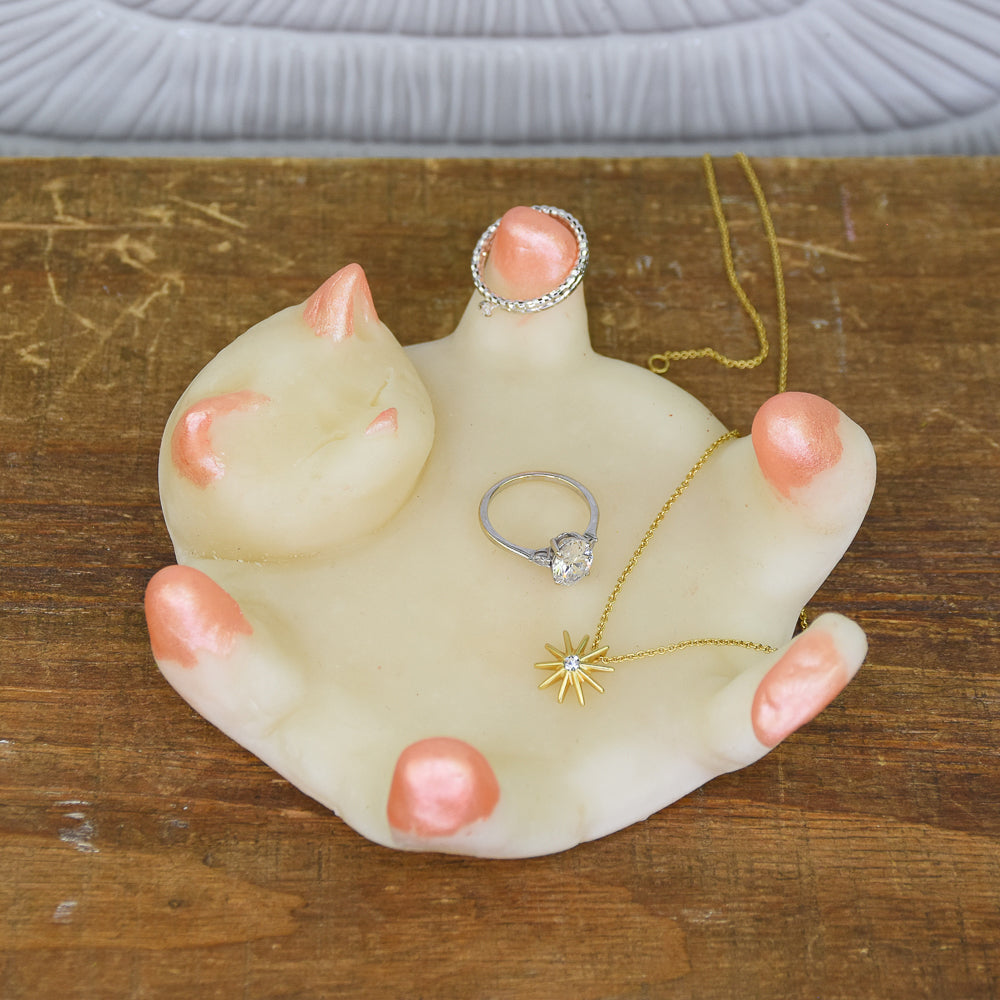
Refresh your table or desktop with this charming little catch-all dish created to resemble a comfy little kitten. TIME TO COMPLETION: 60 Minutes plus drying time - this project will take several days to dry because it is necessary to allow it to dry in a ceramic dish to hold its shape.
Read Less
ADDITIONAL SUPPLIES
  • Clear kitchen wrap or zip lock storage bag
  • Water basin
  • Ceramic bowl for form, about 3”-4” across the bottom
  • Sharp craft knife
  • Peach mica powder
  • Paintbrush
  • Coordinating felt
  • White glue
View full details
Project Instructions

Step 1

Getting Started:

Surface: For the best results in sculpting and crafting with air dry clay, plan to work with a smooth, well-cleaned, non-porous surface.

Amount: Because the clay is made to air-dry, try to open only what you need at the time and leave the rest still wrapped or sealed and stored. Pinch or cut off the amount you need and take more out as you go, even for larger projects.

Working: Knead your clay before you begin shaping it for your creations. Our polymer clay is already soft and pliable, but warming the clay with your hands is a good practice to spread the substance, condition the material and get a feel for what you’re working with.

Shaping: You can use a combination of your hands, crafting tools and multimedia materials to shape your clay into the design you desire, create unique patterns and textures and incorporate mixed media elements. Remember: you can create anything you can imagine! Just make sure the finished product is exactly what you want before allowing it to dry.

Drying: Lay or stand your air dry clay projects on a nonporous surface with a clean and smooth finish in an area with low humidity. Let the projects remain untouched and
undisturbed for about 24 hours to ensure complete hardening.

Step 2

Divide the bar of clay in half. We will use half of the bar for the dish. The remaining half should be wrapped tightly and stored for future projects.

Divide the half of a bar as shown. Half of the clay will be used for the body of the dish. One third of the remainder will be used for the head. The remaining 2/3 divide evenly into five pieces for the legs and tail.

Step 3

Using water to smooth, roll the largest piece into a flat dish shape. Carefully pinch up the edges.

Step 4

Roll the head piece into a ball. Push the head onto the side of the dish using water and a Ball Tool to smooth the seam between the head and dish. Pinch up ears and pull out a nose as shown. Use the 6mm Ball Tool to indent the ears.

Step 5

Gently position the dish with the head into the bottom of a ceramic dish to support the clay while it dries.

Step 6

Shape the remaining five pieces into little cones. Add these to the edge of the bowl for legs. Use the 12 mm Ball Tool to smooth the seams between each new element and the edge of the bowl. Dip the tool in water as you smooth to help the pieces mend together.

Step 7

Add each foot as in Step 6.

Step 8

Add the tail and pose it as you wish.

Step 9

Smooth the belly with wet fingertips.

Step 10

Position the legs and paws as desired.

Step 11

Add a tiny triangle for a nose.

Step 12

Use the tip of an Etch ‘n’ Pearl to inset sleepy eyes.

Step 13

Allow the cat to dry in the bowl as long as it takes. This will take several days because the bottom of the bowl will dry very slowly seated in the ceramic bowl.

As the cat dries, the clay will pull away from the sides of the bowl. Eventually, you can insert a flat tool - like the knife shaped tool from the Clay Tool Starter Set between
the clay and the bowl to release the clay.

Step 14

Once the clay is released, it will most likely have a ridge of clay where the drying clay stuck to the bowl.

Step 15

Use a sharp craft knife to remove the ridge of dried clay from the edge.

Step 16

Use a sharp craft knife to remove the ridge of dried clay from the edge.

Step 17

Dip a paintbrush in water and pick up some mica powder. Paint mica powder on each paw, tail, and tips of the ears.