

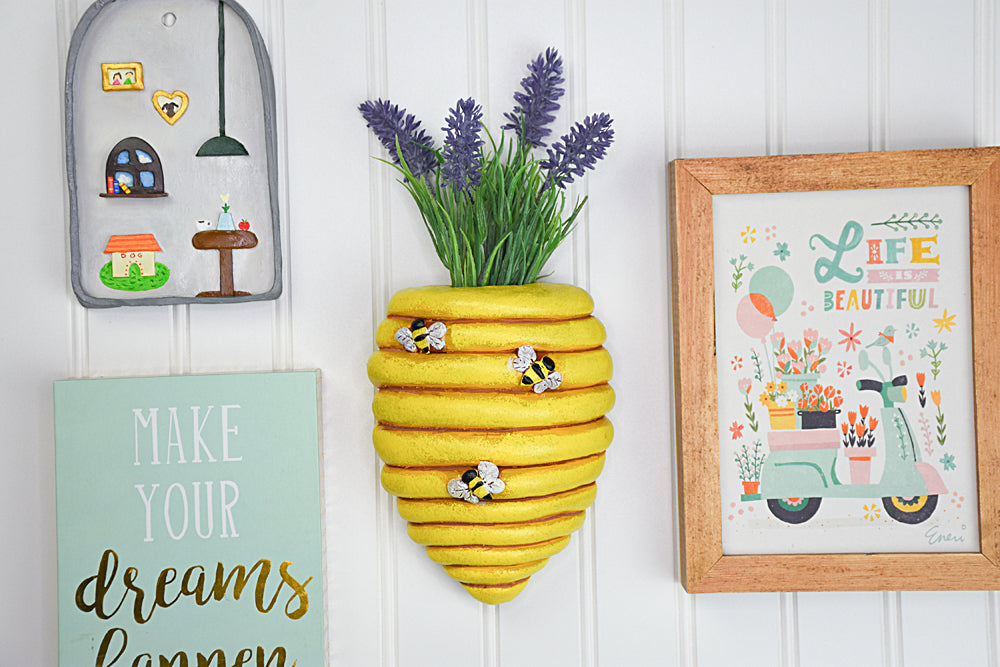
Original Sculpey® Terra Cotta Beehive Wall Planter
Original Sculpey® Terra Cotta Beehive Wall Planter
Read More
Delight your favorite indoor gardener with this adorable beehive wall planter. Even your “non-gardeners” will love this, dressed with artificial plants.
COMPLETION TIME:
3 Hours to make, bake, (bakes once for 15 minutes, and a second time for 1 hour) and paint. Drying time needed for paint.
Read Less
ADDITIONAL SUPPLIES
- Empty toilet tissue cardboard tube,
- Packing tape,
- Wood skewer,
- Large paper clip,
- Damp rag,
- Glossy acrylic paint in Yellow and also School Bus Yellow,
- Glossy acrylic paint White,
- Glossy acrylic paint Black,
- Paint brush - fine,
- Sponge
- NOTE: You will need two blocks of the Terra Cotta clay for this project
Project Instructions
Step 1
Step 2

Step 3

Step 4

Step 5

Step 6

Step 7

Step 8

Step 9

Step 10

Step 11

Step 12

Step 13

Step 14

Step 15

Step 16

Step 17

Step 18

Step 19

Step 20

Step 21

Step 22

Step 23

Step 24

Step 25

Step 26

Step 27
