Skip to product information
1 of 1

Original Sculpey® Cinnamon Roll Trinket Keeper

Original Sculpey® Cinnamon Roll Trinket Keeper

Designed by Precious Nunez
Read More
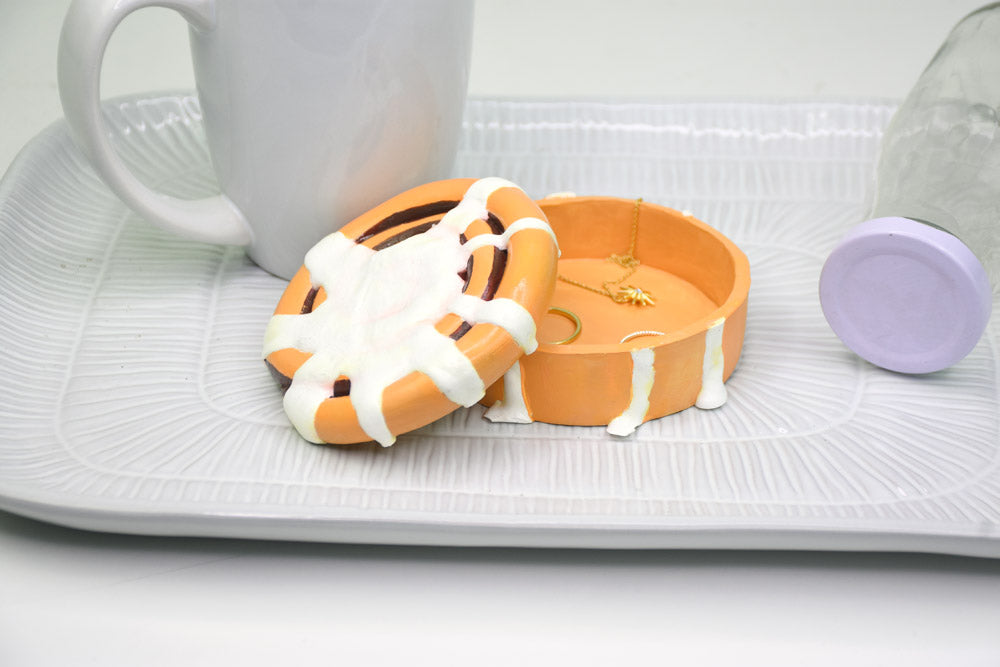
Craft a delightful cinnamon roll-inspired trinket dish with Original Sculpey® in White! Perfect for storing jewelry, small accessories, or gifting to a friend, this project combines creativity and functionality. TIME TO COMPLETION: Approximately one hour
Read Less
ADDITIONAL SUPPLIES
  • Glass cup
  • X-acto knife
  • Acrylic paint
  • Paint brushes
View full details
Project Instructions

Step 1

Getting Started:

Please make sure your work area is covered and you are not working on an unprotected surface. We recommend working on the Sculpey® Oven-Safe Work Mat, wax paper, metal baking sheet, or disposable foil. Uncured clay may damage unprotected furniture or finished surfaces. Be sure to cover your crafting area appropriately.

Start with clean hands, unwrap and knead clay until soft and smooth, or condition by running clay though a Pasta Machine. We recommend using a designated machine for clay purposes only. When working with multiple colors, clean hands with soap and water or baby wipes (we have found that baby wipes work best) before switching colors. Shape clay, pressing pieces firmly together. Wash hands after use.

Baking (also called Curing):

Begin by preheating oven to 275 °F (130 °C). After you are done creating; for best
results bake/cure clay on an oven-proof surface such metal, aluminum foil, an index card or the Sculpey® Clay Mat at 275°F (130 °C) for 15 minutes per 1/4" (6
mm) thickness according to package directions. Oven safe glass or ceramic
surfaces are also acceptable for baking/curing; however please note that the
baking/curing times may take longer as the glass or ceramic surfaces take
longer to heat up. For best baking results, use an oven thermometer. DO NOT USE
MICROWAVE OVEN. DO NOT EXCEED THE ABOVE TEMPERATURE OR RECOMMENDED BAKING TIME.

Step 2

Roll out a slab in your clay machine on the thickest setting. Use a glass cup to make an indent and cut the excess with an X-acto knife.

Step 3

Roll a large snake of clay and flatten through the machine on the thickest setting. Overlap the clay onto itself, grab the acrylic roller and slightly smooth out to keep an extra thick slab. Cut the sides to keep it straight and leveled.

Step 4

Wrap the slab around the base you made on Step 2. Make sure to keep the sides straight and cut off any excess clay. Smooth out harsh lines with your fingers.

Step 5

Roll a long and thick snake. Wrap the snake in a coil to mimic the look of a cinnamon roll trying to keep as little layers as possible. Keep wrapping till you reach the size of the trinket and large enough to sit on top as a lid.

Step 6

Bake/cure according to Step 1 above and allow to cool.

Step 7

Use a dark tan color to paint the trinket and the lid. Let the paint completely dry before painting another layer.

Step 8

Use a thin brush to draw a brown acrylic paint the swirl on the inner end of the lid as a cinnamon roll. Bake for a few minutes till the paint is completely dried and adhered to the piece.

Step 9

Use the white Liquid Sculpey (stir well first!) to drizzle along the top of the cinnamon roll to appear glazed. Bake according to Step 1.

Step 10

Slice the cured Liquid Sculpey to open the trinket after baking (can be done easier if clay is slightly warm).

Step 11

Repaint any discoloration that may have occurred. Use Sculpey Gloss Glaze to seal the paint and provide a glossy look!